
Elevation Gain: 1,058m
Distance: 8.47km
Total Time: 13 hours
Date: August 9th, 2024
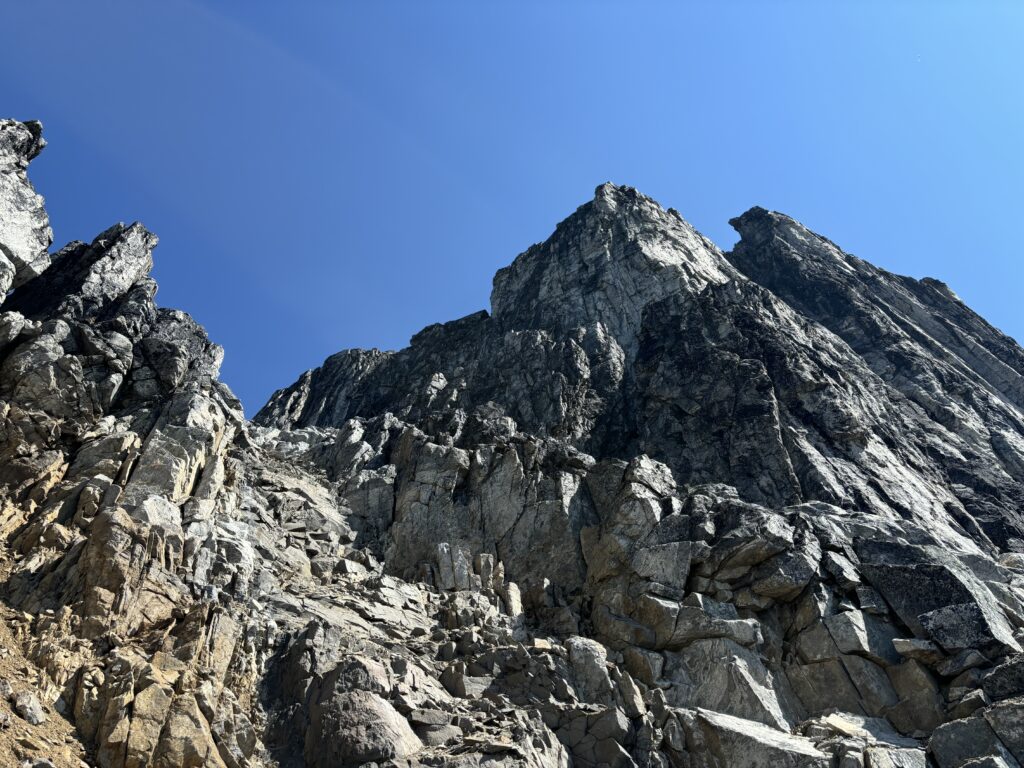
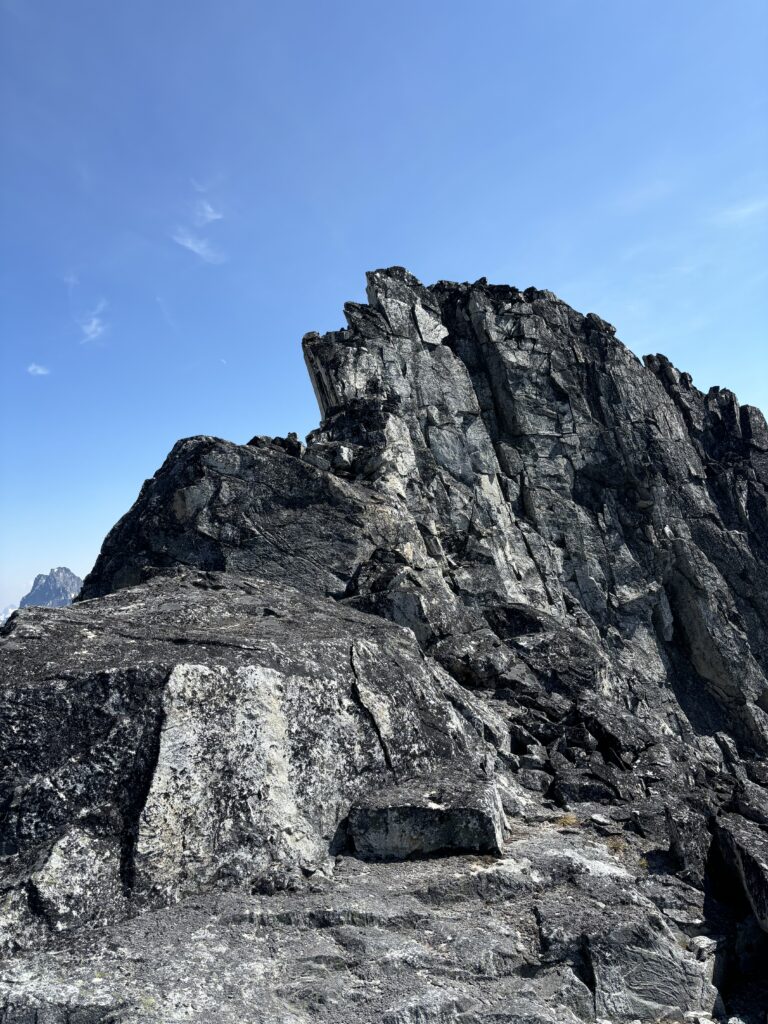
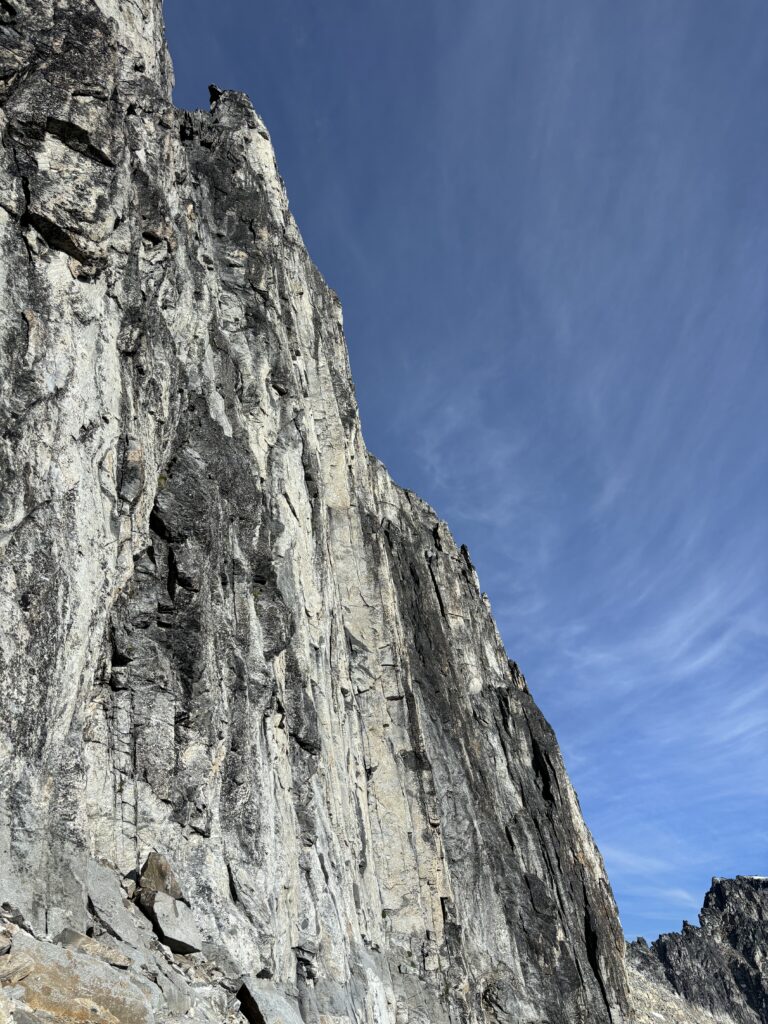
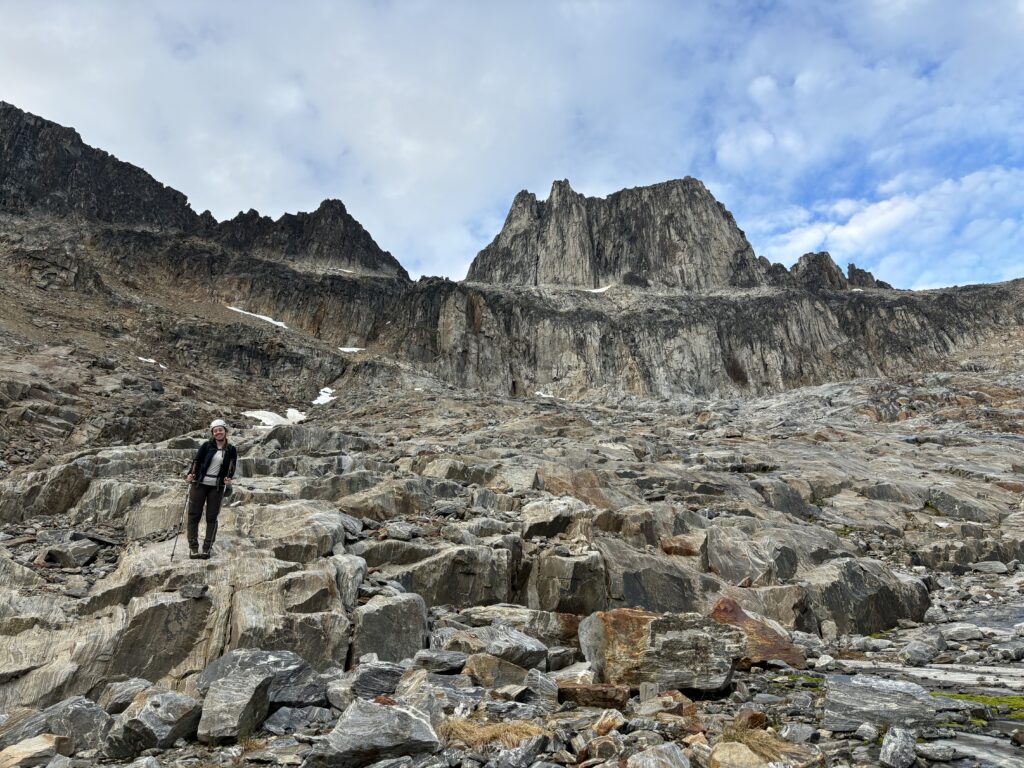
Located just 1.5km south east from Diana Mountain at the eastern end of the Nemesis ridge system stands a large monolith of stone: Peak 2679. It’s unnamed and was seemingly unclimbed when Andrea and I landed into the Frontier Creek group several days prior. Peak 2679 is perched above a massive expanse of granite slabs and a steep headwall that blocks easy access to its lower face. There appear to be no easy routes to the top and the only sane ridge line running close is cut off by a massive vertical notch on the east side. From afar it resembles a Trident and so we resolved to call it Trident Tower in the days leading up to our attempt of it. While doing a small outing up nearby Diana Mountain, we had spotted a potential ascent line up the west face and decided to make an attempt on it the following day.
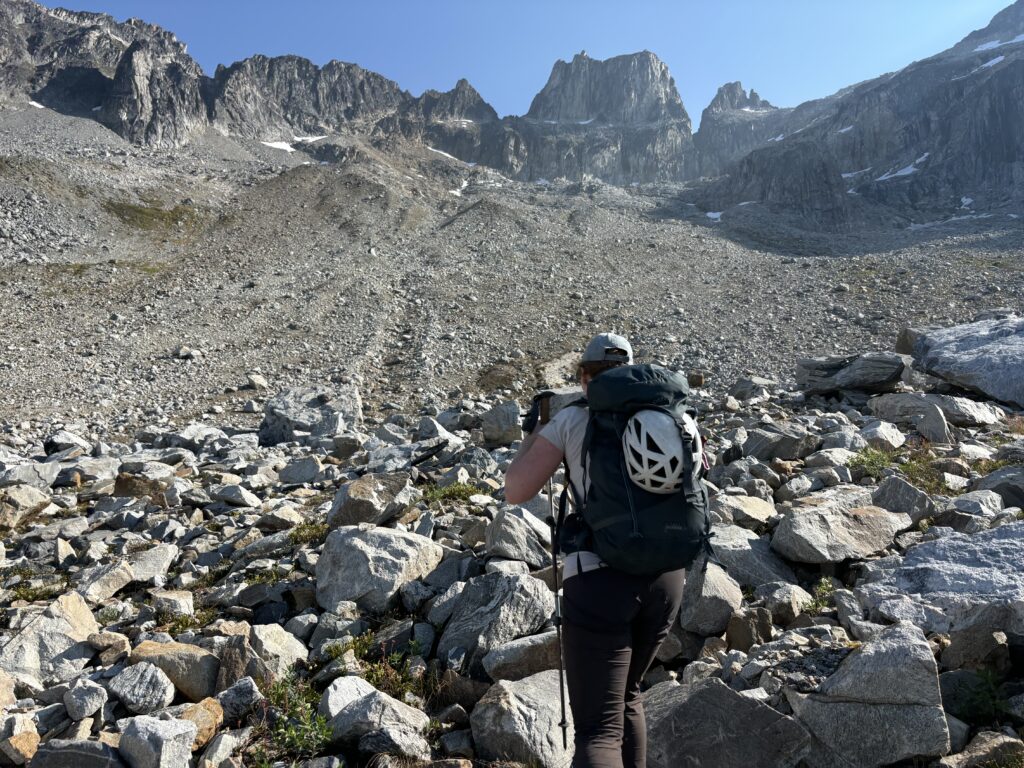
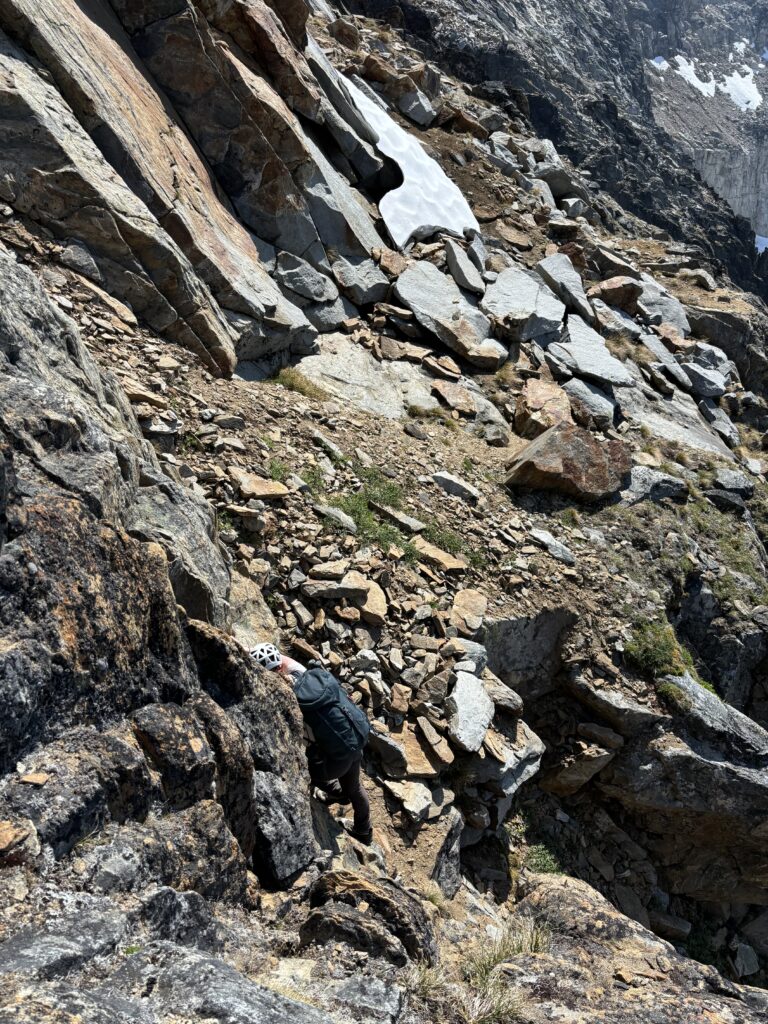
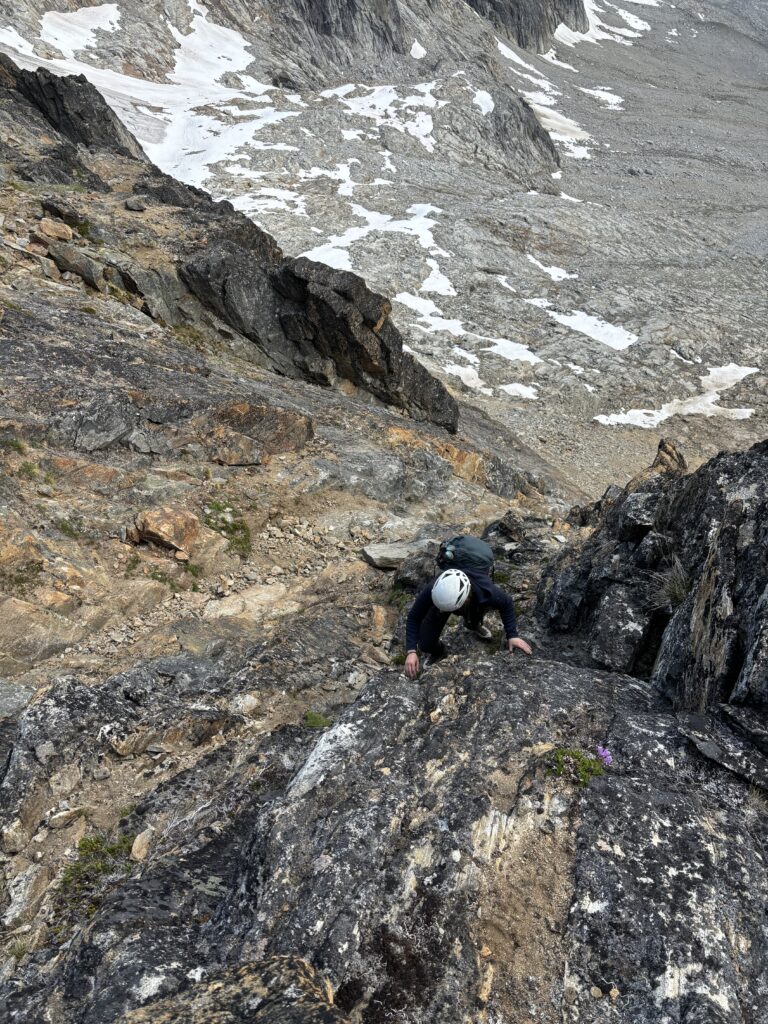
Now in the early morning hours we found ourselves making the same side hill traverse approach as for Diana. Both of us were quite exhausted from the previous days exploration and it took some extra motivation to put one foot in front of the next. This time we didn’t have to go as far as Diana though. We cut up the slopes early on and scrambled up loose glacial moraine towards the steep headwall below the main summit tower. Our plan was to try and scramble up steep sandy slopes into a gully far climber’s left and then traverse across benches to reach the base of the summit tower. Two massive channels cutting through the bench had potential to cause problems. Then there’s the summit tower itself, steep on all sides and with unknown features. Nonetheless, we’d take it one step at a time.
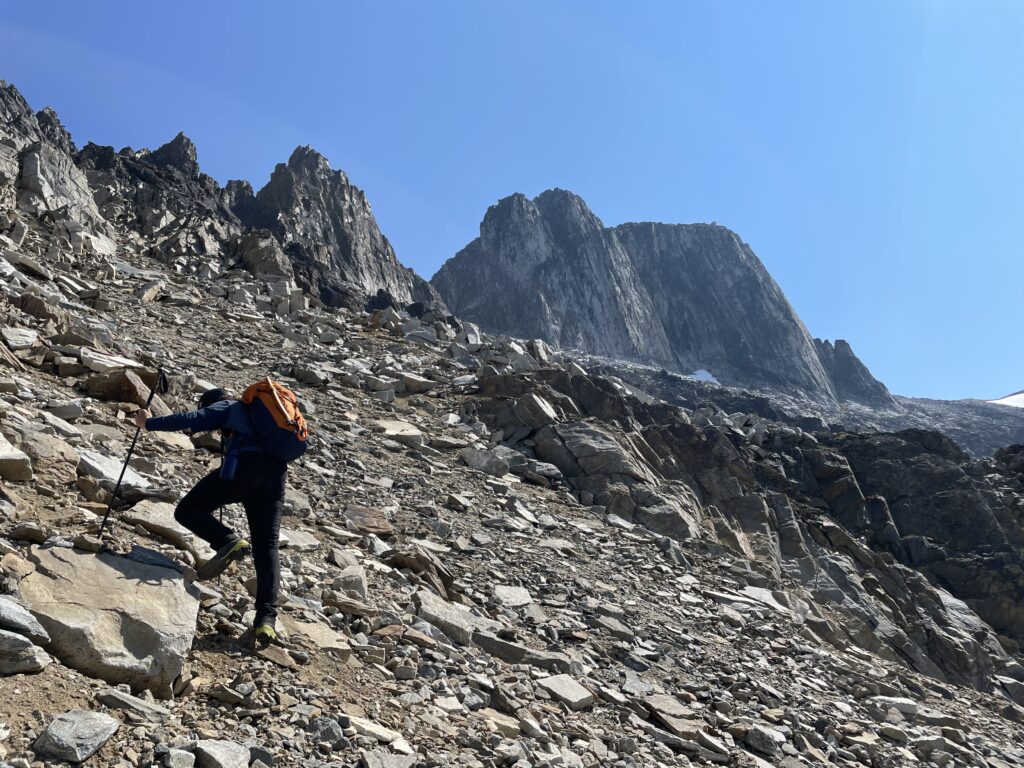
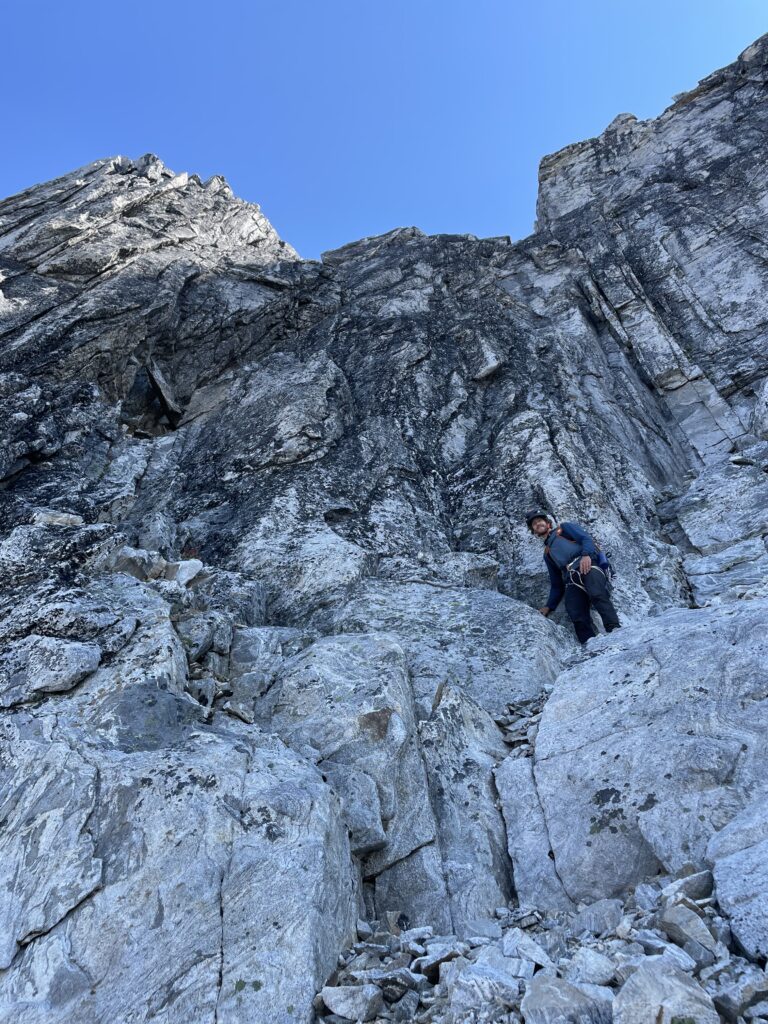
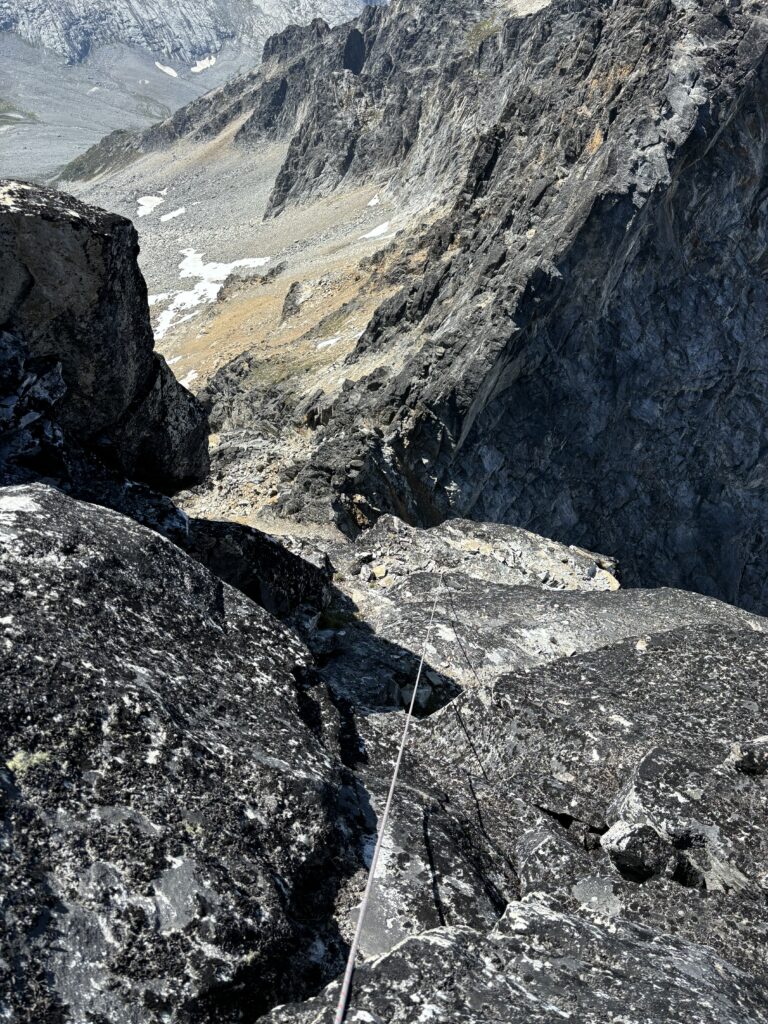
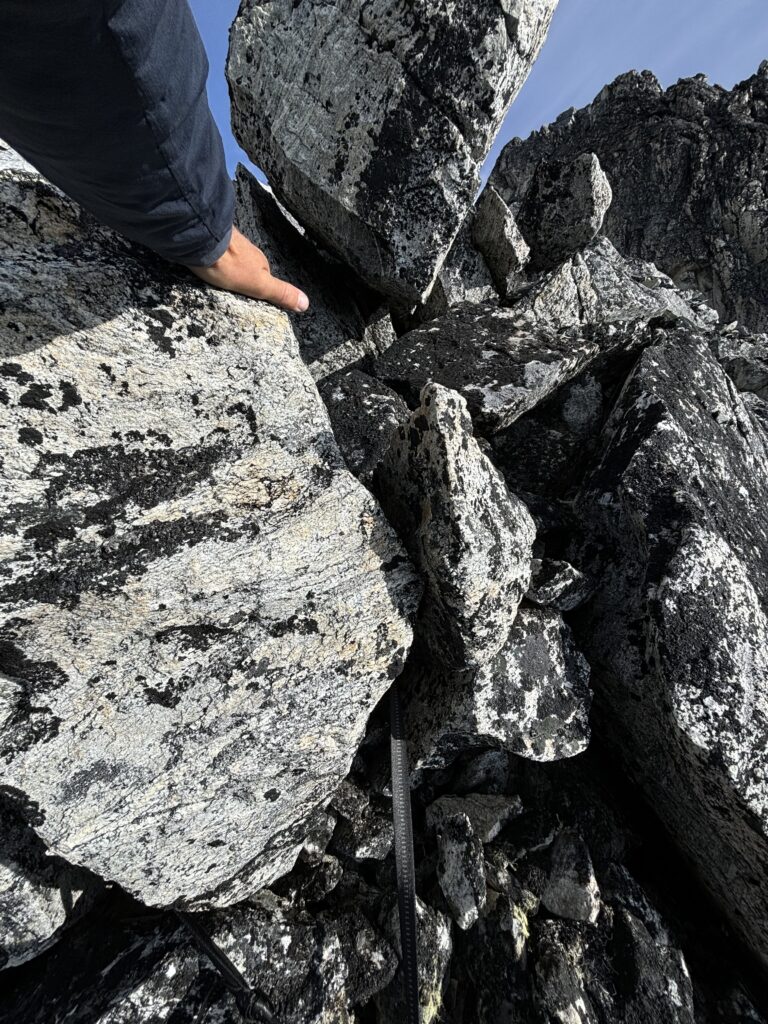
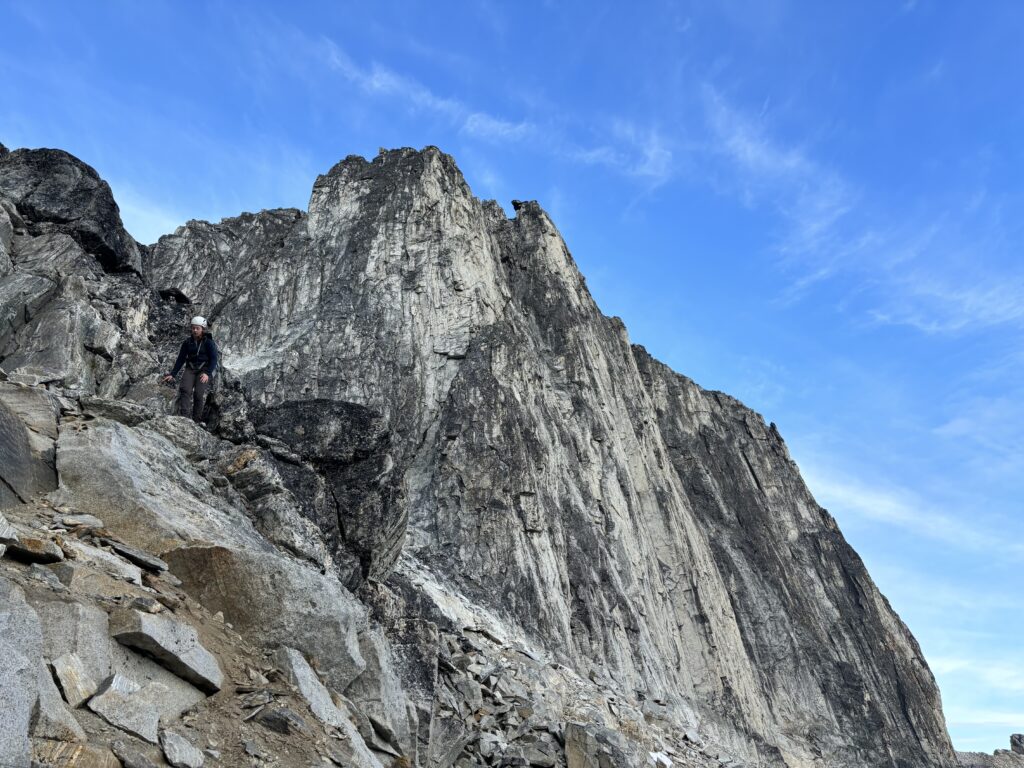
We reached the gully we spotted after some slab hopping and a short scree treadmill and it posed no issue to climb. Wherever possible we scrambled on 3rd class rock next to the gully and that sped things up. After reaching the bench, we made a short 4th class down climb and traverse followed by another small 3rd class down climb on loose rock to gain the tamer section of bench. Once on the bench we traversed all the way over to the first channel. Neither of us could spot an easy way into the channel, but it looked straight forward to exit out on the other side. It was then that we decided I’d rappel in and scope out the next channel. If that went easily enough, we’d commit to pulling the rope and continuing on.


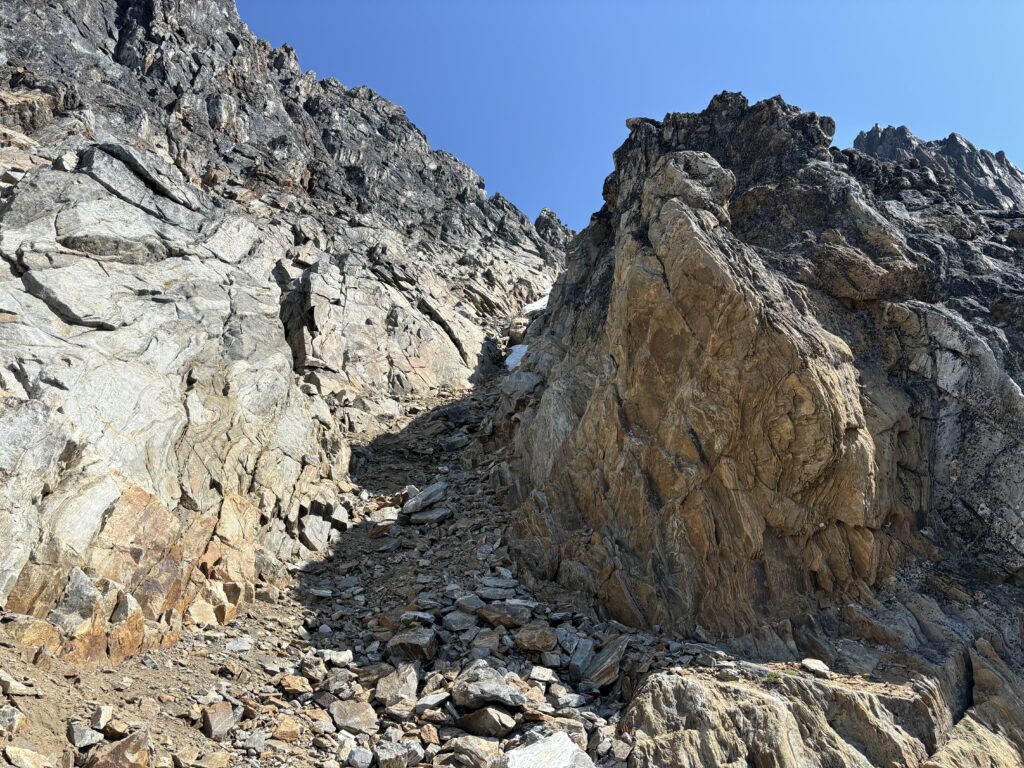
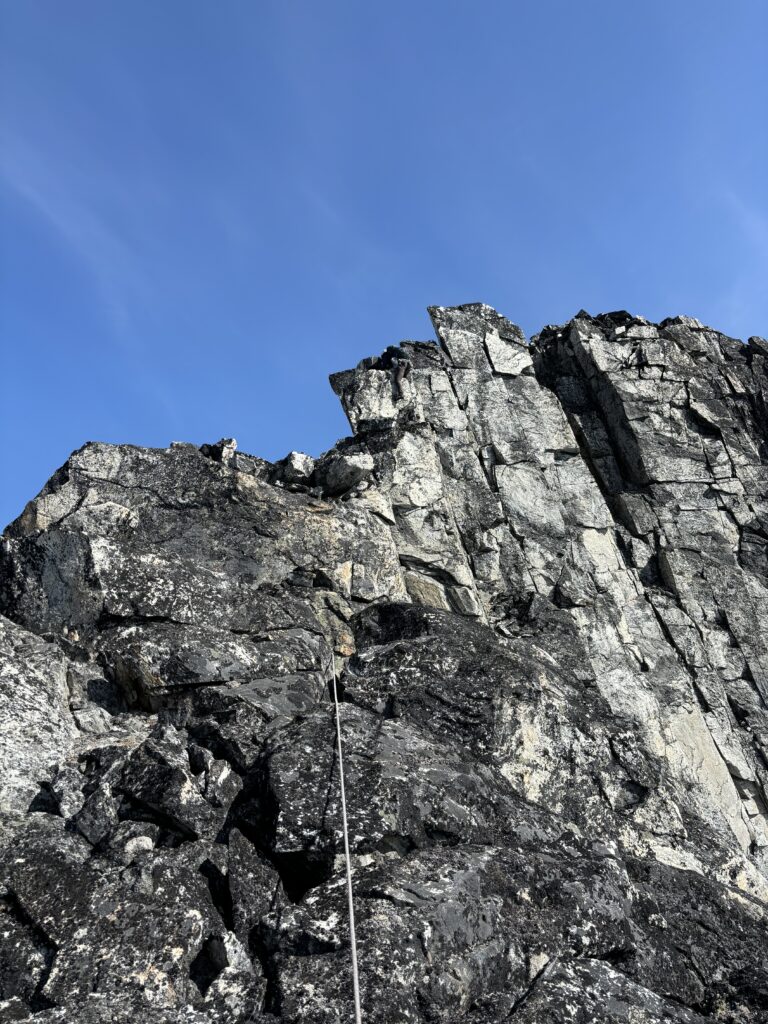
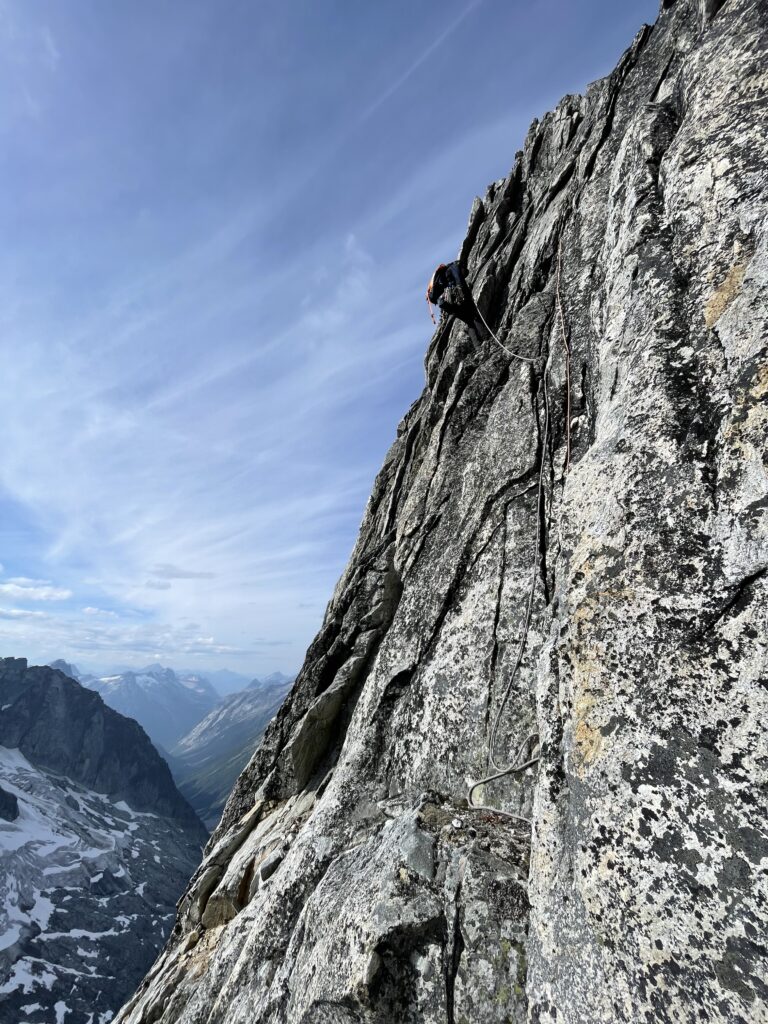
With that I rapped in and traversed over to the next channel where an easy 3rd class exit/entrance presented itself. I called out the good news to Andrea and she soon joined me. We then scrambled out of the second channel and up 3rd class terrain to reach the base of steep tower. Now standing directly below the west face, the rock actually looked amazing and highly featured. I saw a number of possibilities and was now feeling quite confident we could at least get to the upper headwall we’d spotted from Diana Mountain. Now committed to giving it a shot, we geared up and I swung in for the lead.
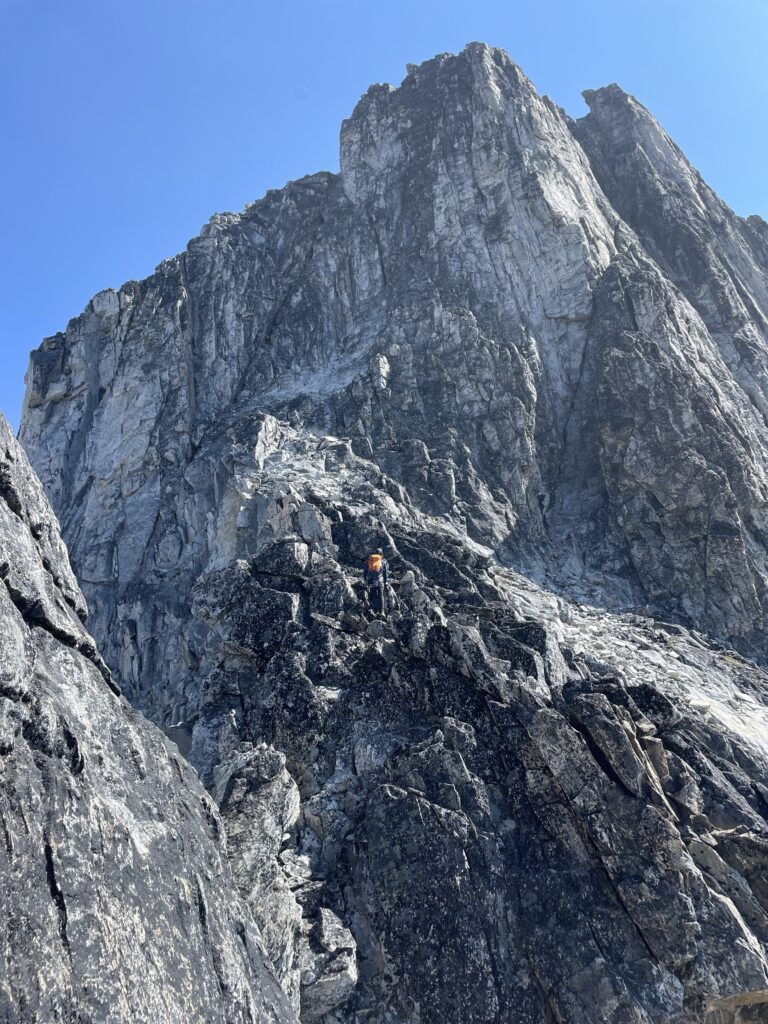
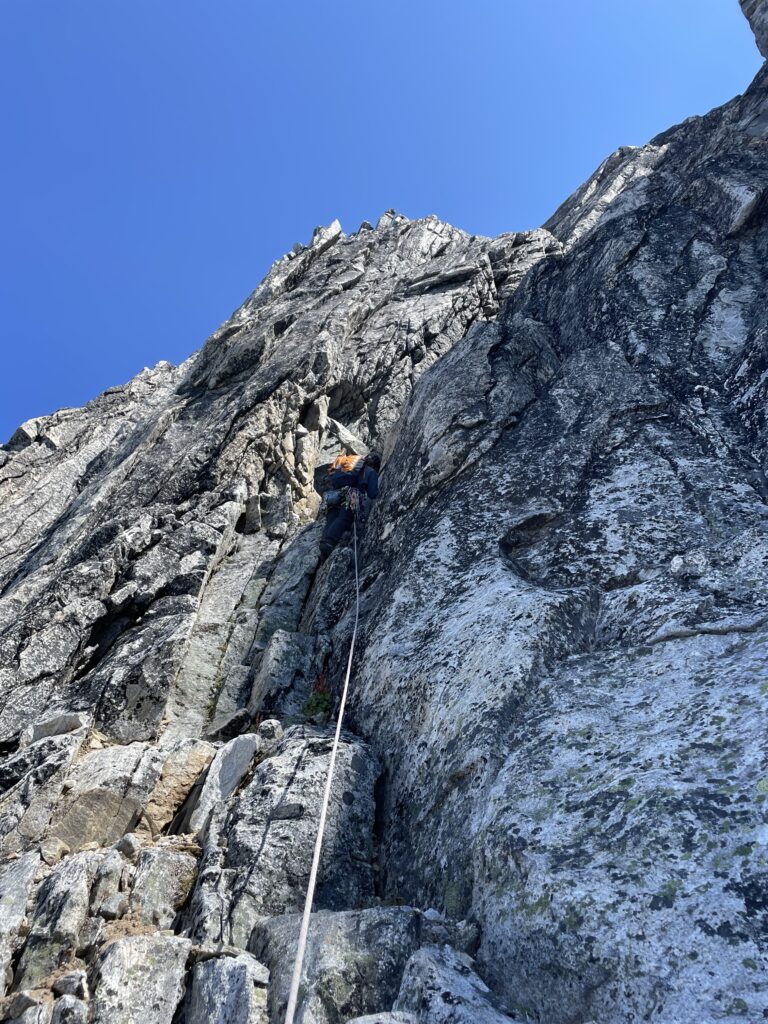
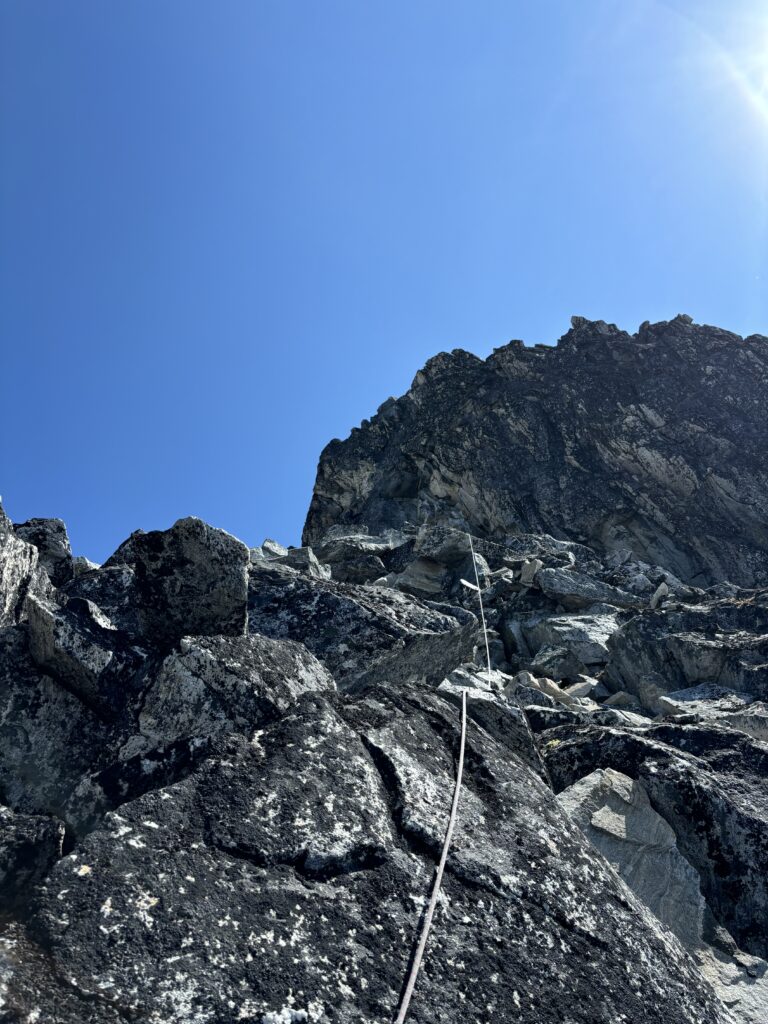
I climbed up a chimney system, stemming up face holds and finding good protection on the left side. As the chimey curved right, I traversed above and across thin face moves and laybacked a short ways climber’s left into a groove. Now the angle of the face eased off and I climbed up simpler terrain to a large bench about 40m up. I had intended to build an anchor here so that Andrea could climb the fun corner and slab system ahead, but I didn’t have enough pro to do so. Large blocks above appeared to offer natural anchors so I continued up another 15m or so and setup an anchor on a large horn.
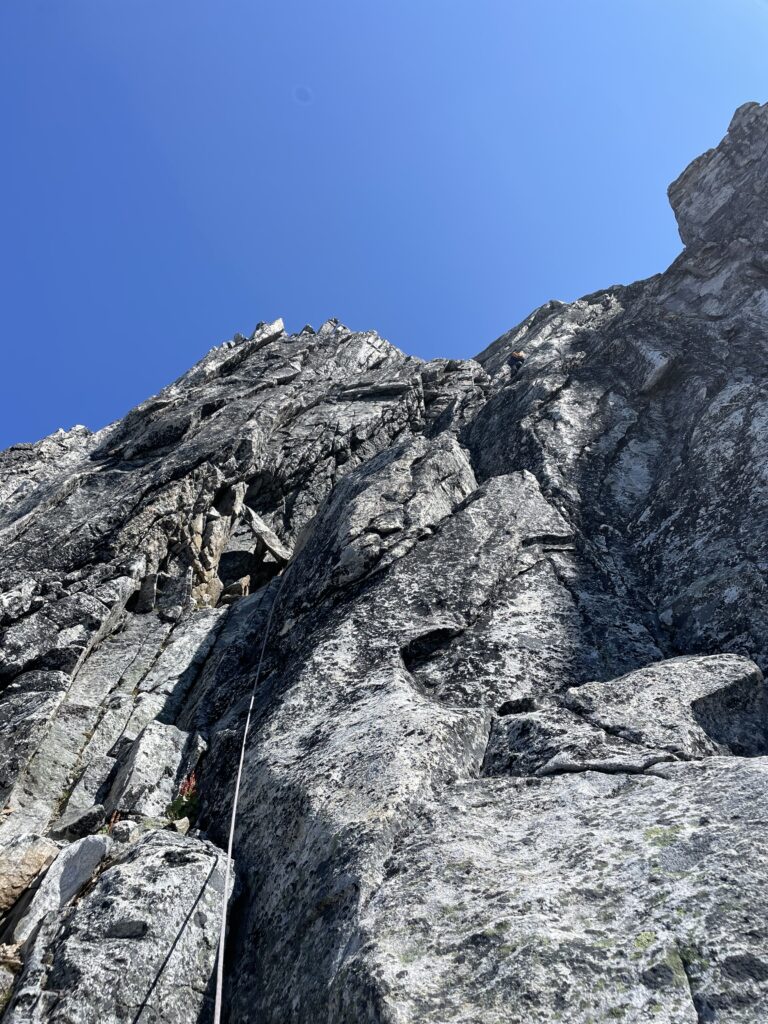
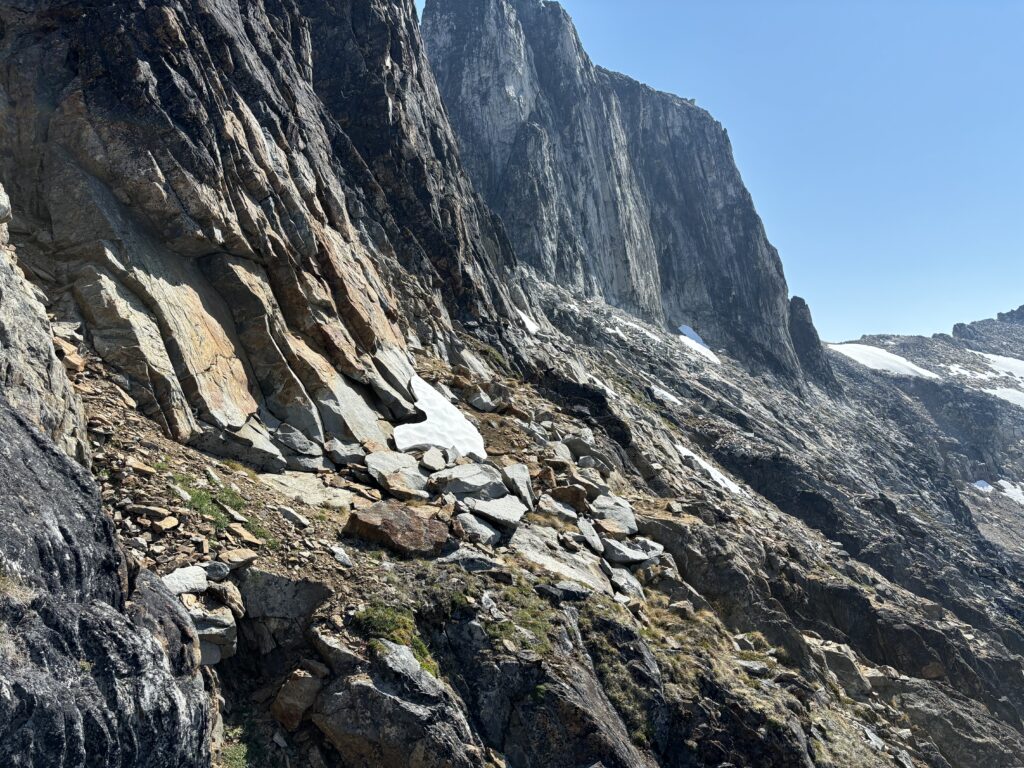
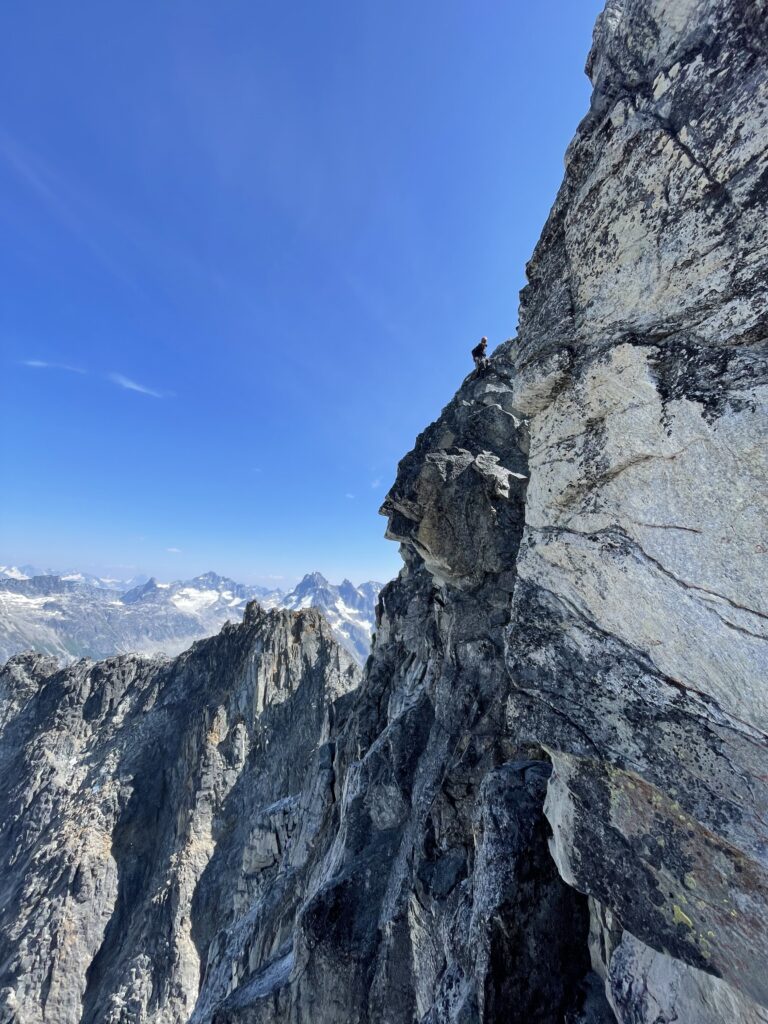
Andrea seconded up and now we had a good look at the upper headwall. There were a few options out right, but large blocks of 3rd class terrain obscured the lower section. Andrea took the lead and headed out to find out what’s what. As it turned out the lower section of the face dropped off to a loose narrow gully. Not liking the looks of things, Andrea continued further climber’s left up some face moves and then wrapped around a corner on the north east side. As she was picking her way through the upper head wall I noticed a long stream of lenticular clouds steam rolling their way towards us. These are usually a sign of high winds and it was looking like we were about to get blasted. Just as the clouds reached Diana Mountain, they stopped in their tracks and circulated back out. A lucky sight to say the least!
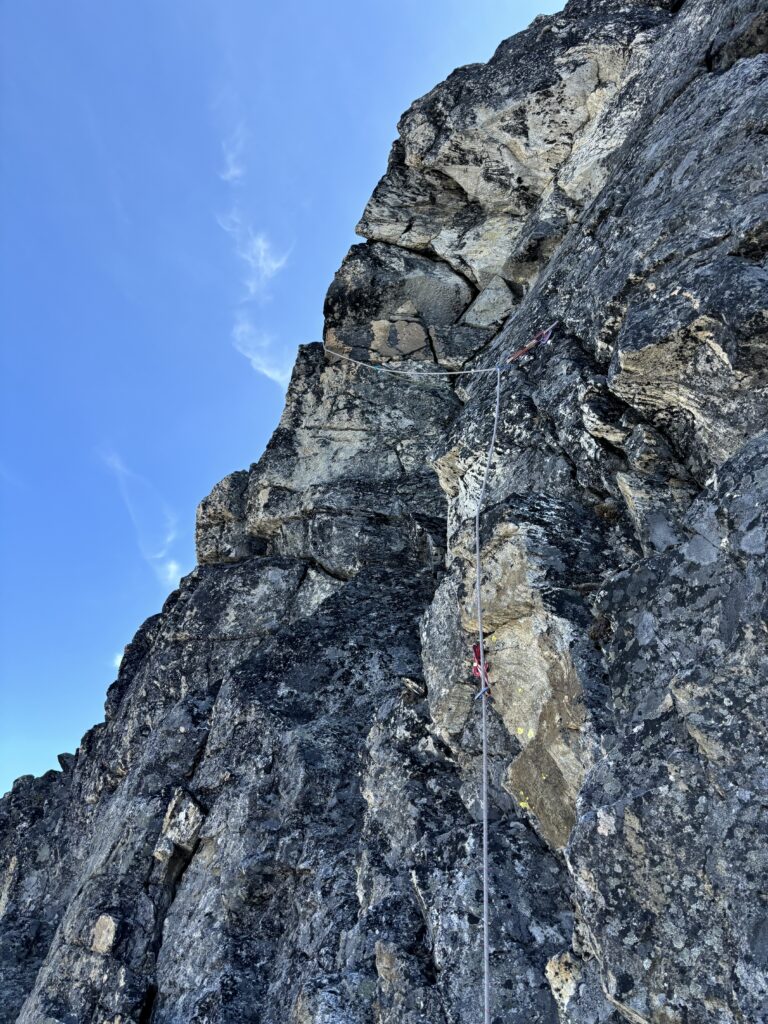
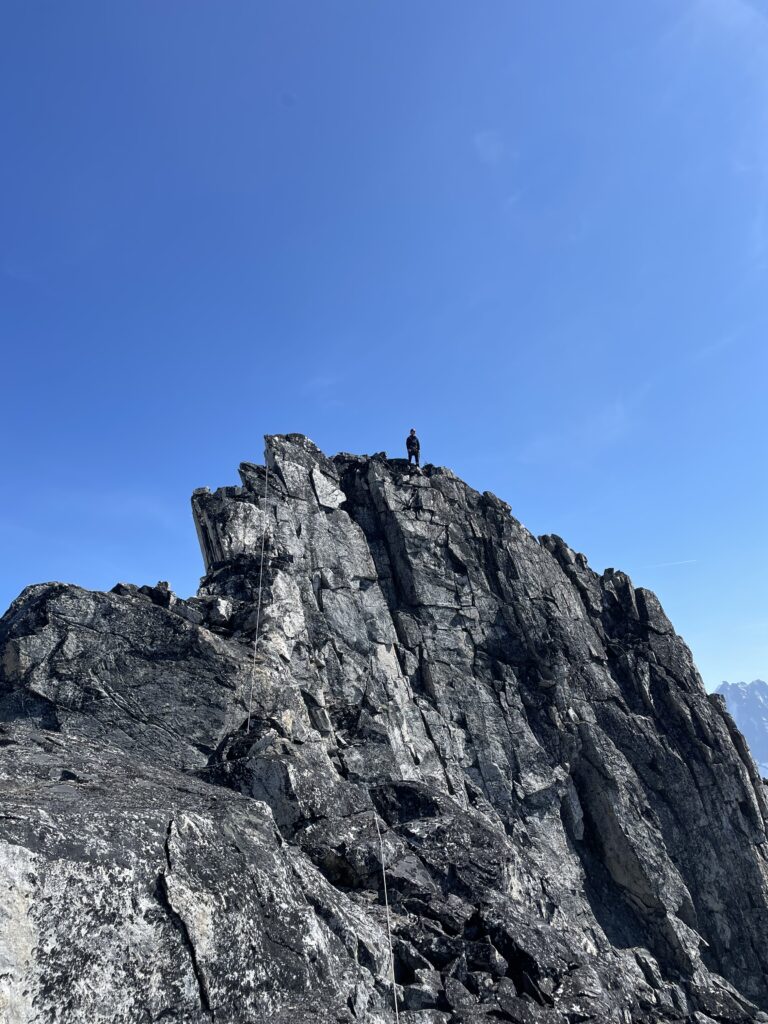
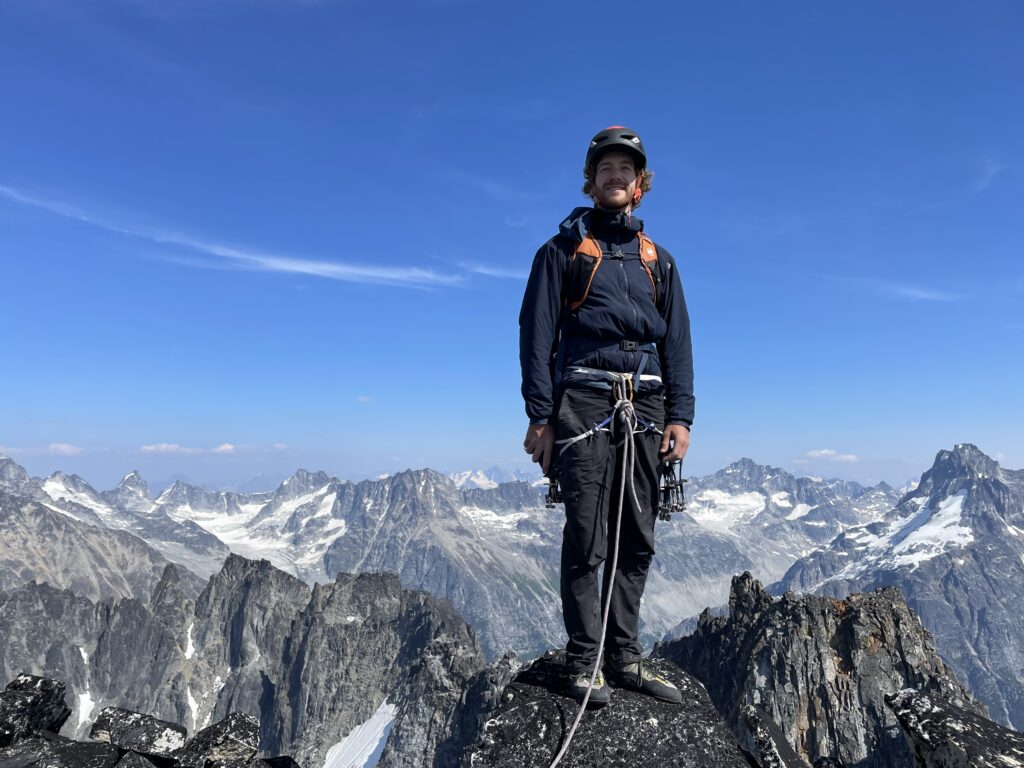
While that was going on the rope drag was getting kind of bad for Andrea. She asked if it was okay to bring me up and have me take the next section. I was thoroughly enjoying the climbing, so fired off a quick yes. I followed up and looked at the fun face moves ahead. I liked what I saw and started the lead. A short, slight overhang with good jugs lead to easy terrain and then the ridge above the upper head wall. Here I caught glimpse of the true summit: a narrow blocky ridge line that didn’t look all too bad. I traversed over, dropped into a notch and then climbed back out onto well protected face moves on the north side. From there it was an easy scramble to the summit.
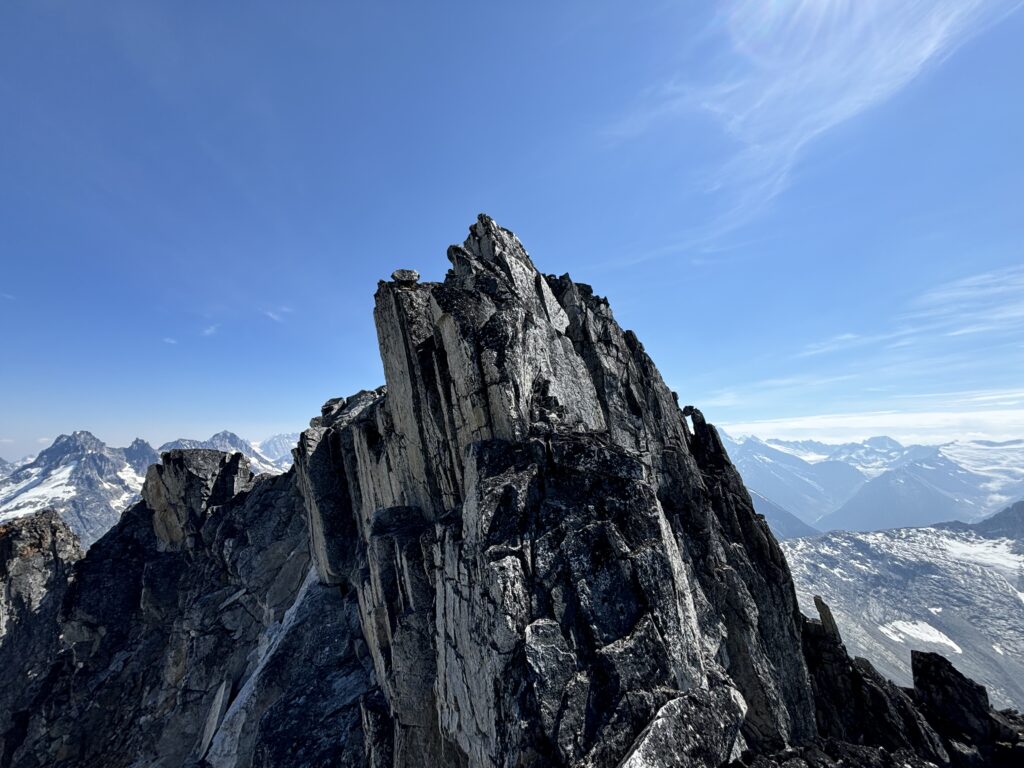
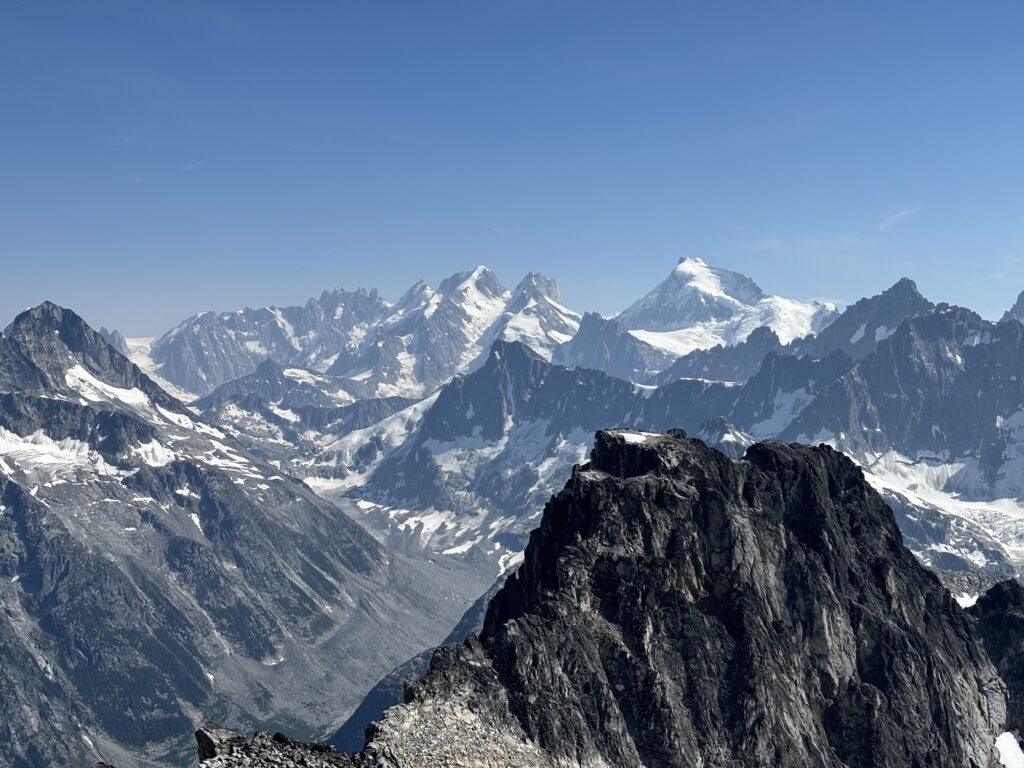
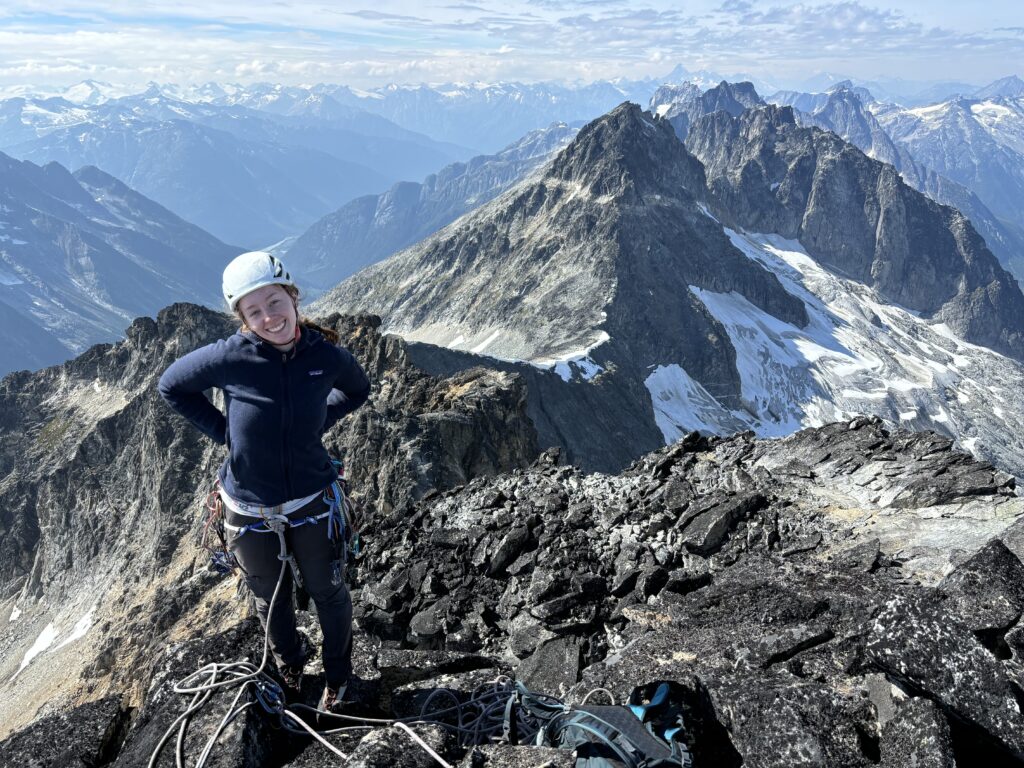
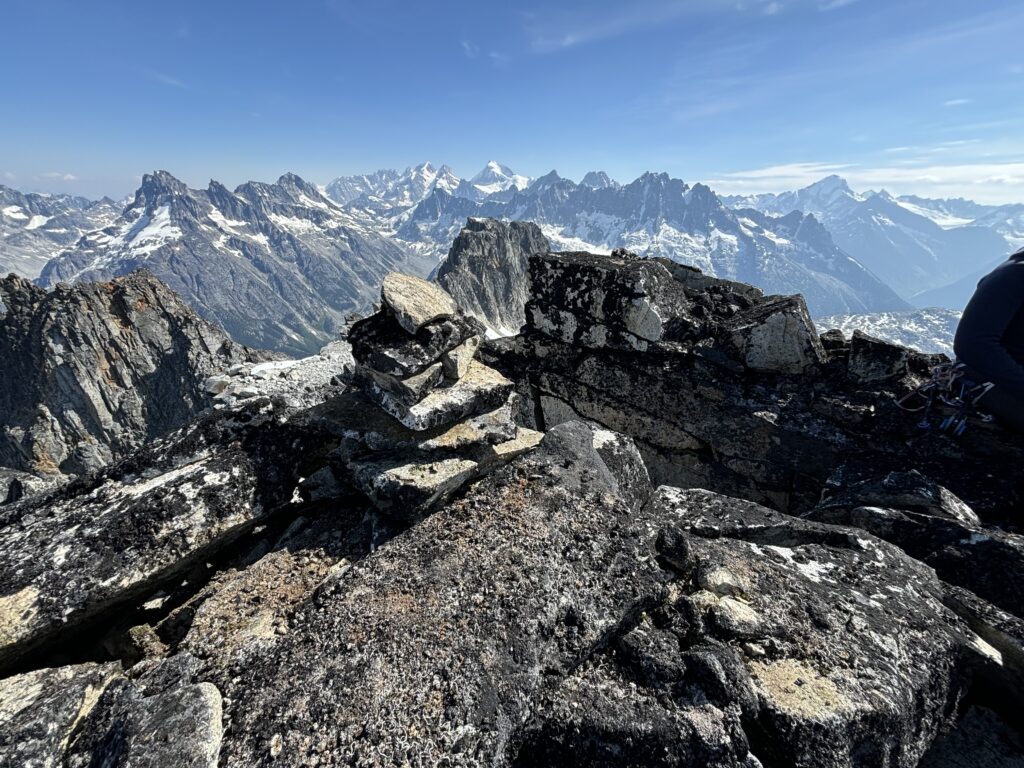
I brought Andrea up and we basked in the perfect sunny temperatures at the top. In 7 days we’d had perfect climbing weather on all but one. I was feeling super thankful to have such an amazing streak of climbing weather. From the summit we had perfect views of the Serras, Asperity, Tiedemann, Combatant and of course Waddington.
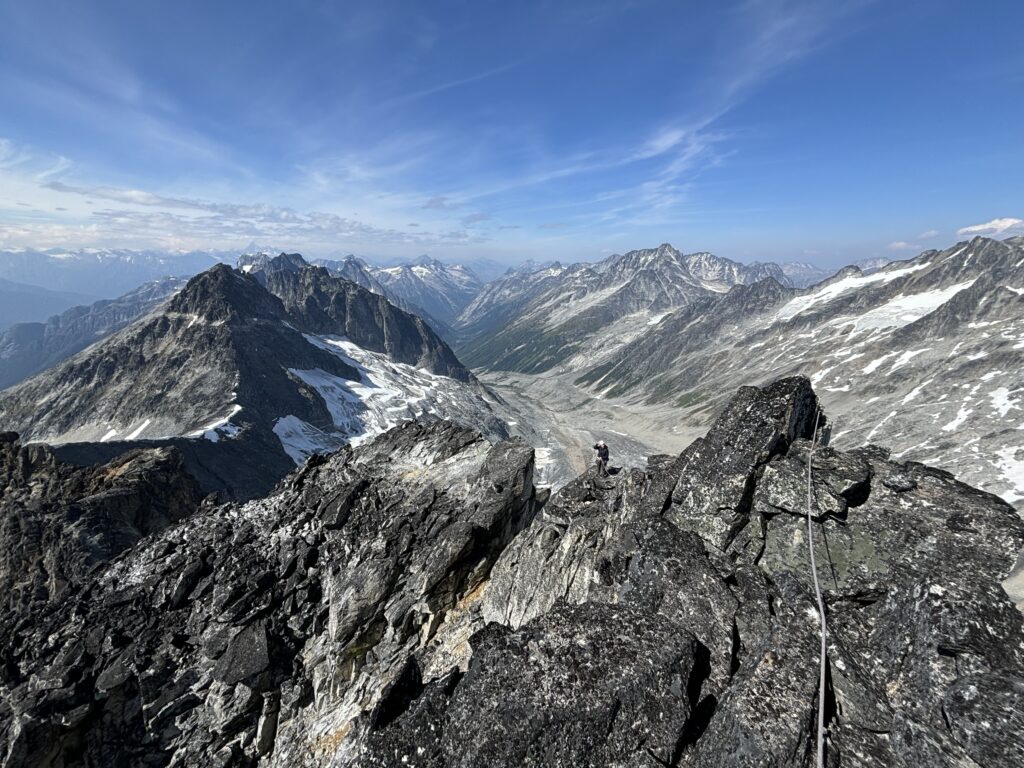
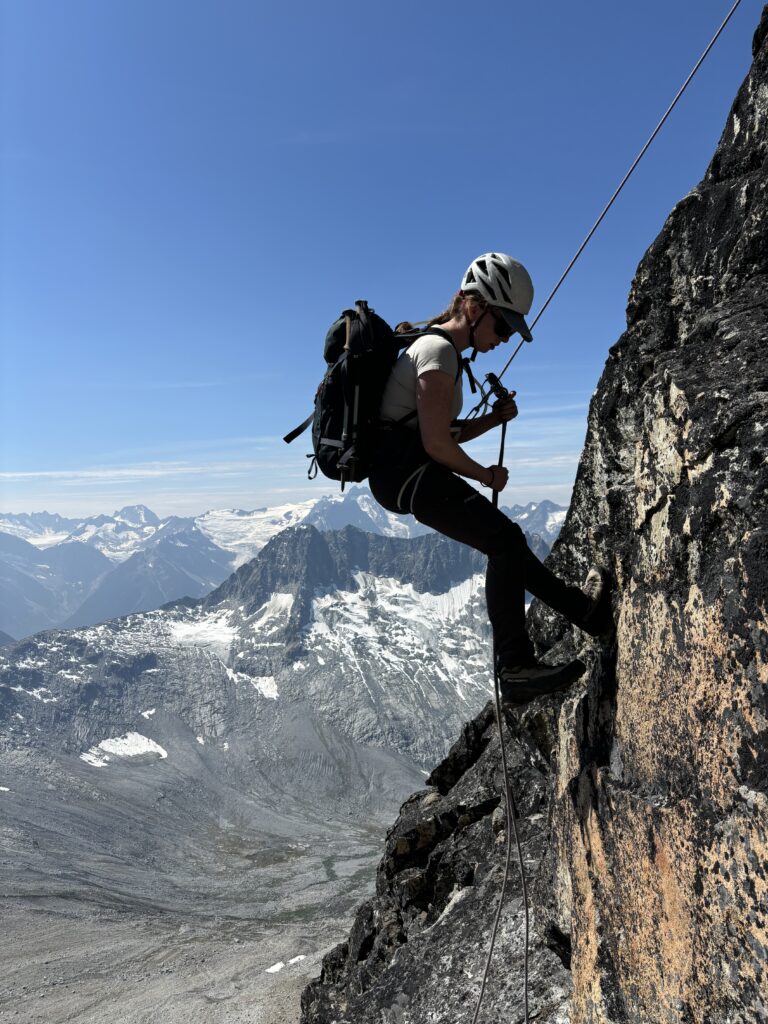
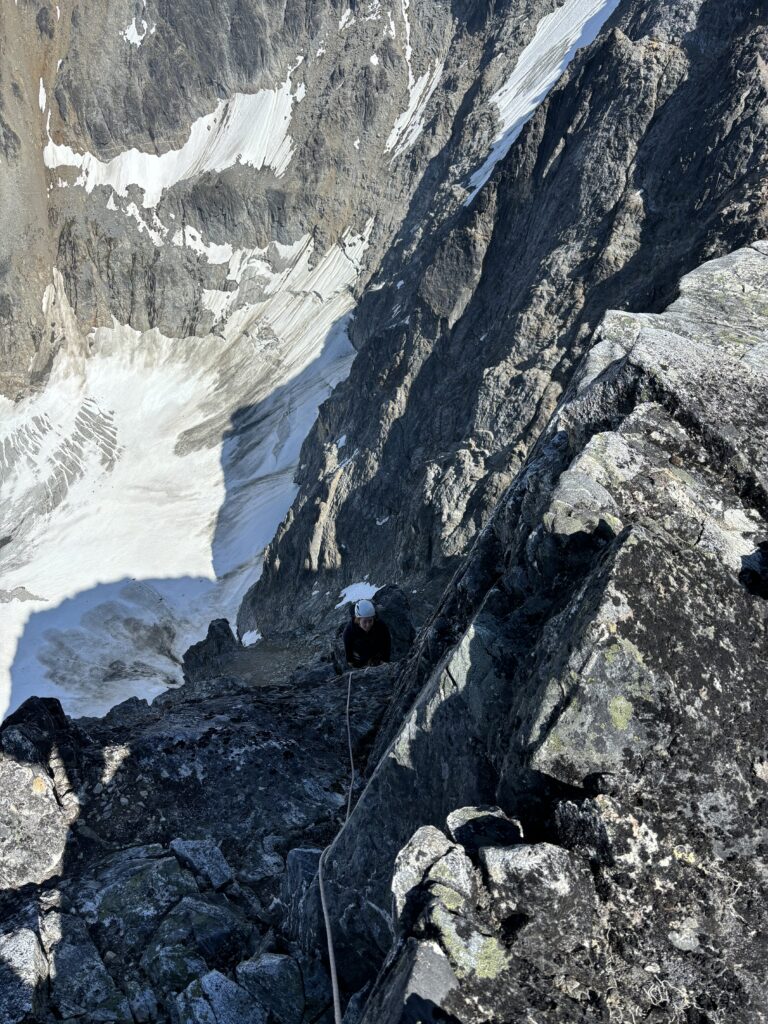
When it got time to get going, Andrea volunteered to “down follow” the route. I’d lead down, placing gear for her and she’d “follow” and clean it. Not sure if there’s a proper name for that, but it worked out to be much quicker than the awkward rappel we were going to have to do. Now below the summit block, we had a large ledge with a number of slingable blocks to work with. We found a suitable one with minimal rope catching terrain and Andrea rappelled off to the base of the upper head wall. I joined her and we scrambled down to the top of the first pitch. Here we whipped out the tag line and did one long 60m rappel to the base of the tower.
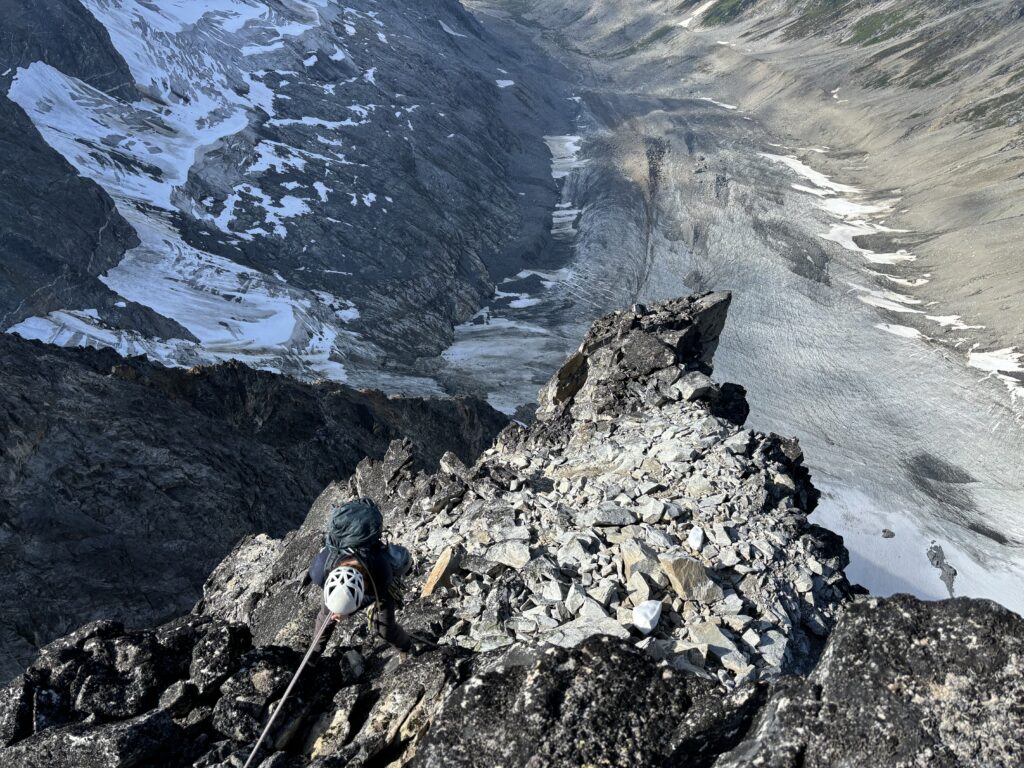

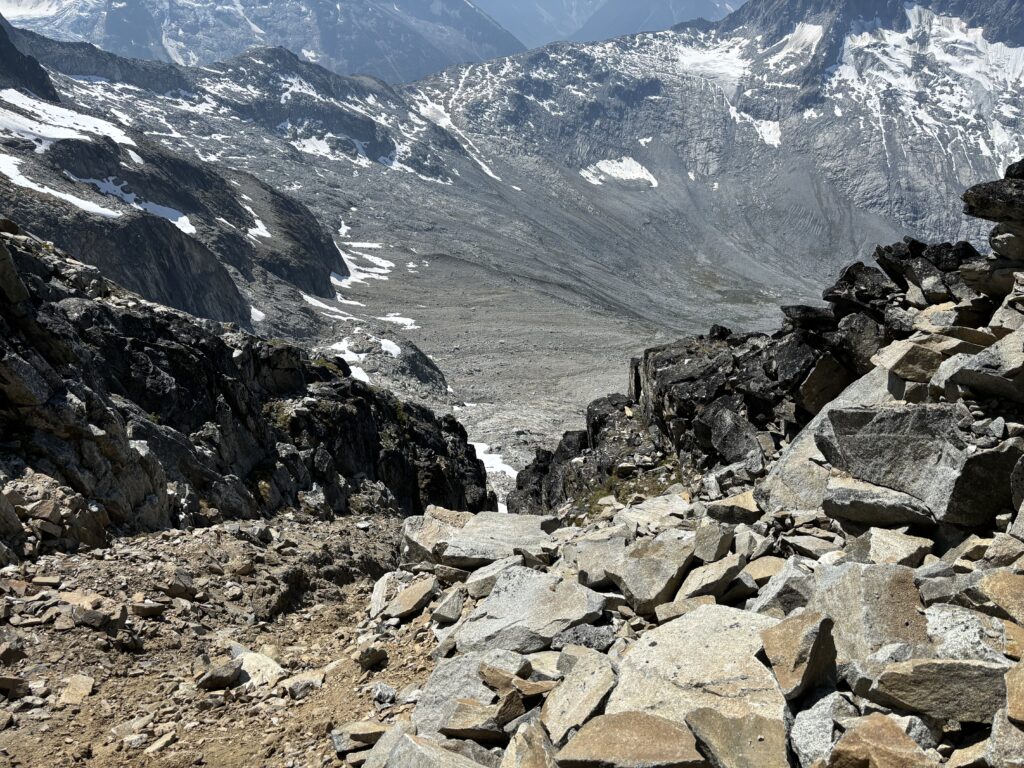
Now we scrambled across the second channel we had crossed on the way in and then Andrea lead a short pitch out of the first channel. We then retraced our steps across the bench into the gully and finally back down the glacial moraine. Camp was reached just before head lamps needed to come out. White Saddle retrieved us early the following morning after an amazing 7 days out in the Frontier Creek group.
Eek. Steep stuff. Well done.