Elevation Gain: ~1200m
Distance: ~13km
Total Time: 1.5 days
Date: August 6th, 2024
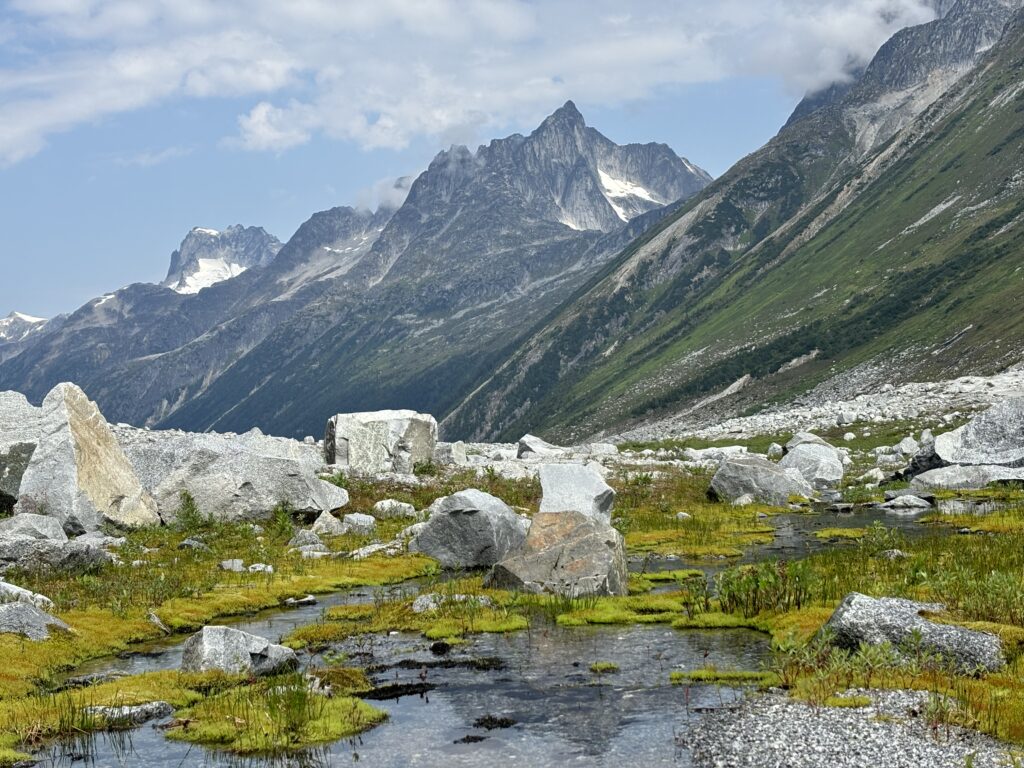
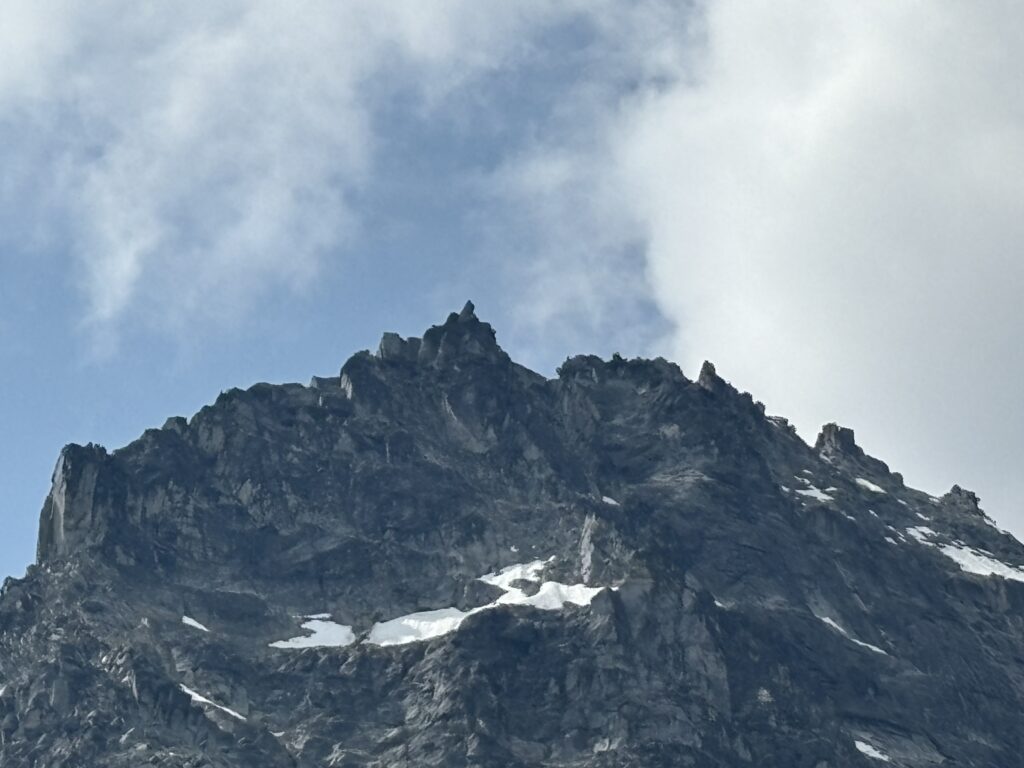
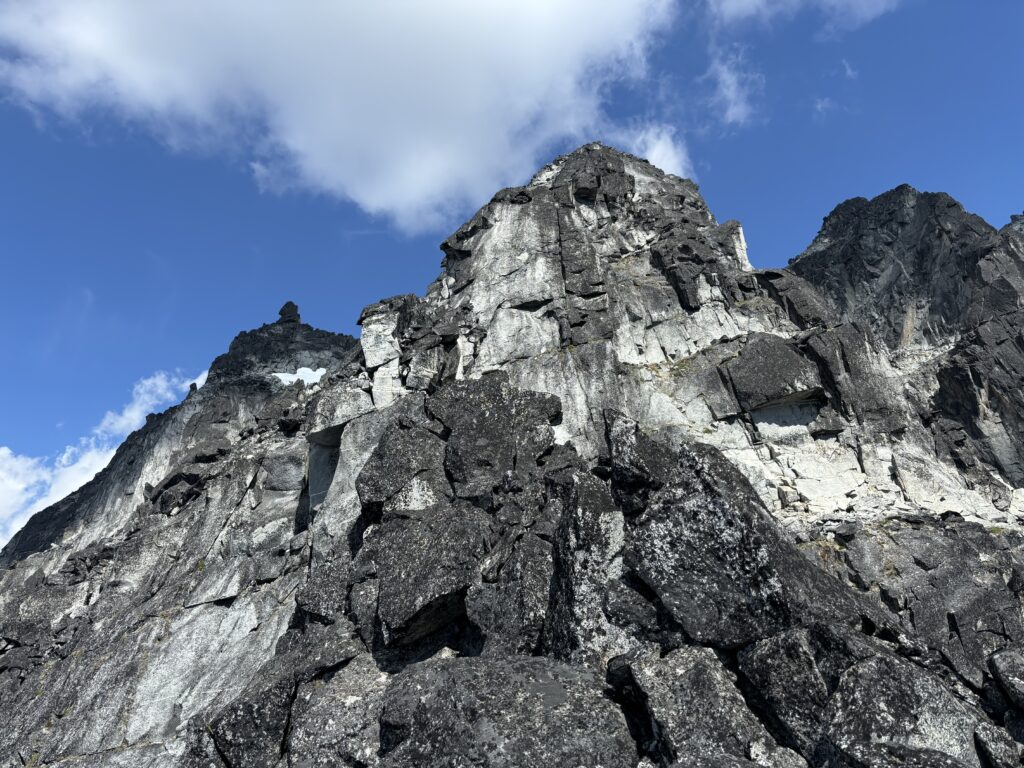
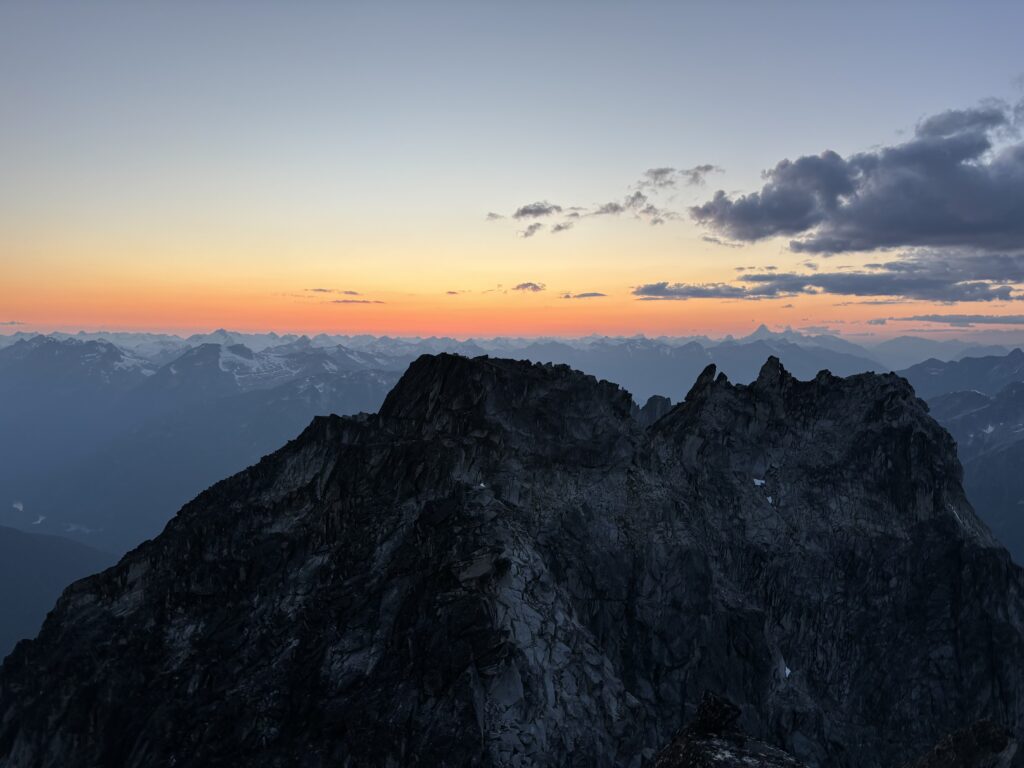
Culbert Crag is the tallest summit along the exceptionally steep and rugged ridge line that forms the south western boundary of the Pantheon Range. The summit is comprised of 4 distinct towers separated by deep notches, although no one tower is tall enough to be its own summit. This peak is named in honour of legendary coast mount climber Dick Culbert, by his long time climbing partner Glenn Woodsworth. He and Glenn, a legend in his own right, made many notable first ascents throughout the coast mountains including Serra V, the Fire Spires and of course the first summits in the Pantheon Range. Dick, with another party also made the first winter ascent of Mount Waddington. I can’t possibly summarize all of Dick Culbert’s accomplishments, but I’ll end on the definitive coast mountain guidebook created by the man himself: “A Climber’s Guide to the Coastal Ranges of British Columbia”. Virtually all guidebooks in BC are a derivative of Dick’s work and we have his exploration and meticulous information keeping to thank for our ability to explore so many areas with ease.
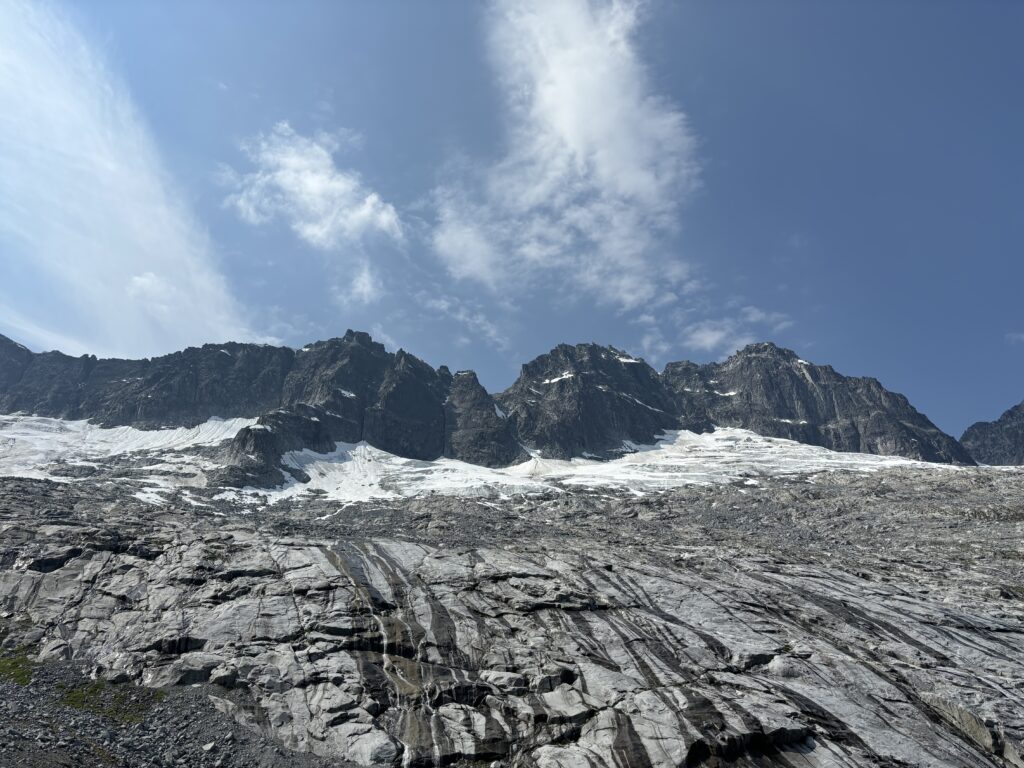
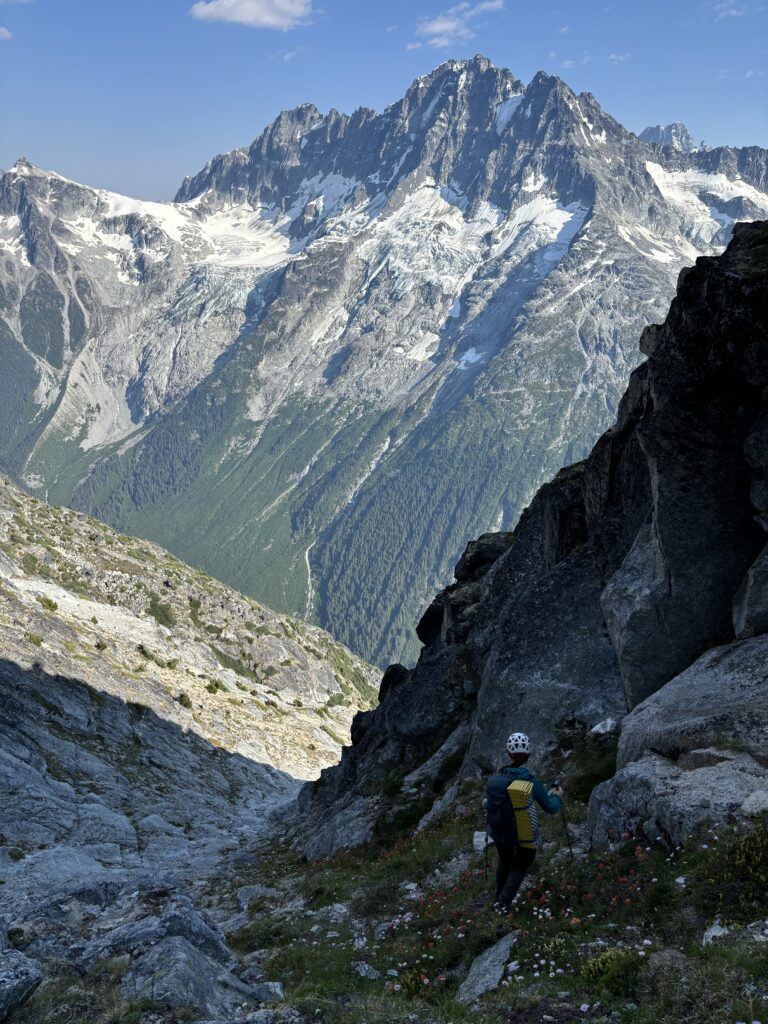
I would not have known about this peak had it not been for Glenn sharing this scarce resource of unclimbed mountains with a contemporary group of BCMC members headed for the Pantheons. The dog legged start of that trip is highlighted in our first ascent of Peak 2480, so I’ll start from our second day of our exploration into the Frontier Creek group. By now we had some pieces of the puzzle on the south west face of Culbert Crag, but we wanted to do another recon mission to see if the north east face offered any viable routes. This was supposed to be a rest day so the plan was to traverse into the massive cirque below us and hop over slabs to get a good eye on the north face.
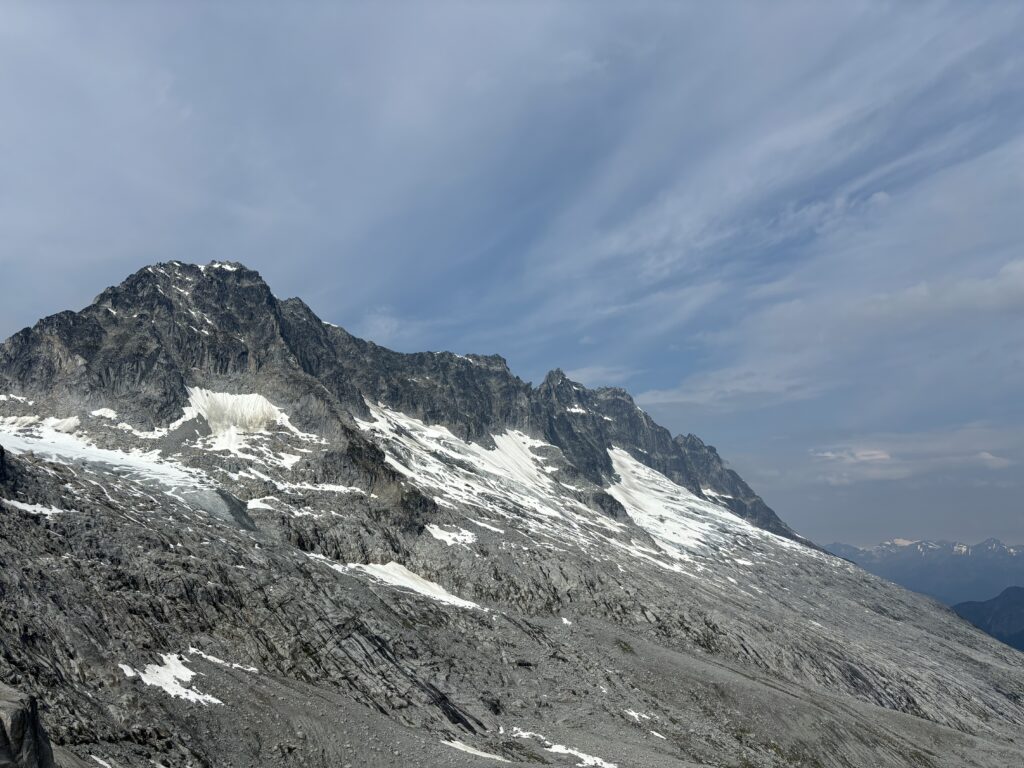
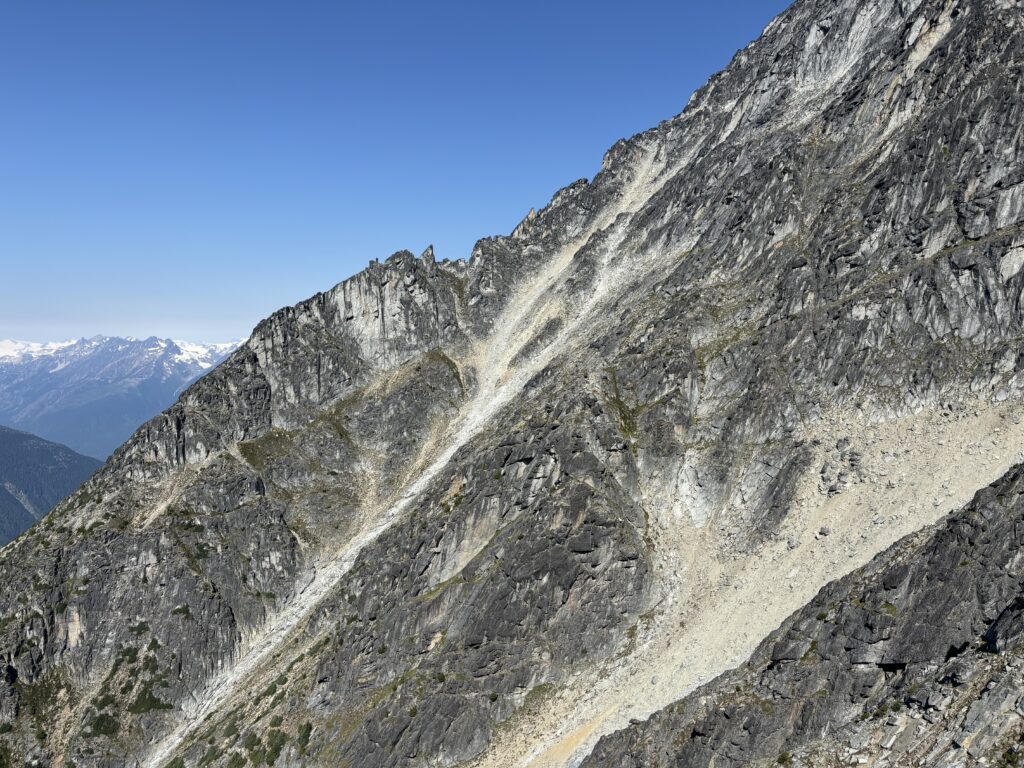
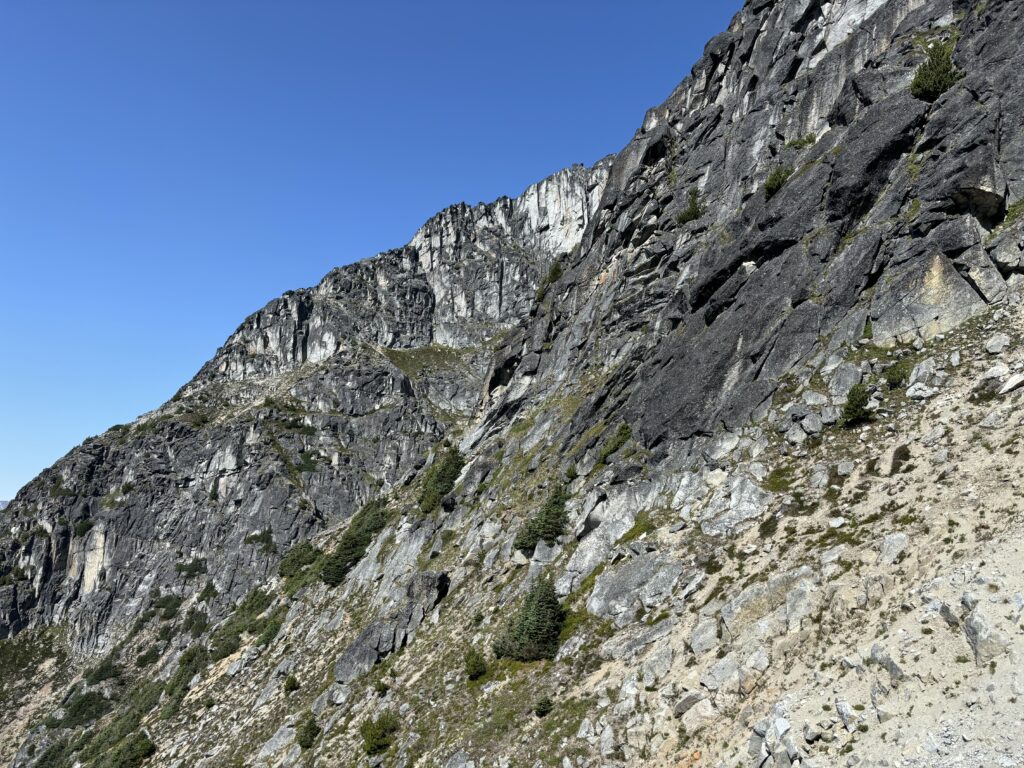
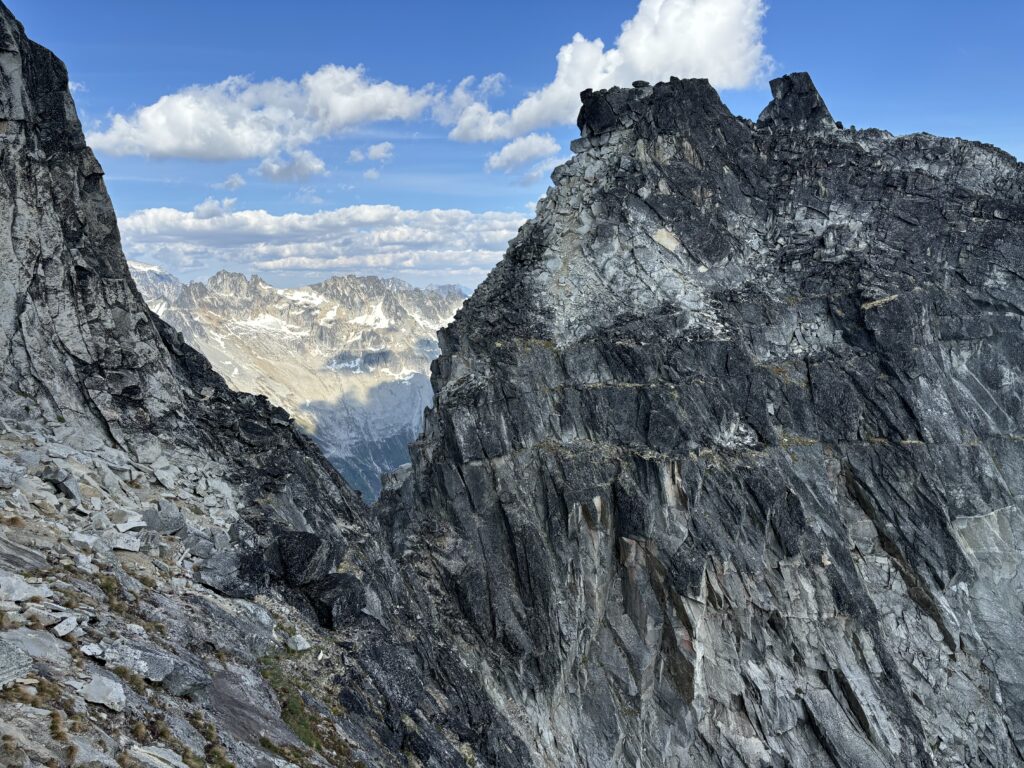
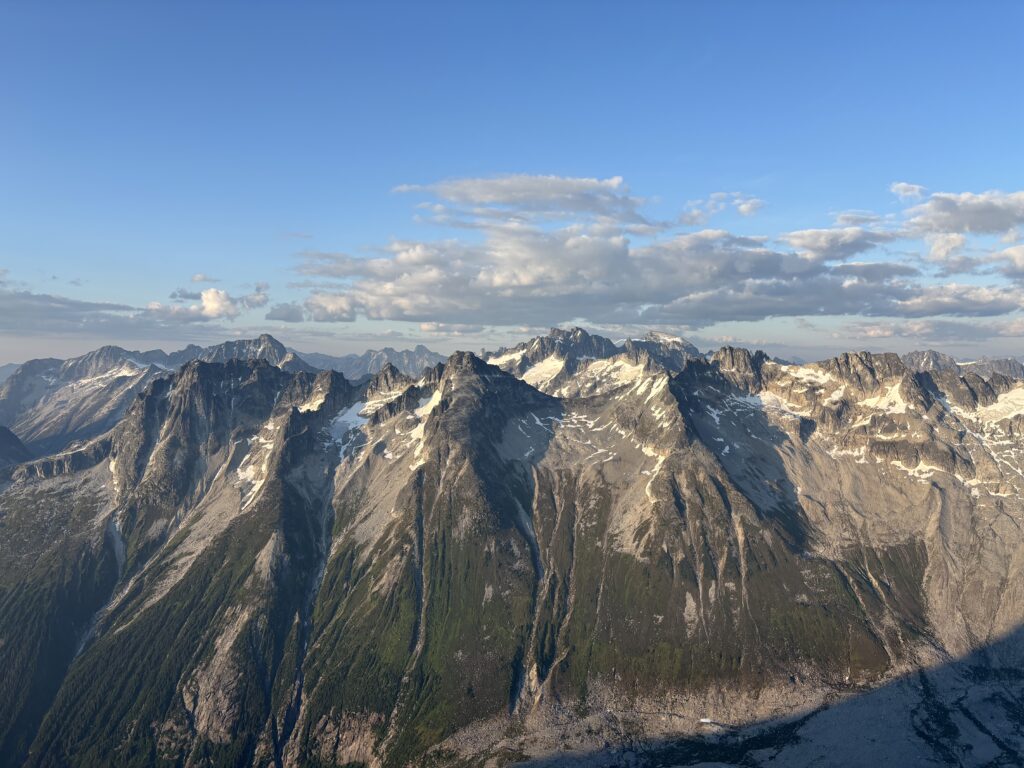
Andrea and I found an easy route along the base of the face and after several kilometers of wandering located no satisfactory route up the north side. The south face of Culbert Crag housed several steep but promising buttresses running up to each of the 4 towers respectively. However, the north side was a steeper and more homogeneous rock wall with a massive characteristic rock band running diagonally across the upper face. In earlier season conditions a snow line may have offered alternative passage, but now deep in the heart of summer those options were limited. With that we headed back for camp to rest up for the evening.
We had done enough recon to decide on an attempt up the south west face via a large gully and then the lower angle ridge/buttress of the 3rd tower. This would allow us to bypass the two massive gendarmes on the col between Sedna and Culbert Crag. In any event, the ridge didn’t lead any where easy or promising and the gullies looked like the best option. From there we’d have to see which tower was tallest and traverse to or potentially climb over each tower to the reach the true summit. Andrea wisely had us pack some gear for an over night bivy with the trade off of heavier packs to climb with.
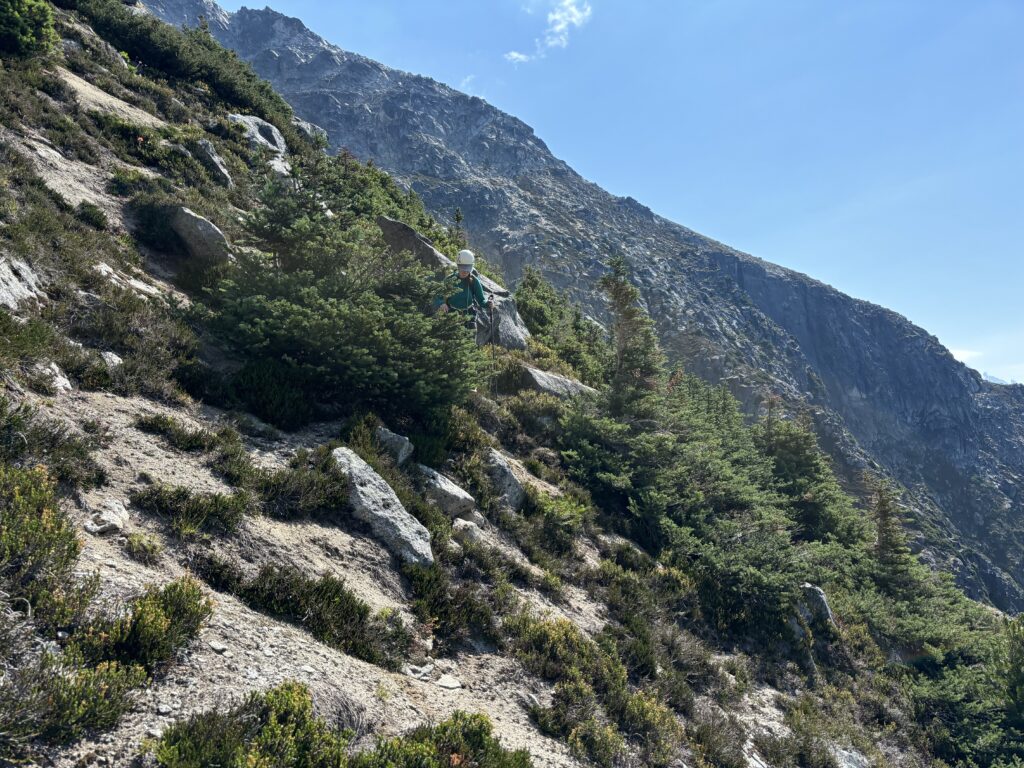
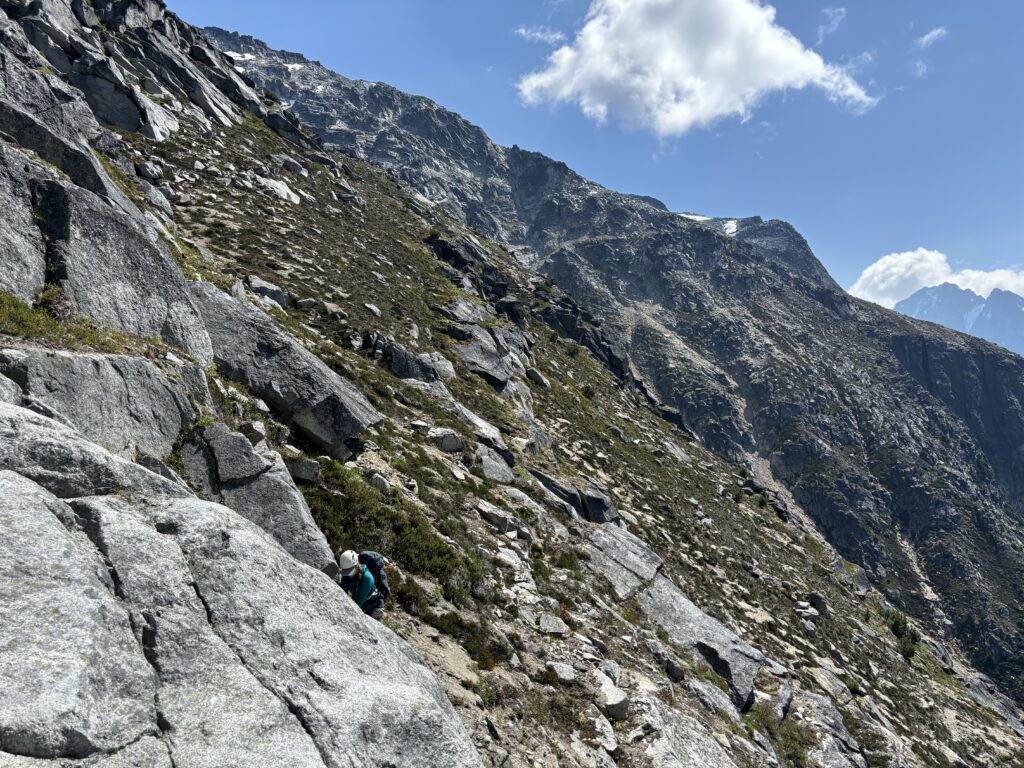
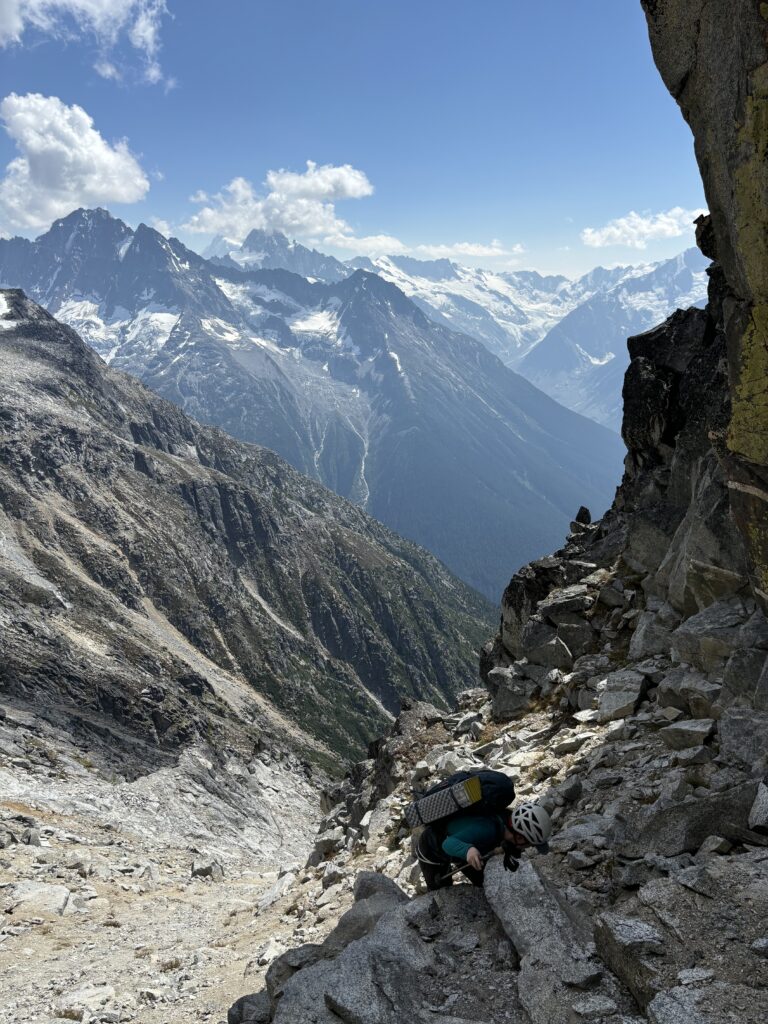
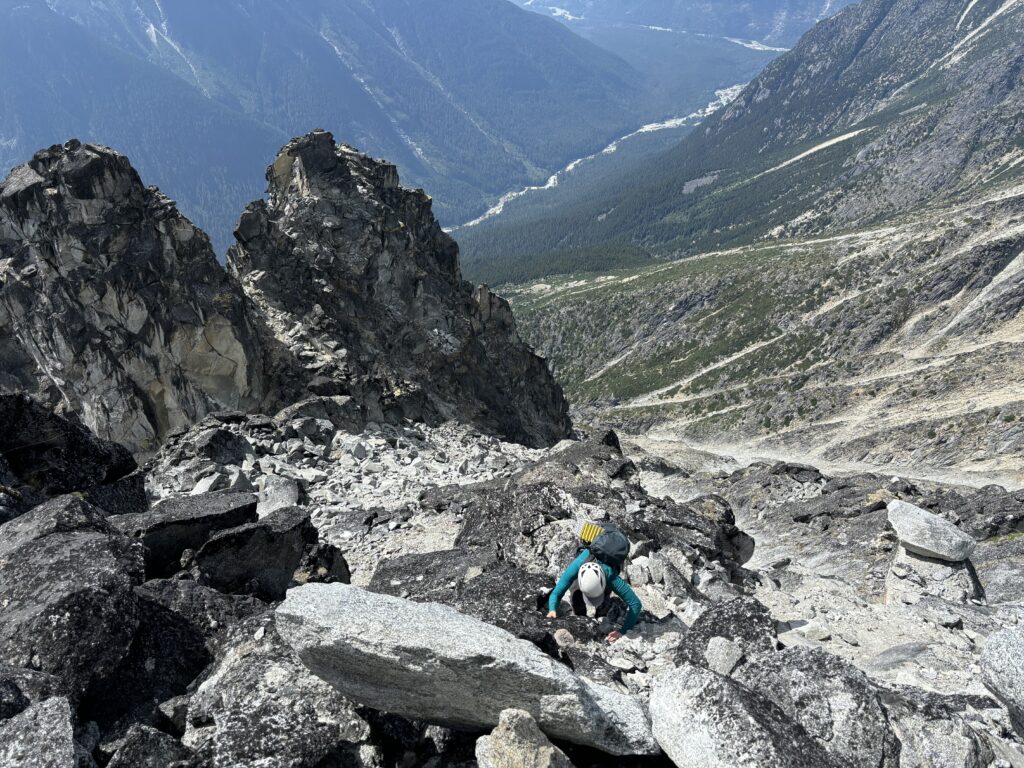
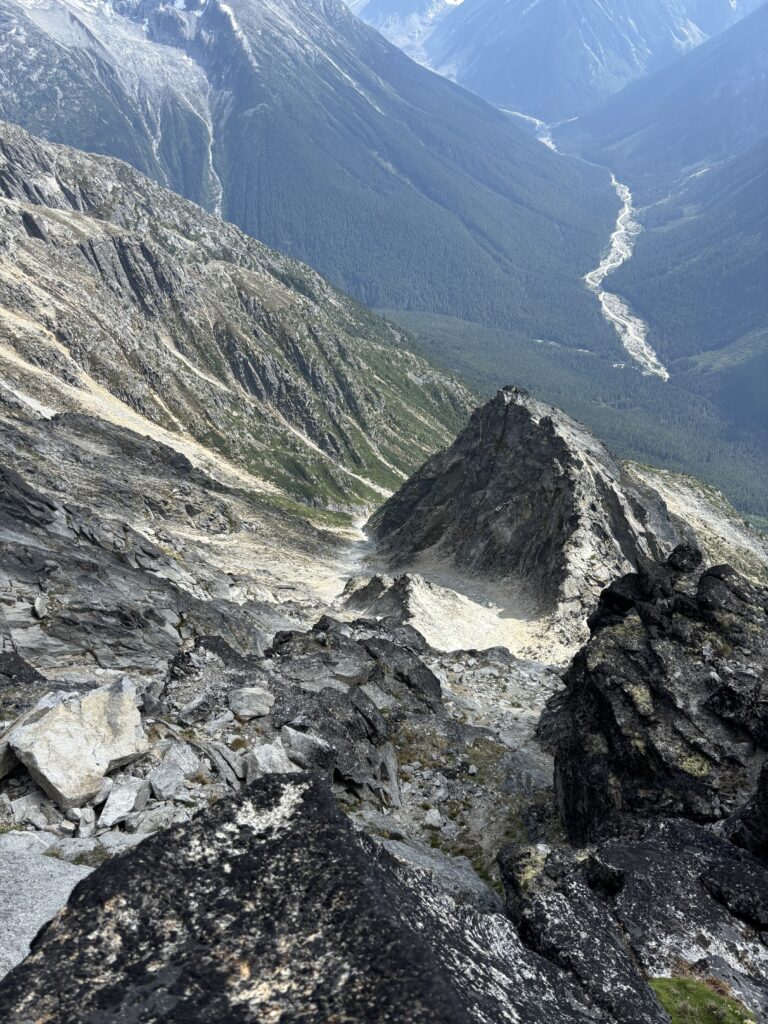
The following day we set off on the now familiar ridge line and scrambled up our previous route to Sedna. We continued along the ridge and this time started dropping down the broad bowl between the true and false summits of Sedna. On our first recon mission I had spotted a rib that looked like it could take us all the way to the gully, albeit with a steep descent into the guts of south face. Sure enough when we reached the edge of the bowl a route came to light. I lead us down some 3rd/4th class moves and then we were onto steep heather and ledges.
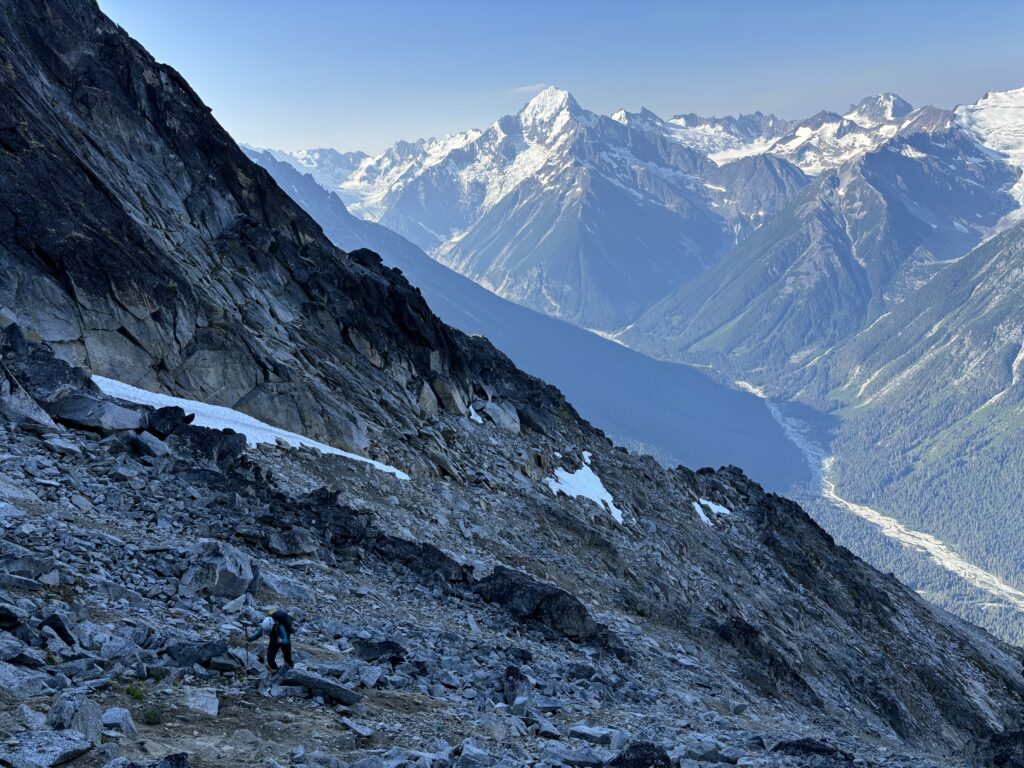


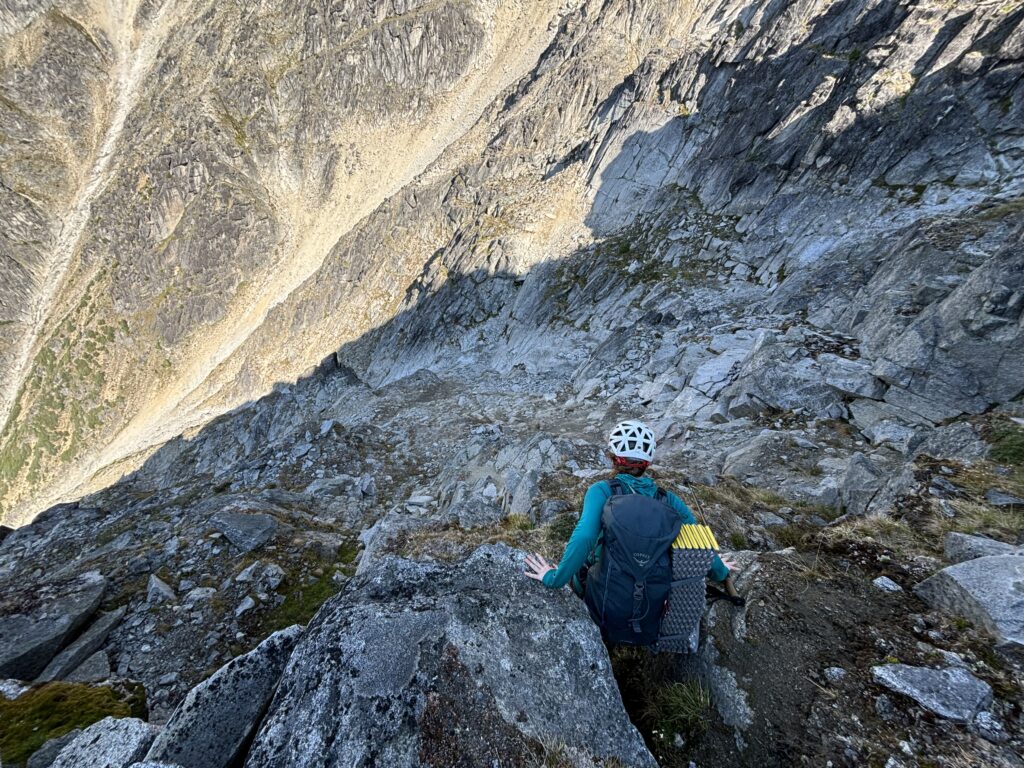
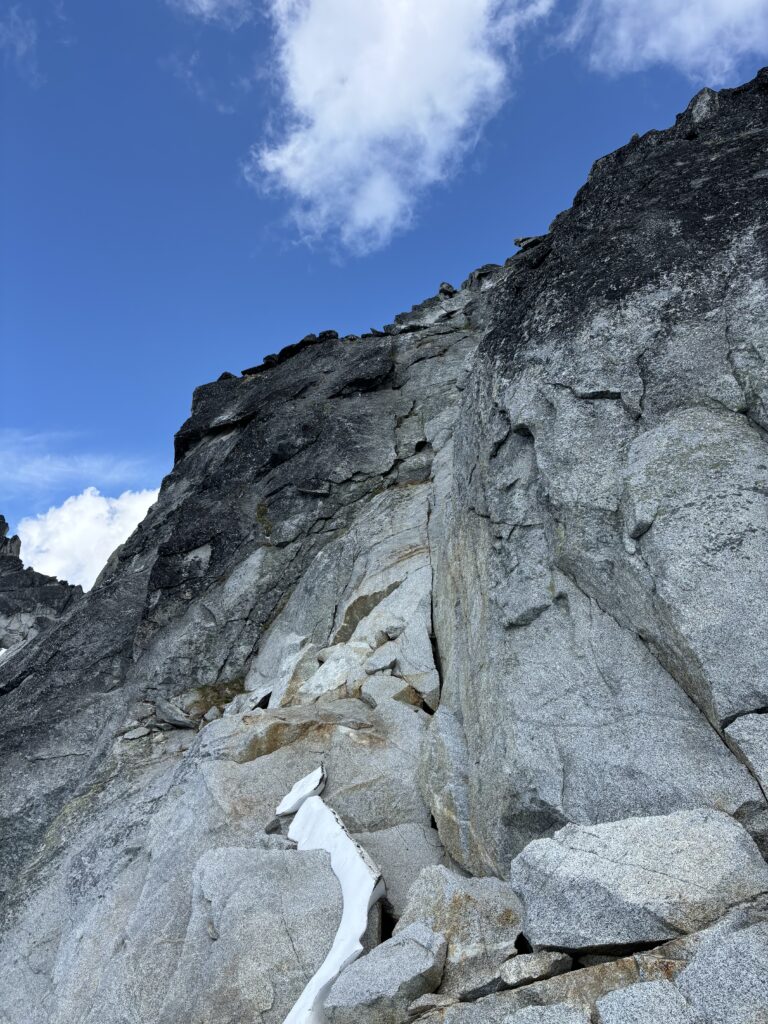
As we descended, the massive buttresses of the south west face came further into focus and we both had a sinking feeling about getting onto such massive terrain. The excitement of the unknown also came with equal parts nerves and fear. I reassured us that we had all the tools and skills to back off whatever we encountered and we pressed on with some assurance in our minds.
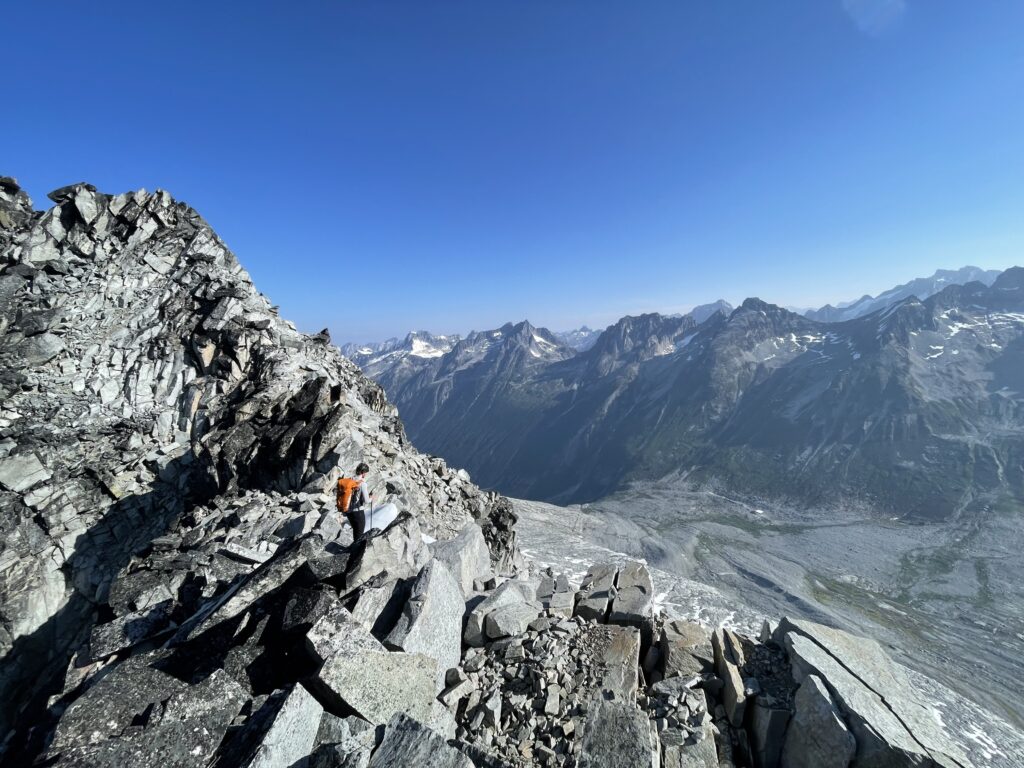
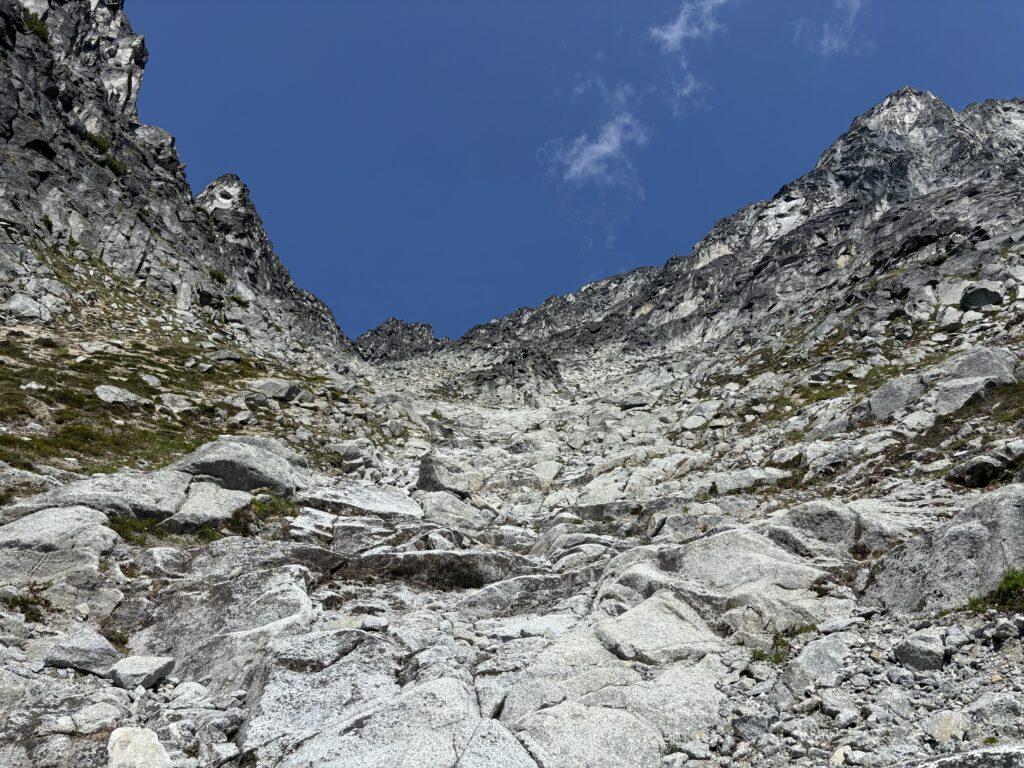
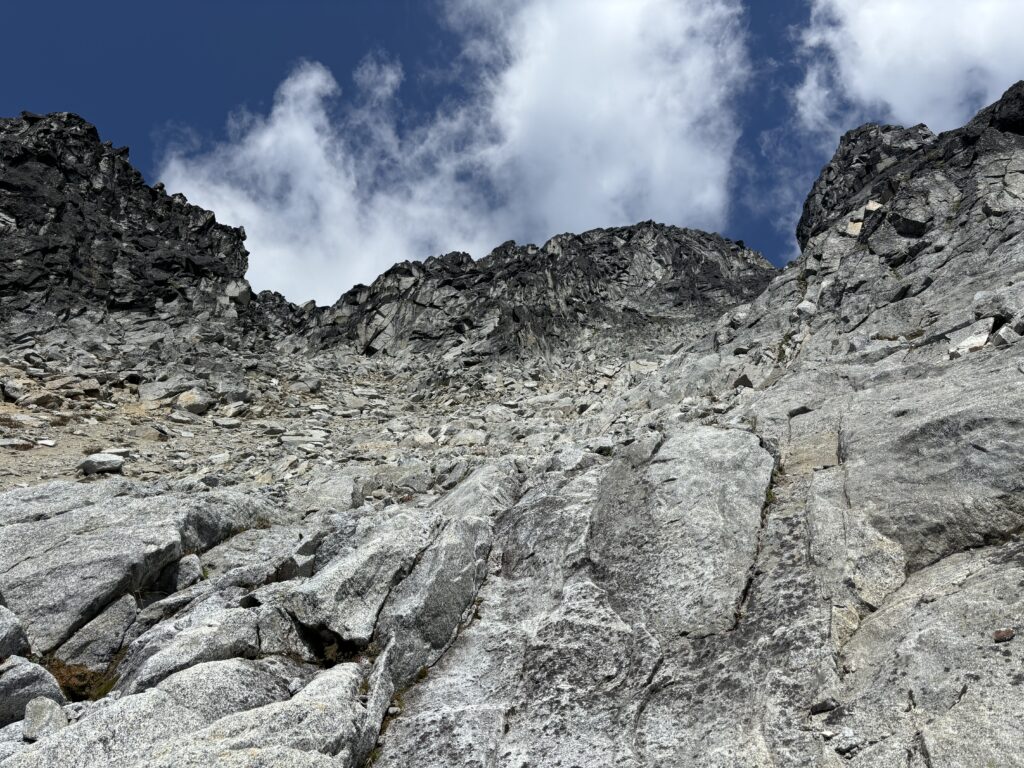
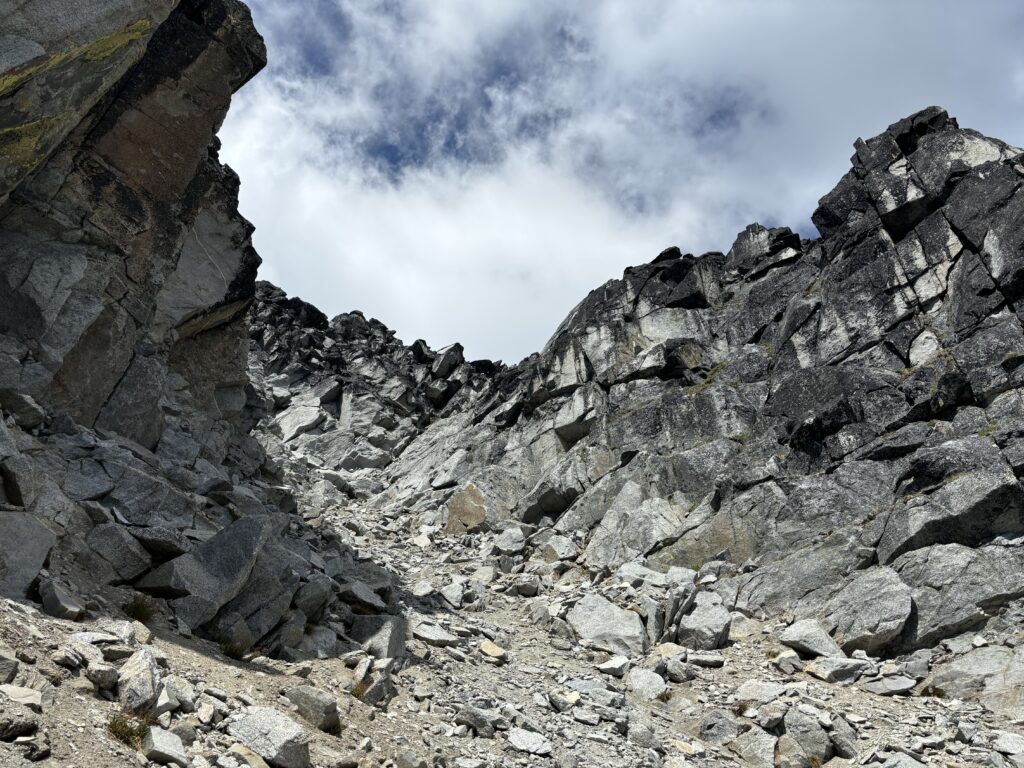
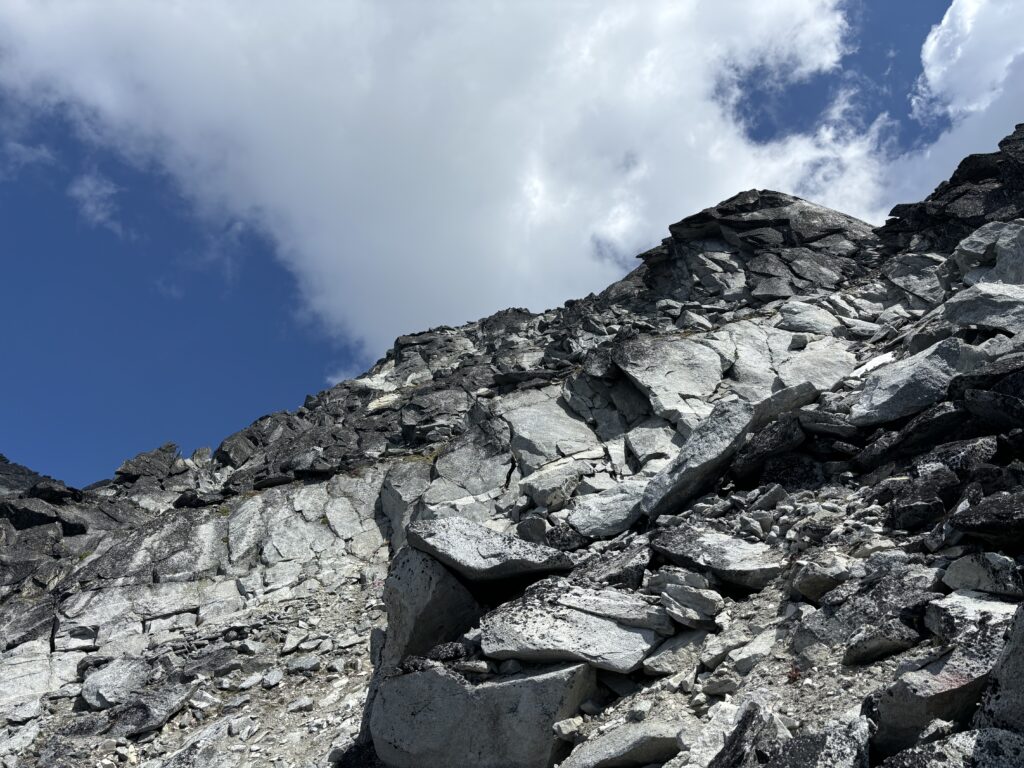
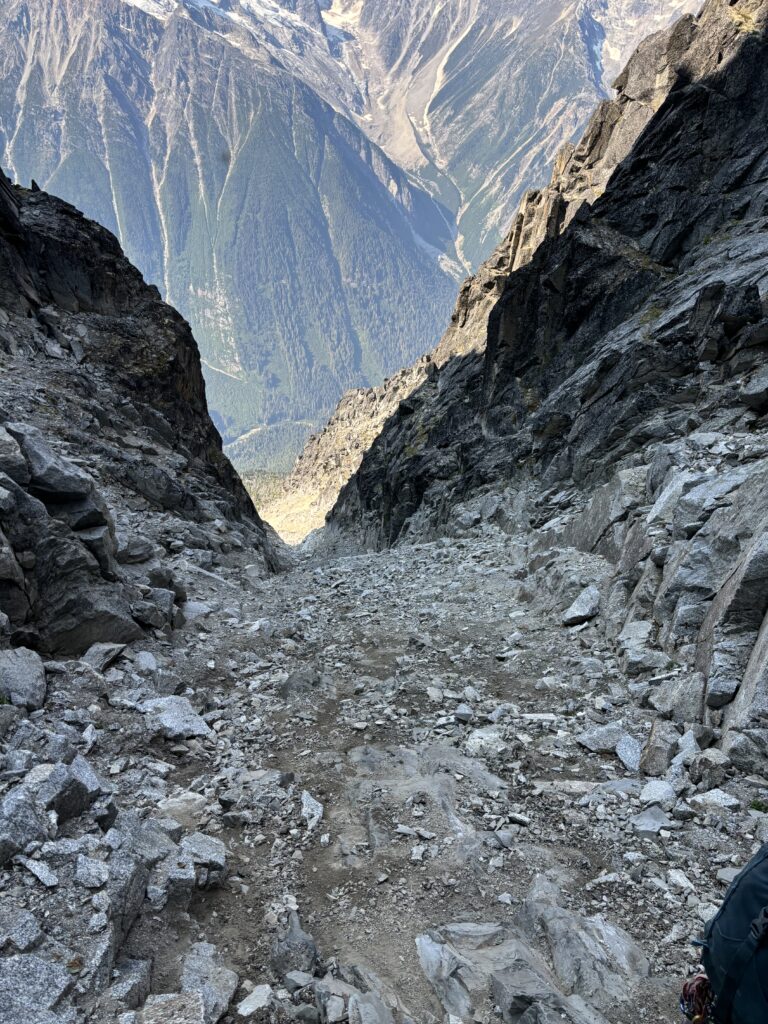
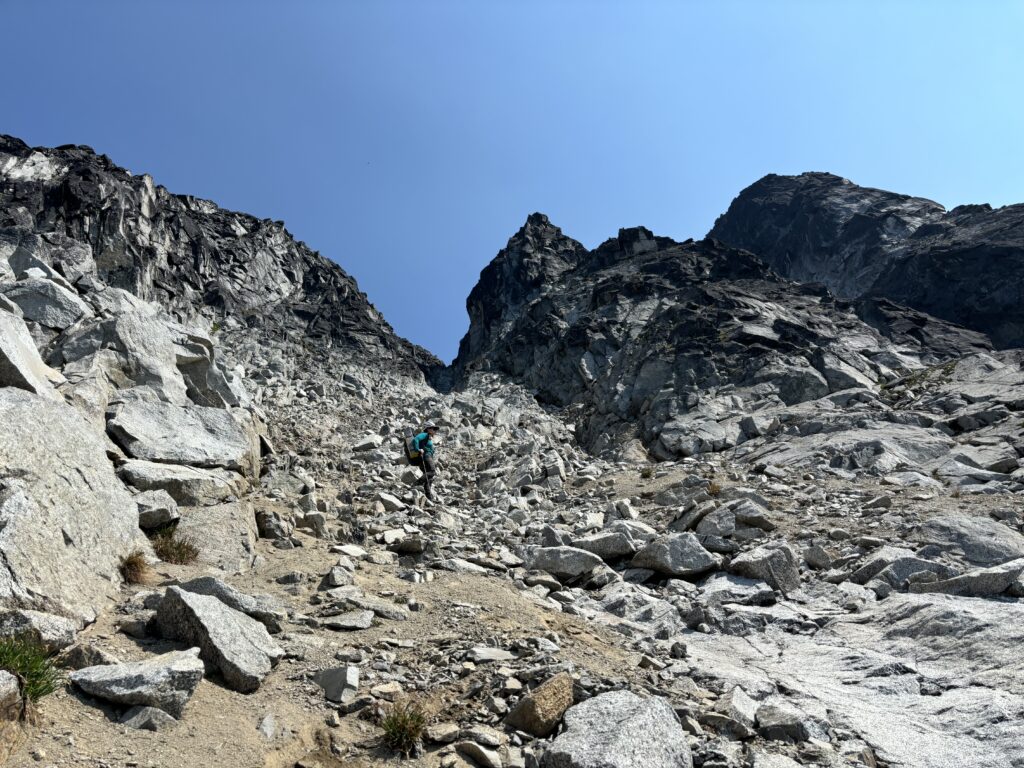
The rib soon gave way to a steep traverse across the first of two gullies. Our target was the second gully as that would take us, at least in part, to the south west ridge of the 3rd tower. The first gully was chocked with hard packed scree concrete, but we managed to skirt across and then moved over steep heather to reach the second gully. I was relieved to see tame slabs and modestly angled scree and sand above. This was looking much better than anticipated.

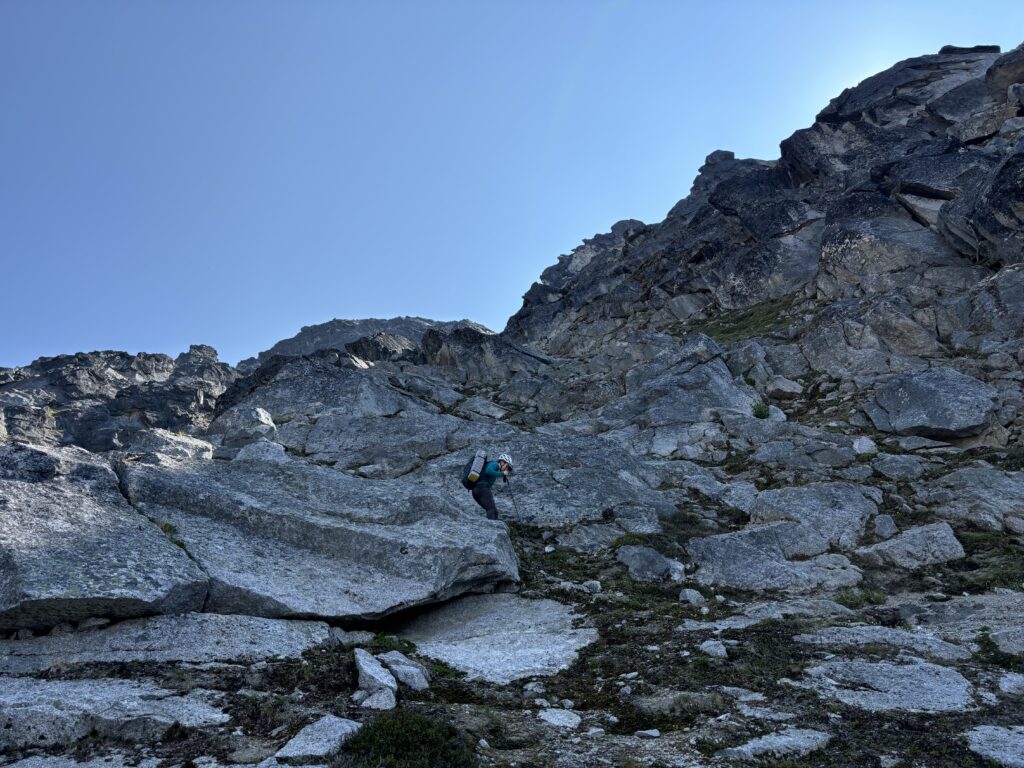

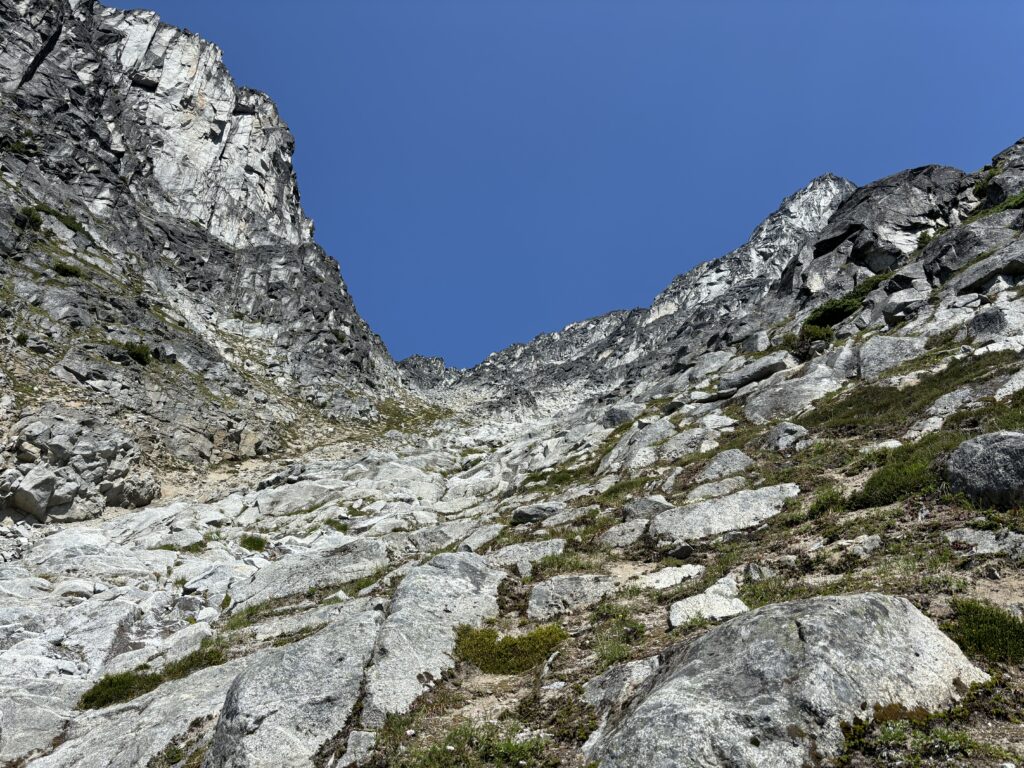
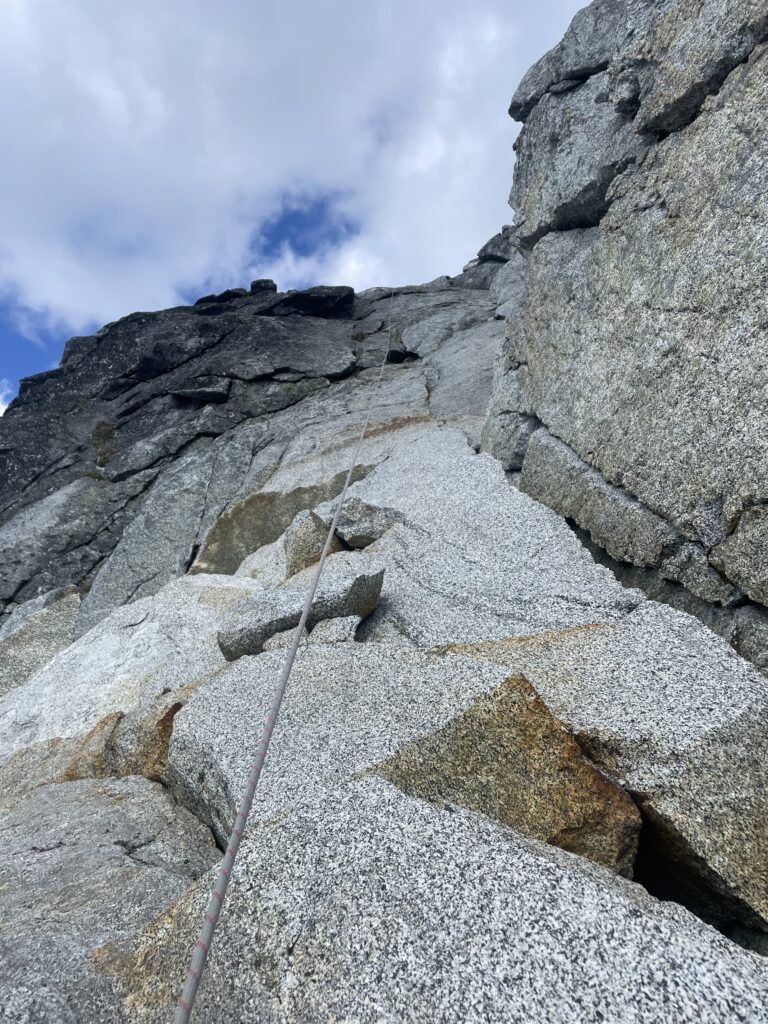
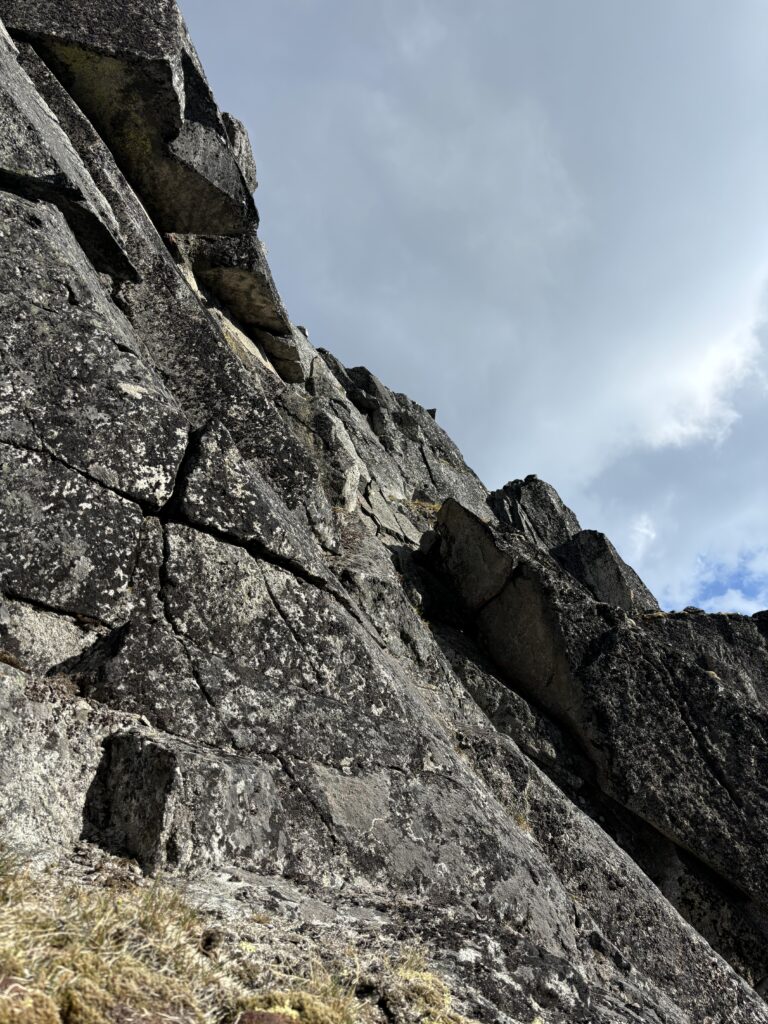
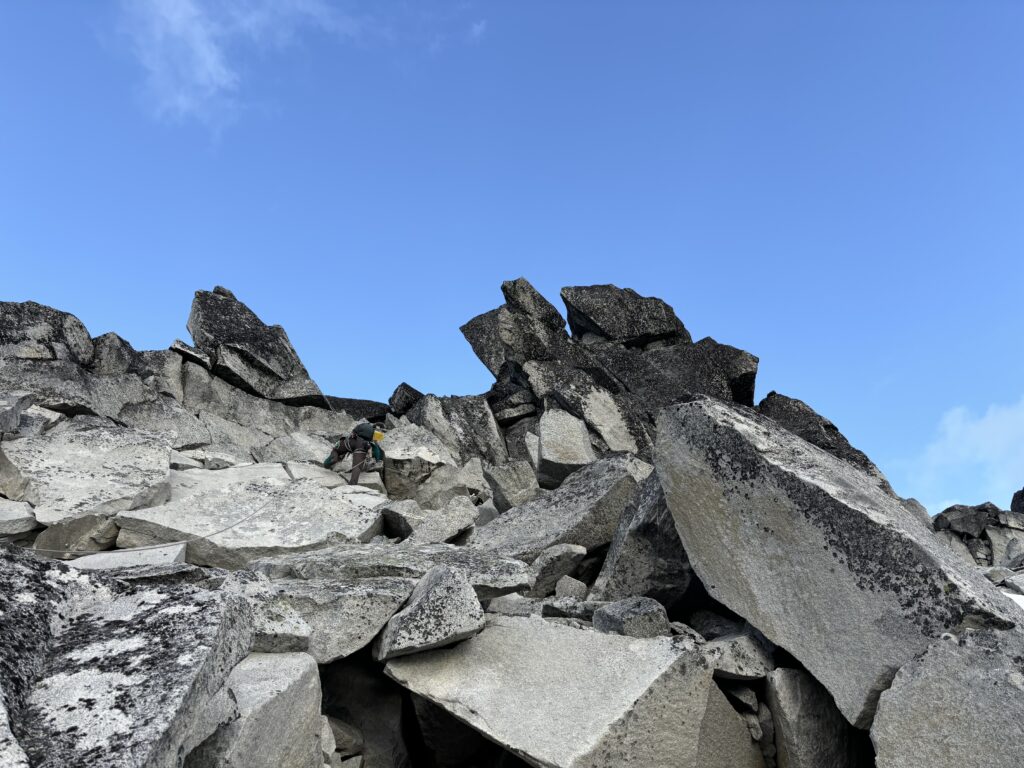
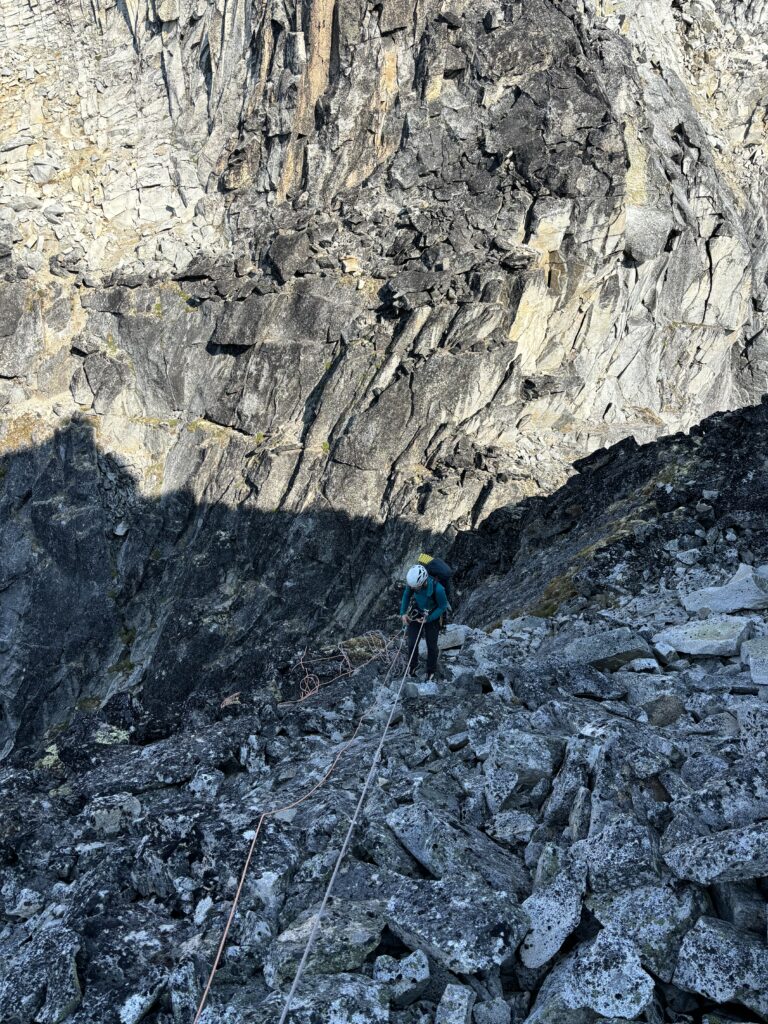
We followed the gully up for perhaps 200m, gaining precious elevation and bypassing numerous steep sections of ridge line in the process. Ahead the gully forked left to the ridge or right to a notch between the 2nd and 3rd towers. The right option did look somewhat possible, but it seemed like a long ways to go on crappy terrain to get shut down. We both preferred the more aesthetic ridge line option and so continued left to the ridge. Andrea located a flat bench that wrapped around the ridge to the west side and there we found 3rd and 4th class terrain. As we trended back towards the ridge crest the terrain steepened and we opted to rope up here. Andrea lead the first pitch through mostly 4th and low 5th terrain all the way to the ridge crest. I then led up the ridge directly though a short section of lichen covered grooves and then to a large ledge.

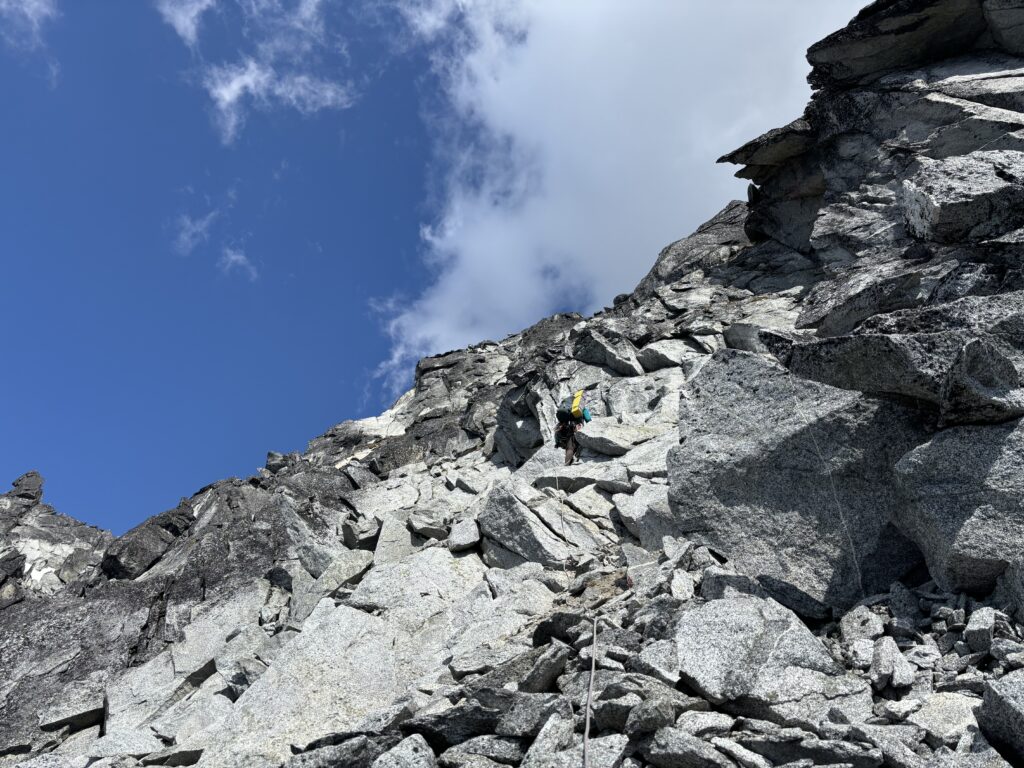
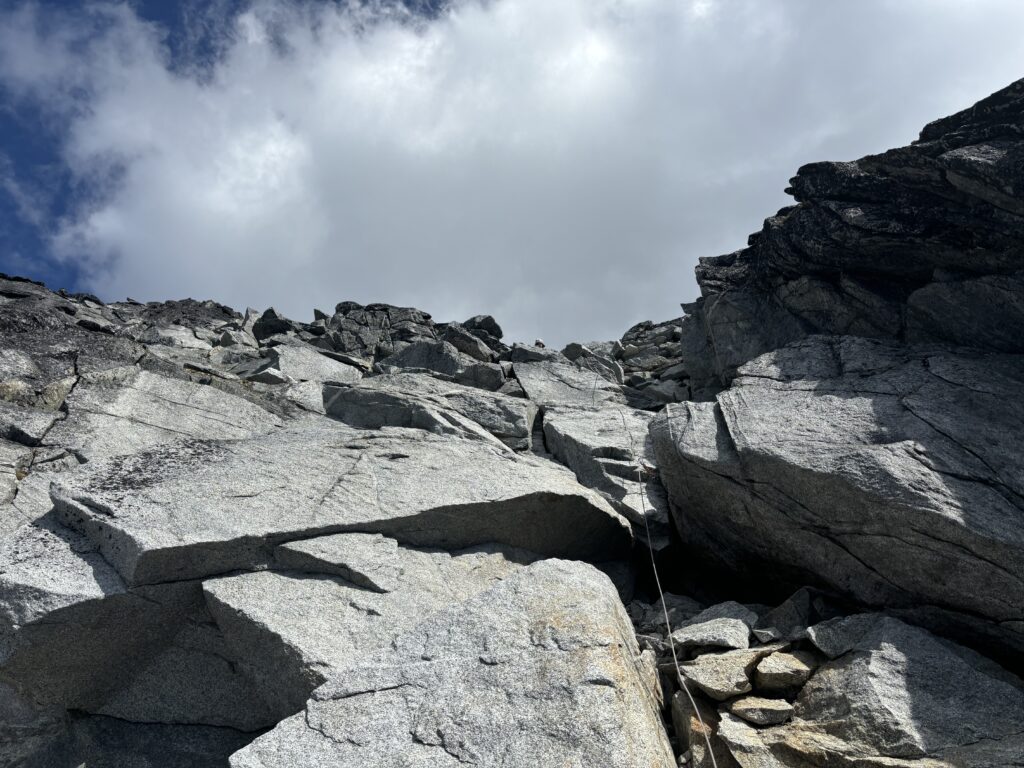
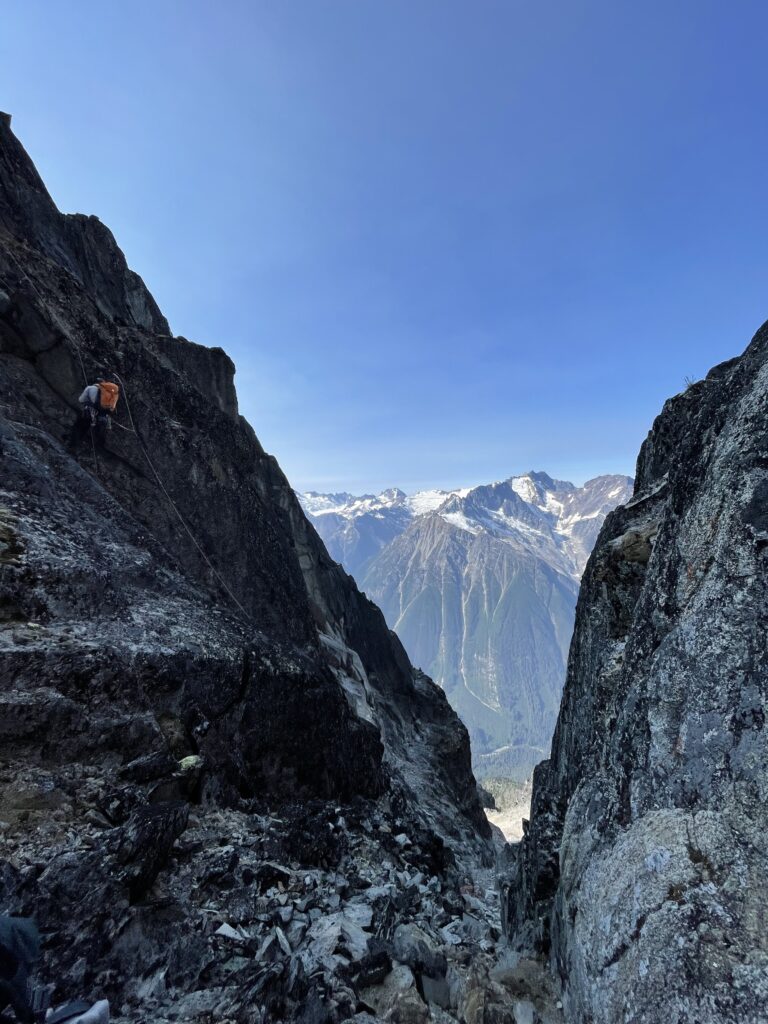
Andrea asked if I could lead the next section too and I happily obliged. Ahead was a fun looking dihedral with the option to stick left on textured face climbing and then up through flakes. The face climbing looked awesome, so I climbed up that finding some 5.6 moves and lead a full rope length up the ridge. We were now quite close to the top of the 3rd tower and so far the ridge had not given us any show stoppers. I was still anxious about any traverses through the deep notches between the towers though. In Glenn’s photo, albeit from quite a distance, they had appeared quite vertical and could certainly pose a problem. Nonetheless, we had to get there first and now Andrea lead one final pitch to the base of the tower, wrapping through a loose and dirty corner before reaching scrambling terrain.
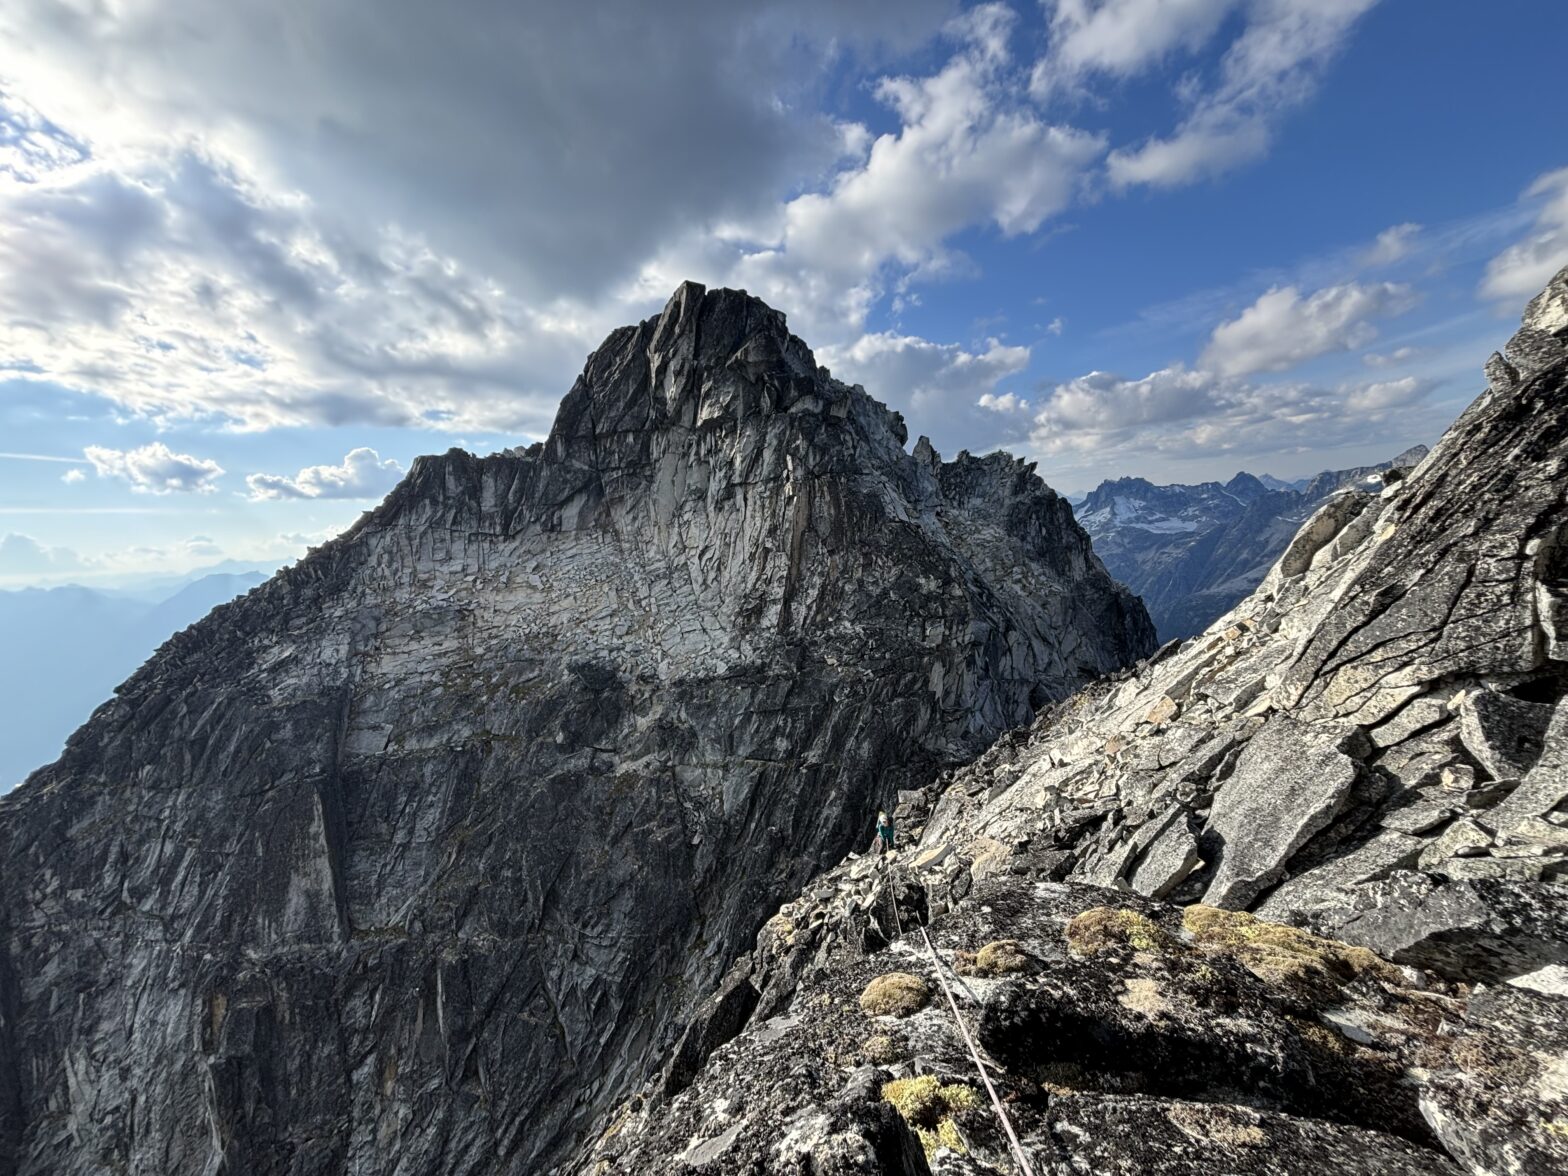
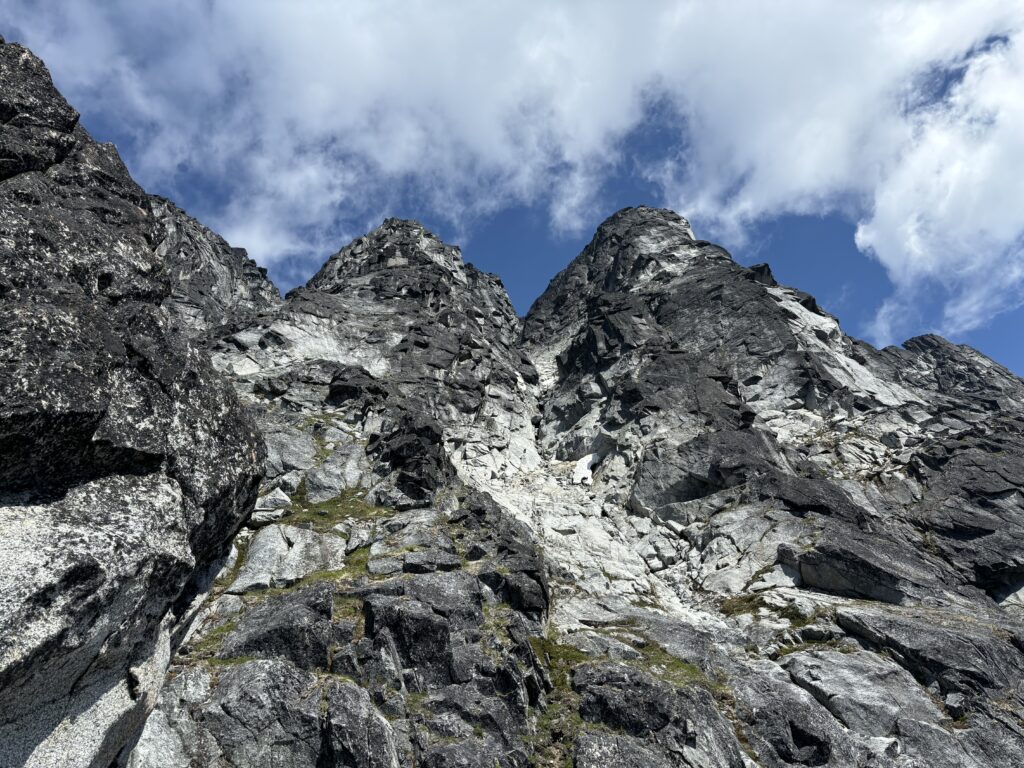
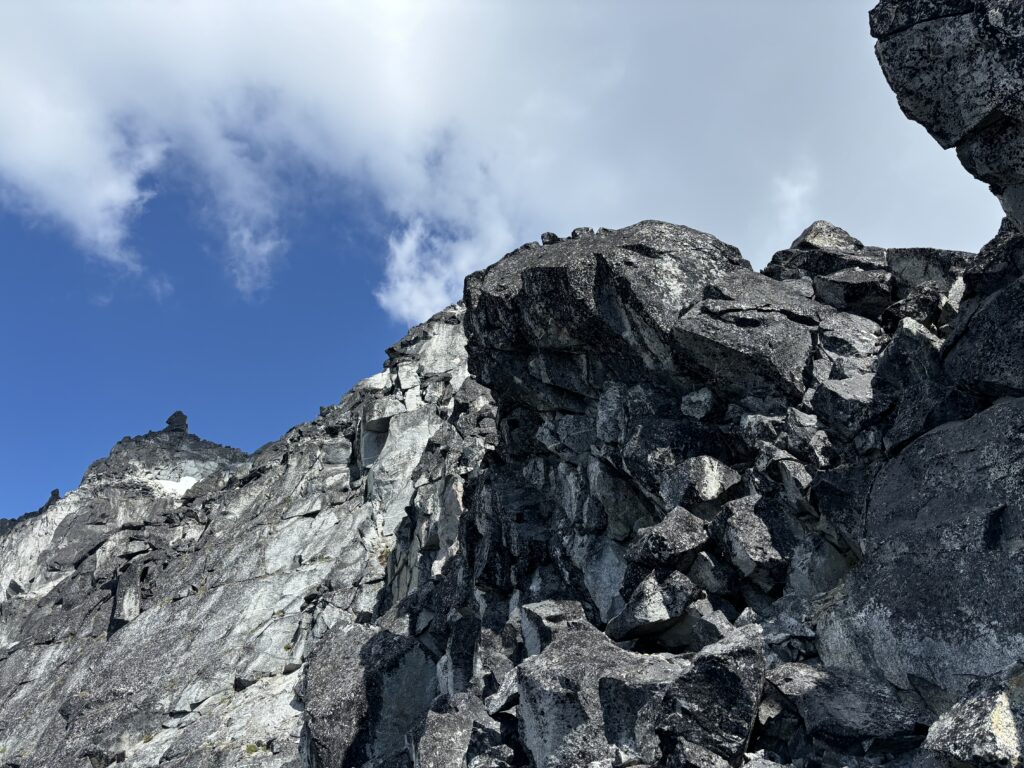
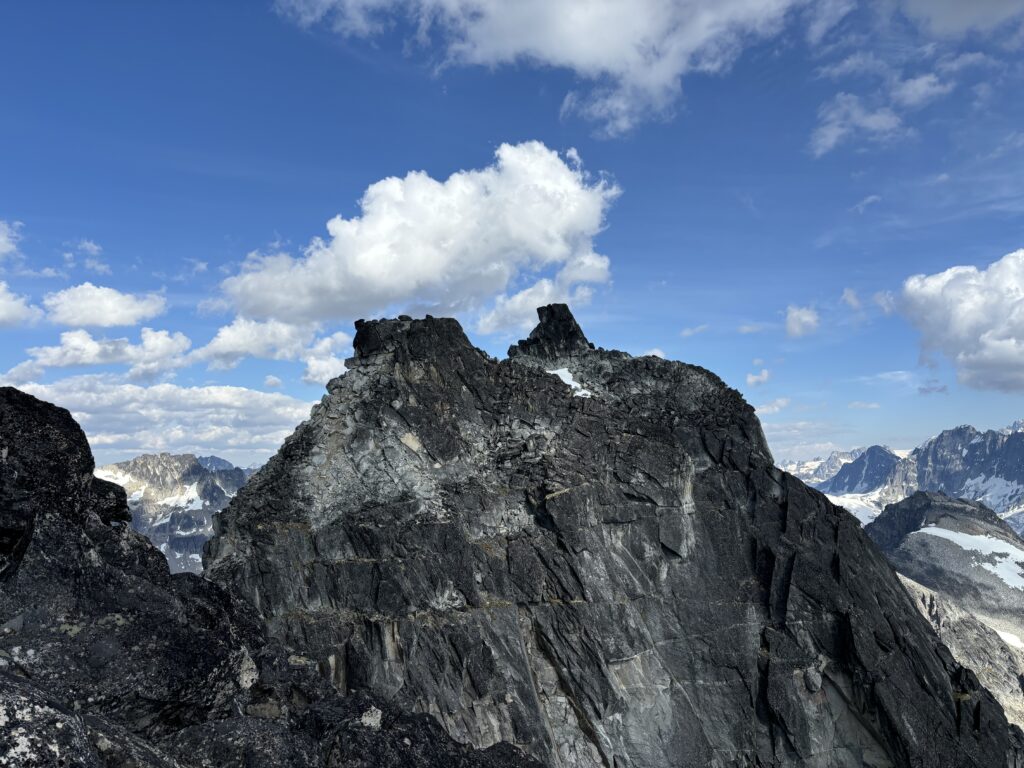
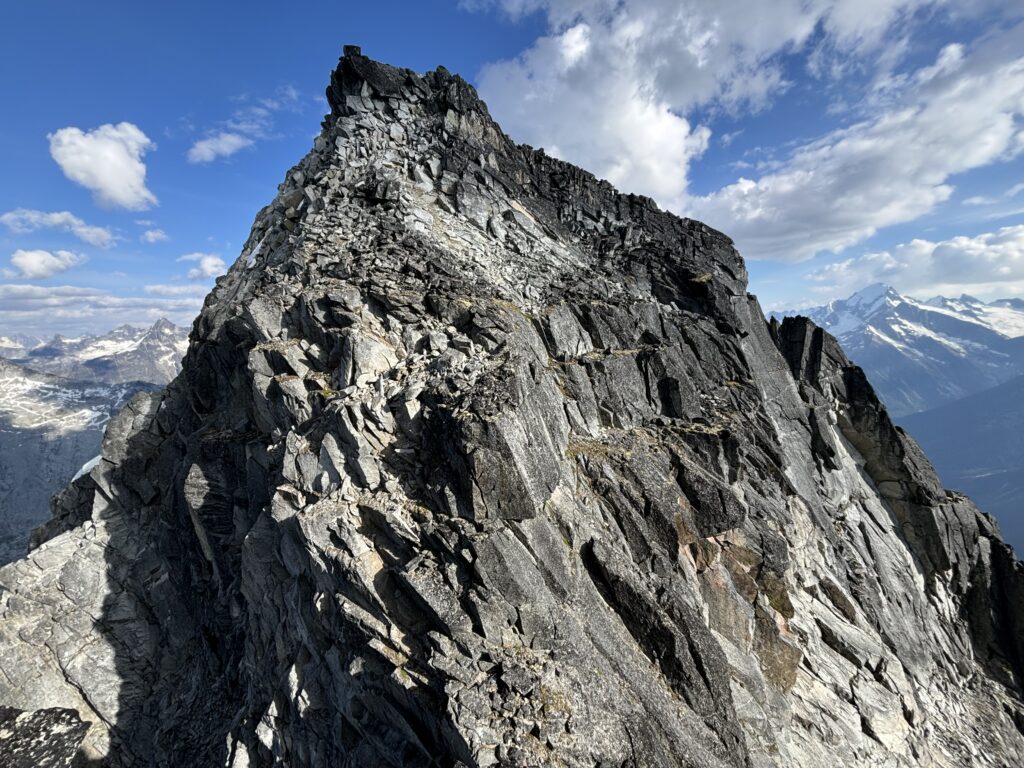
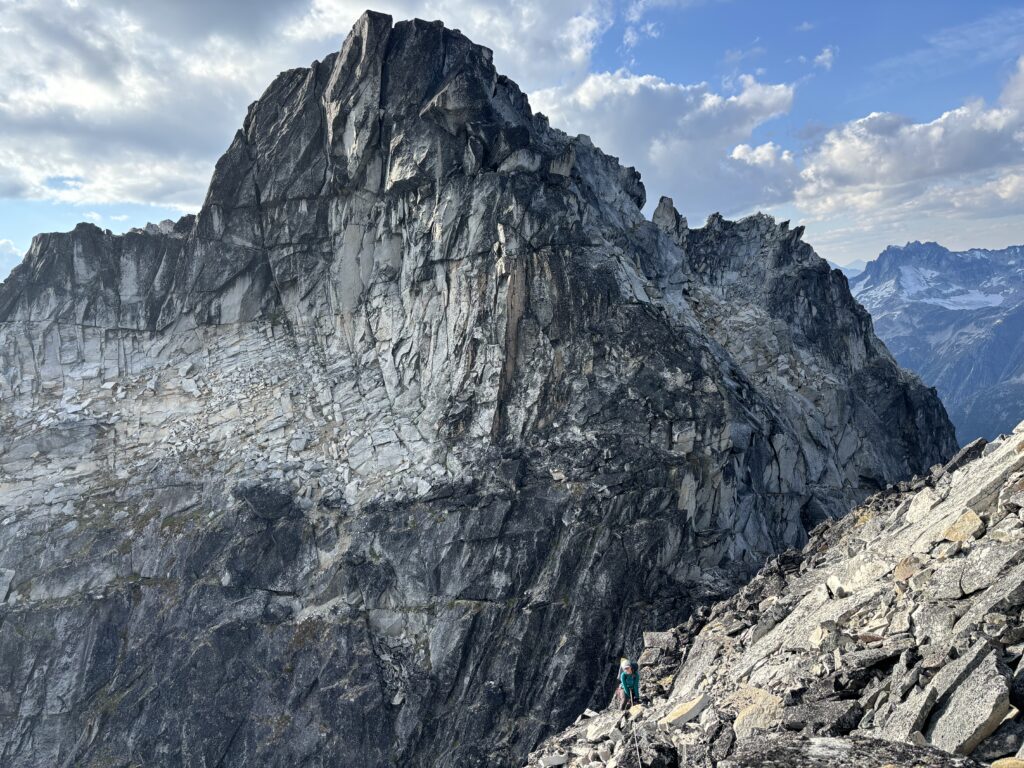
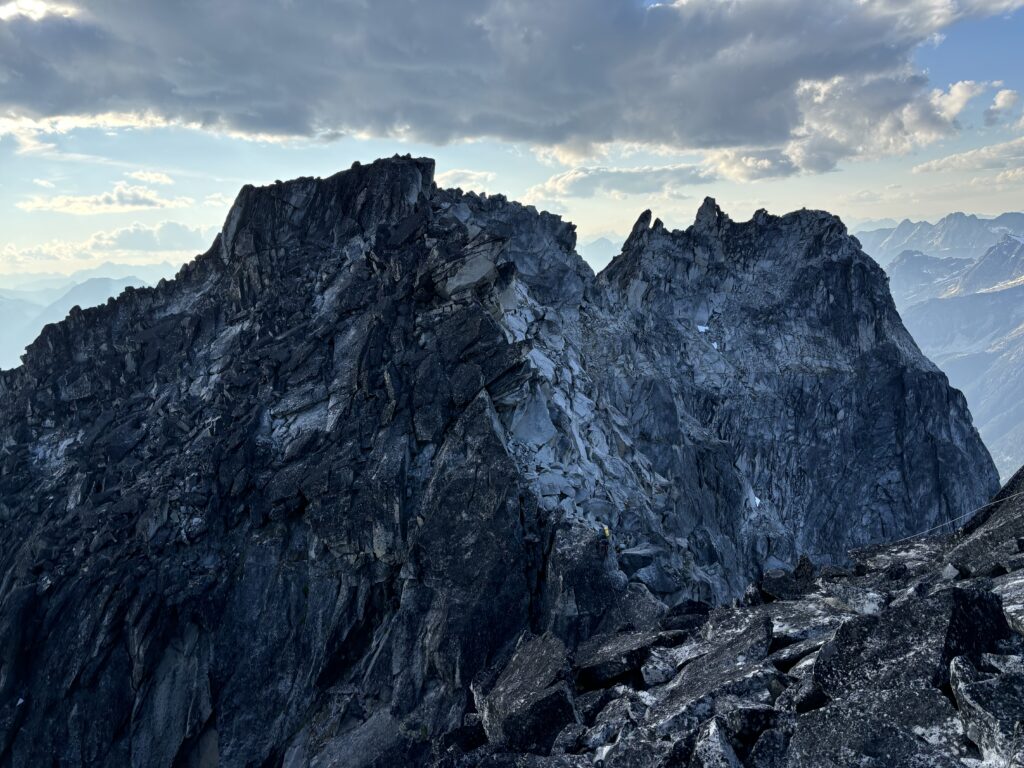
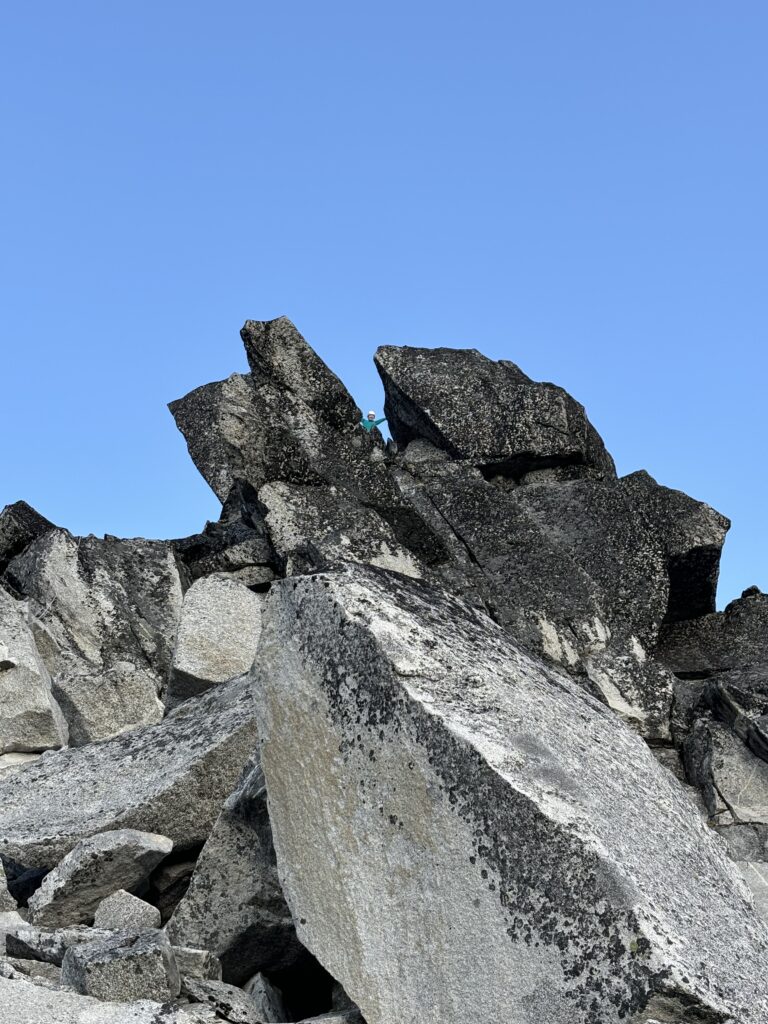
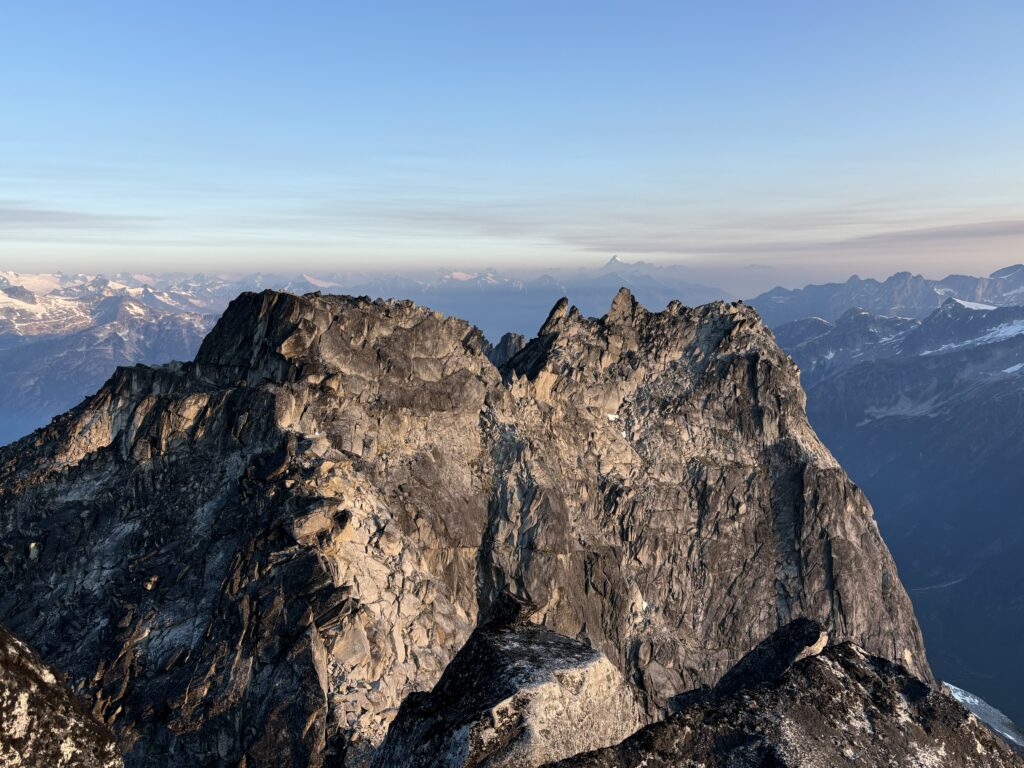
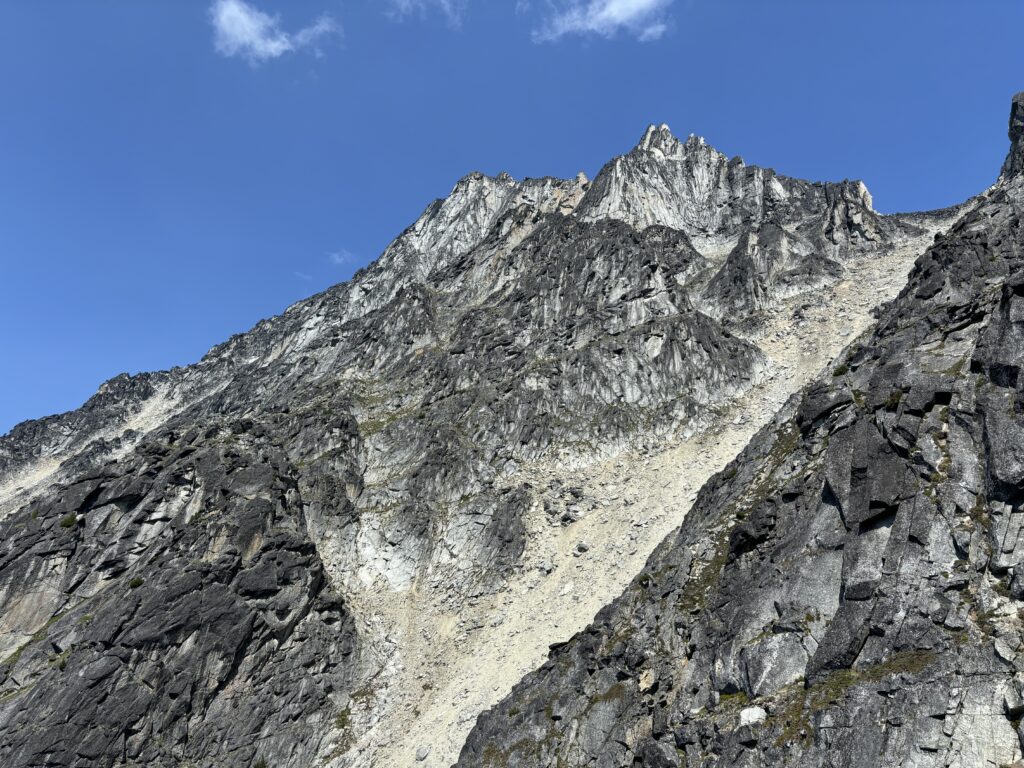
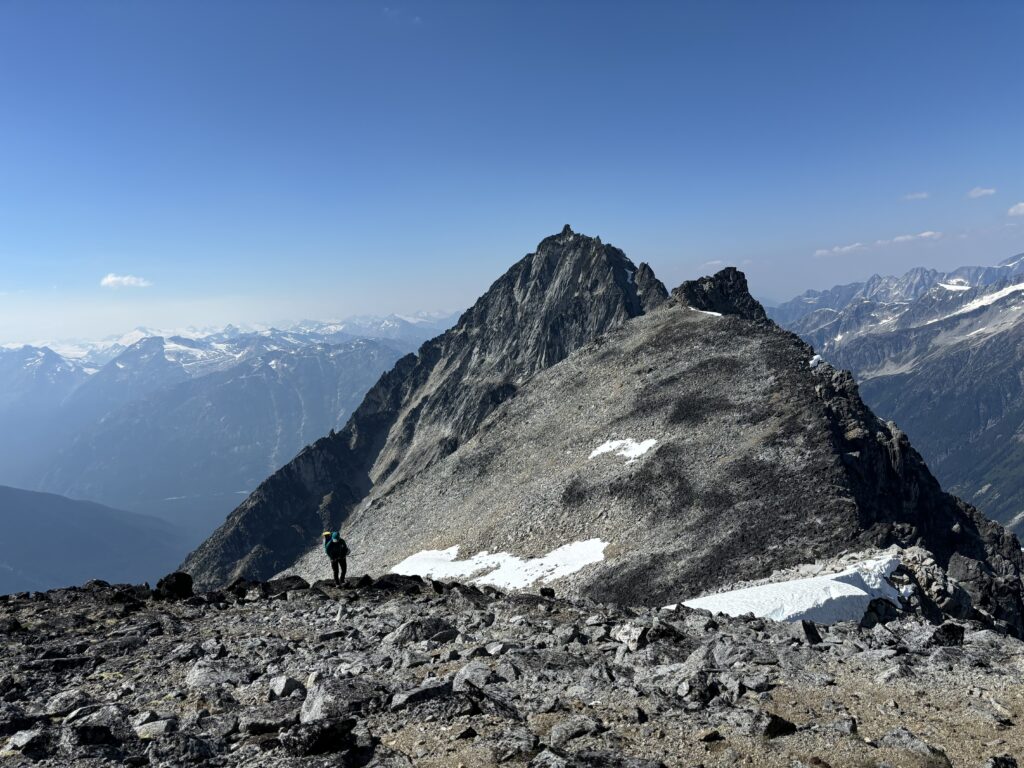
At last we had a clear view of all 4 towers. To the left was the 4th and western most tower with two massive granite pinnacles perched precariously along the ridge. They looked quite terrifying and objectively dangerous to climb. Thankfully as I scanned right it was quite obvious that the eastern most tower was quite a bit higher than all the others. We were now set on making a direct traverse to the first tower and if any of others looked close in height we could then head back. As it were, we only had about 2 hours of daylight left and so picking one tower to go for first made the most sense anyhow.
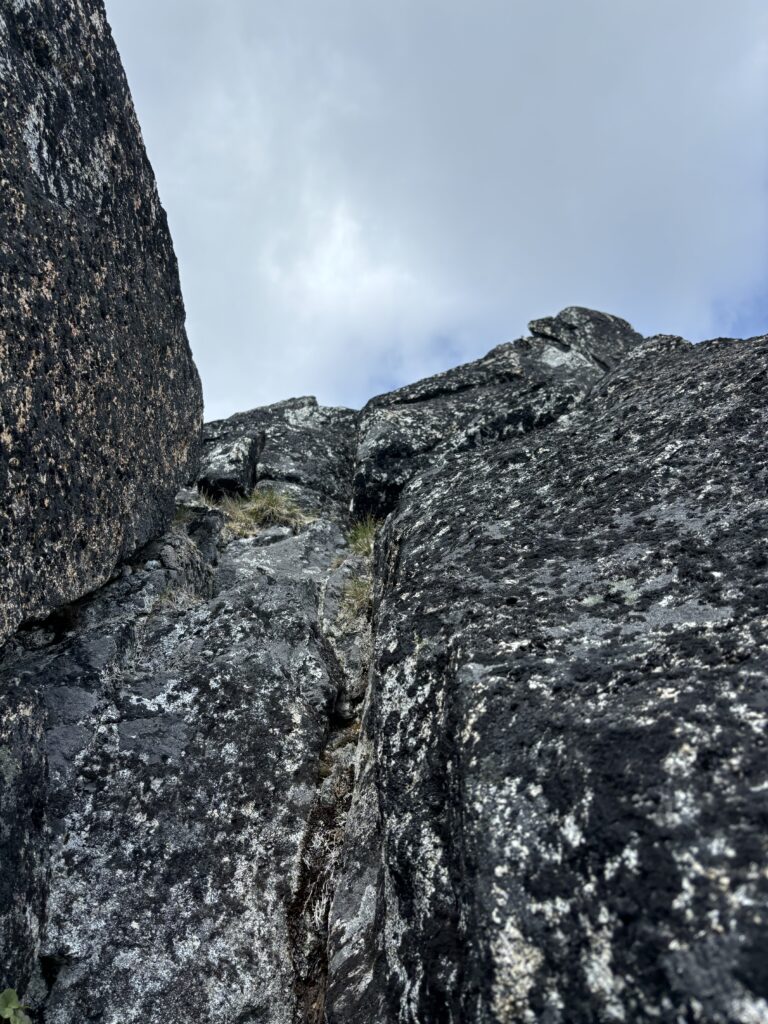
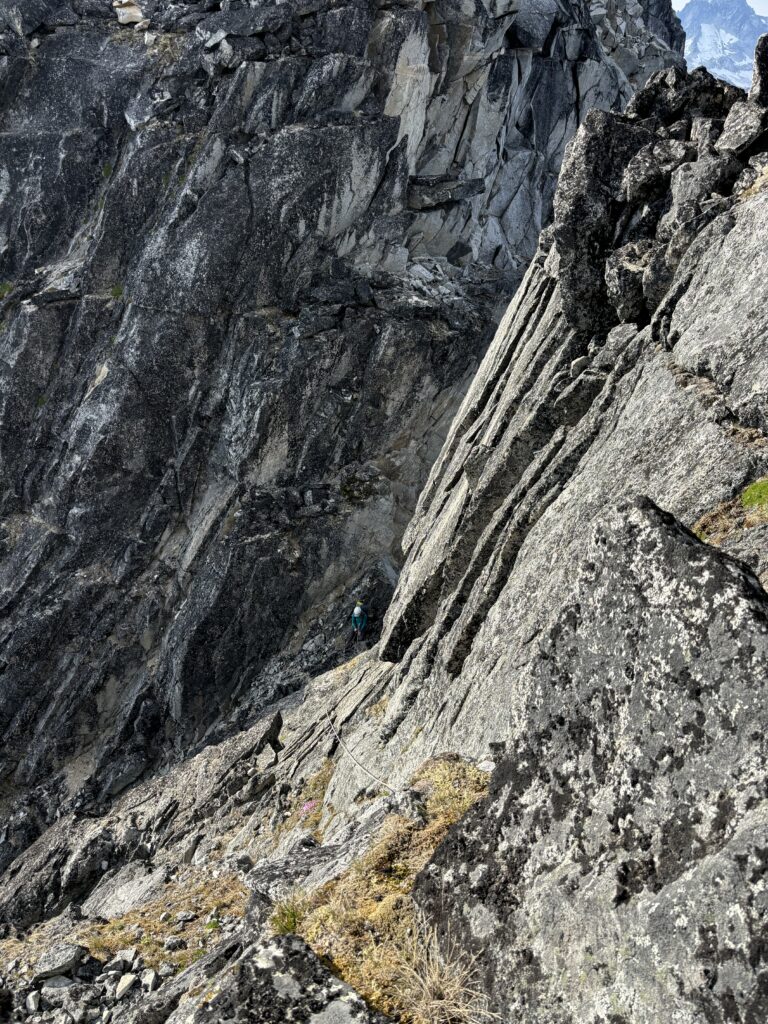
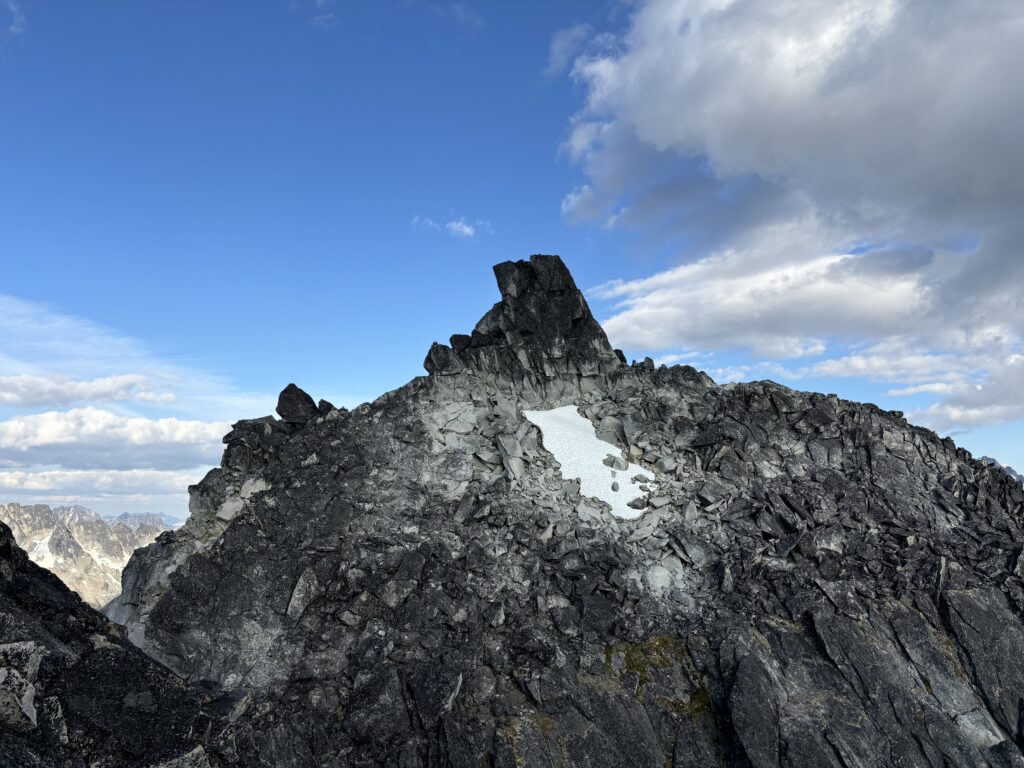
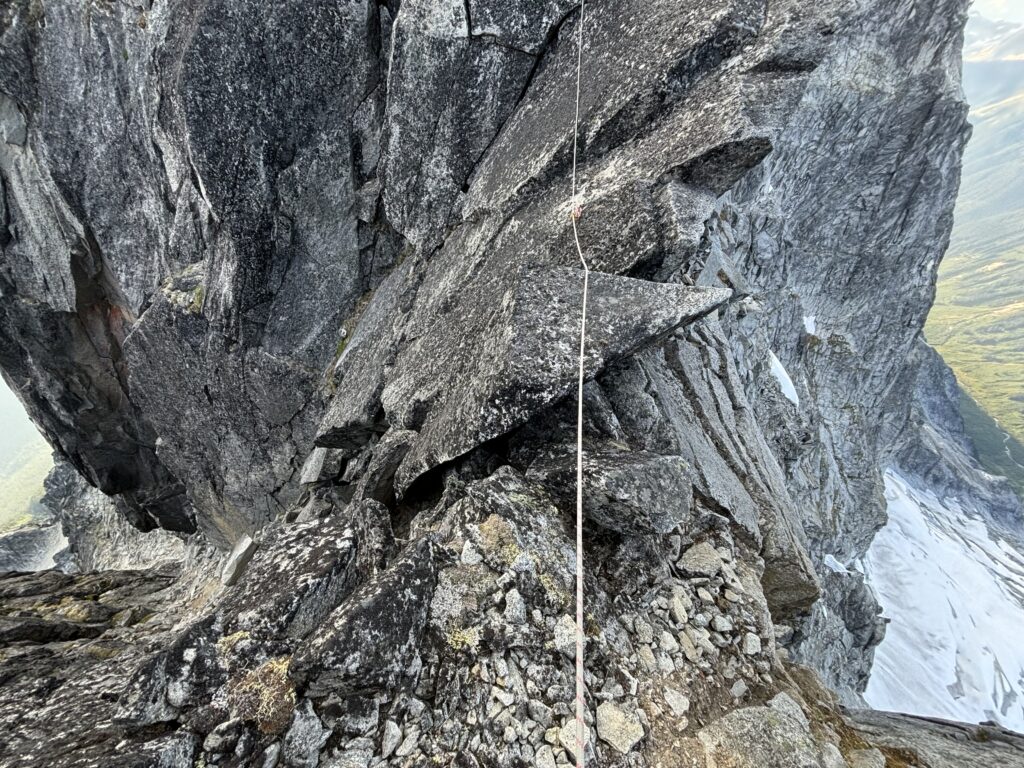
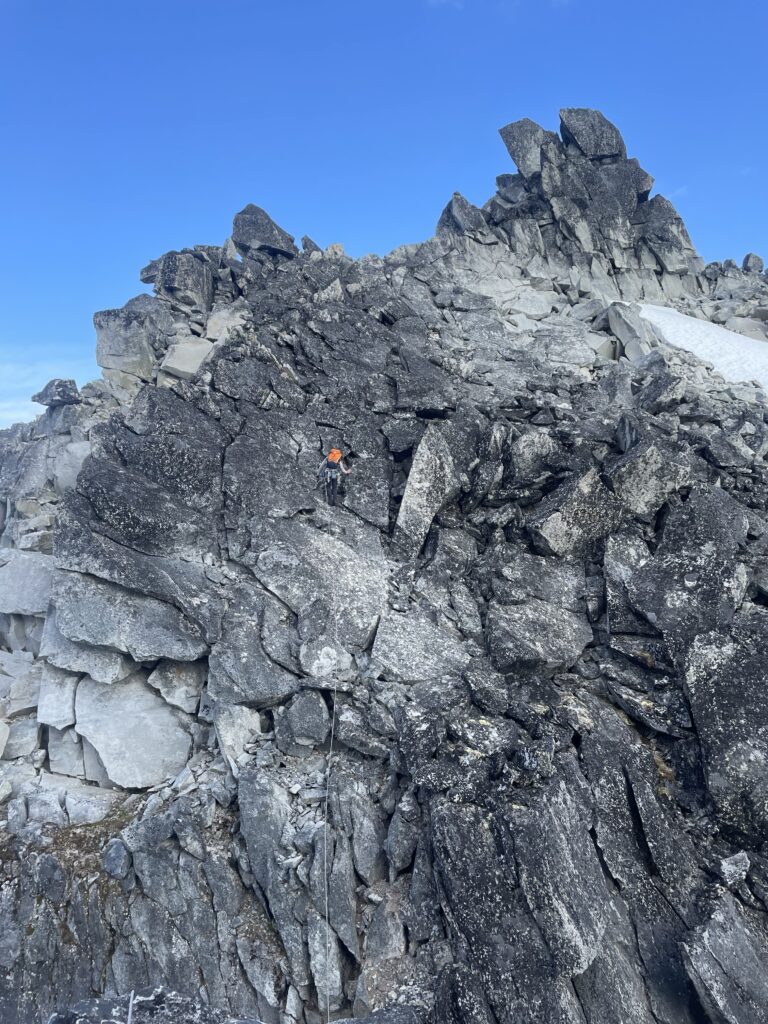
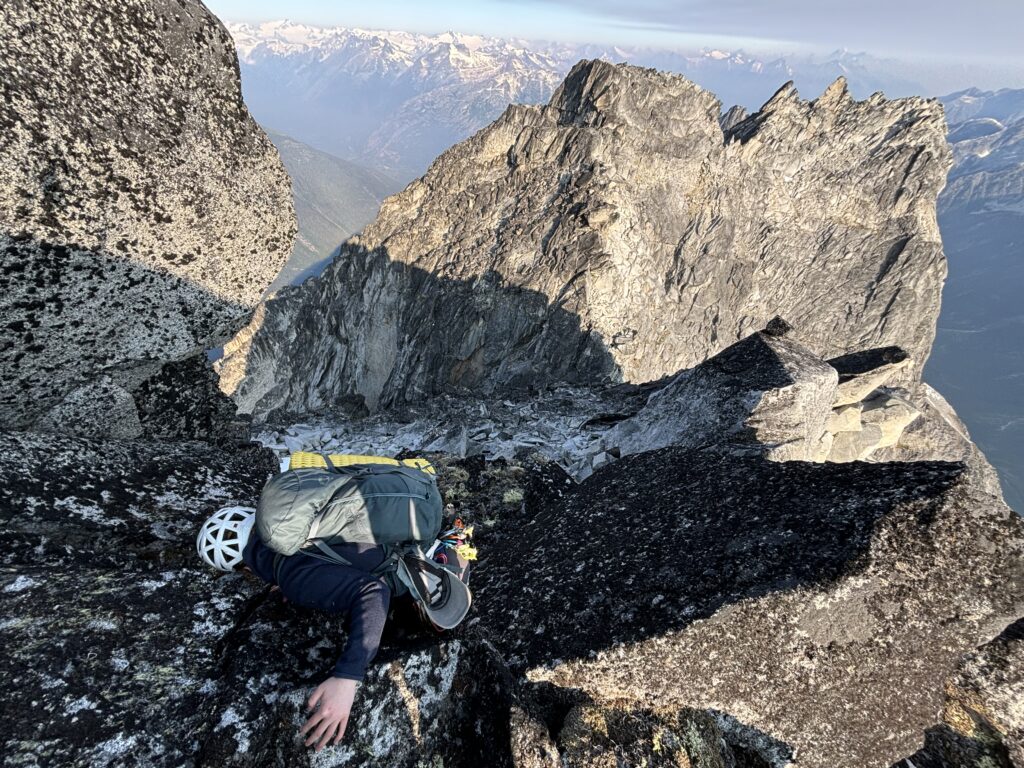
We scrambled a bit further up the 3rd tower and spotted a bench on the south side that we could traverse across to reach the notch to the second tower. Both of our hearts sank when we first caught site of it though. The second tower appeared to be comprised of steep loose and tottering death blocks running from the notch all the way to the summit. From our perspective it looked like they were ready to fall on even the whiff a climber approaching. Which coincidentally, the rocks probably could smell us in our current state. My philosophy has been to at least go to the base of the thing and take it piece by piece. So after some calming of the nerves I made an exploratory traverse across the bench. As I got closer to the notch the terrain levelled out more and a reasonable line was potentially starting to form. The upper section of death blocks were in fact not all that steep but the lower section out of the notch still needed to be dealt with. I thought I spotted a traversing line underneath the overhanging blocks onto ledges, but from the edge of the bench I still couldn’t see for certain. I told Andrea I was going to rappel in and if still looked too messed up I’d ascend back and we’d call it a day. She was rightly concerned that a lead in this section make take us through some deadly terrain, so this was the one shot to get a good look.

I lowered in and sure enough the line I spotted eased off into reasonable 5.6/7 terrain out onto the ledges climber’s right. We’re on! I called out to Andrea that it would go and she was now prepared to commit. She lowered in and put me on belay. I lead out on nicely featured rock with some good protection and then up through the ledges and onto third class terrain above. I packed the rope up while Andrea went to scout out the notch between the second and first tower. I caught up to her a few minutes later and we both had a good look at the next section. It was much easier than the previous notch, but quite exposed and so we opted to rope up for this too. We down climbed through some low 5th terrain to a ledge before the notch and then I lead across a knife edge section to the other side. From here it was third class terrain to just below the base of the tower.
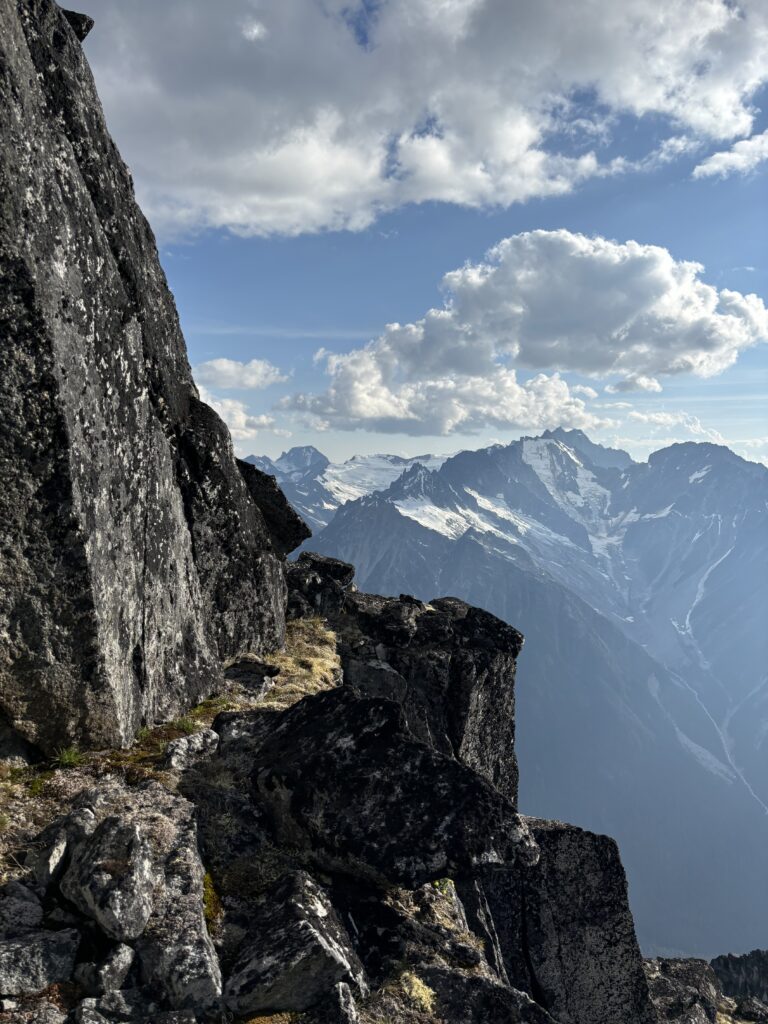
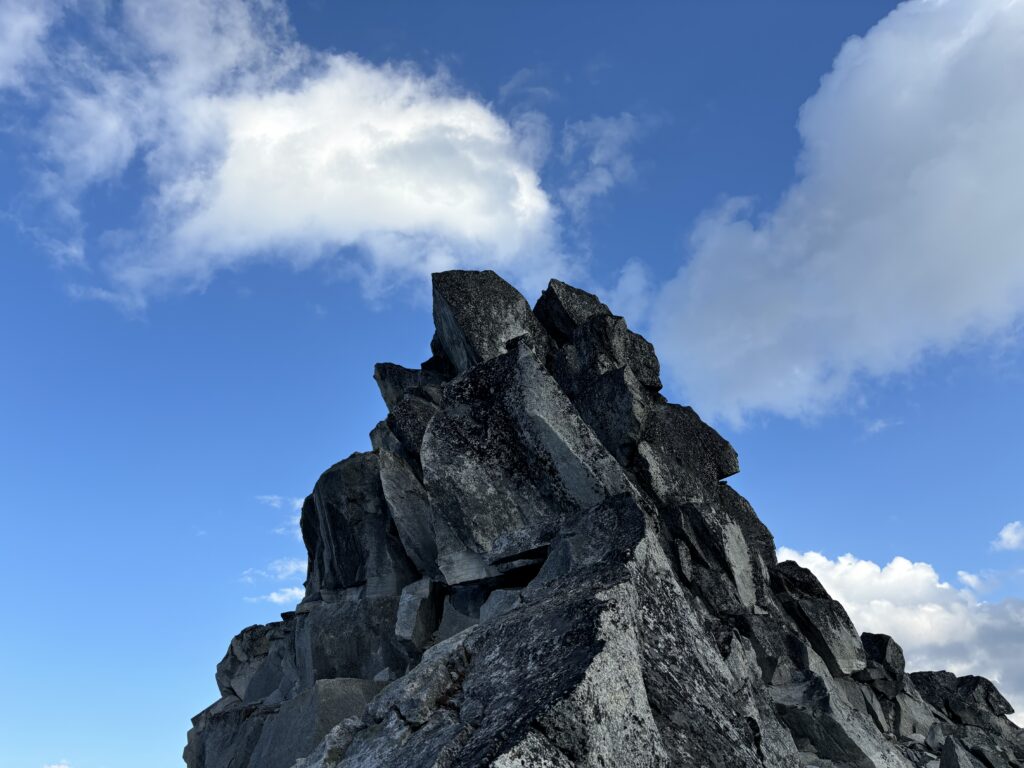
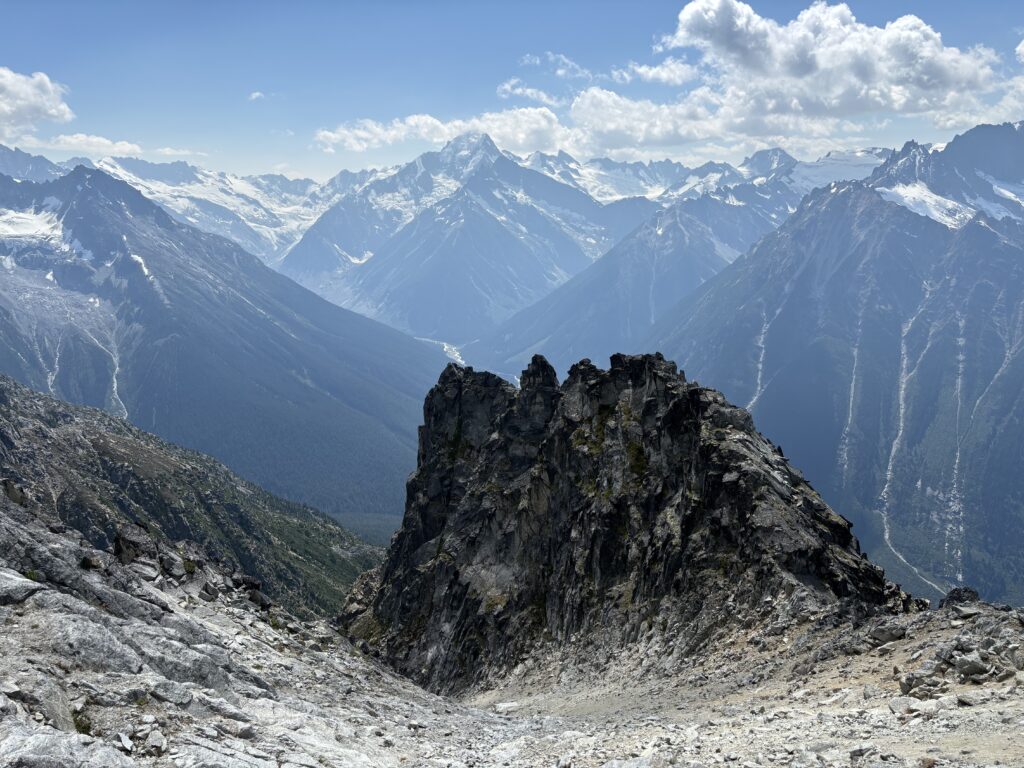
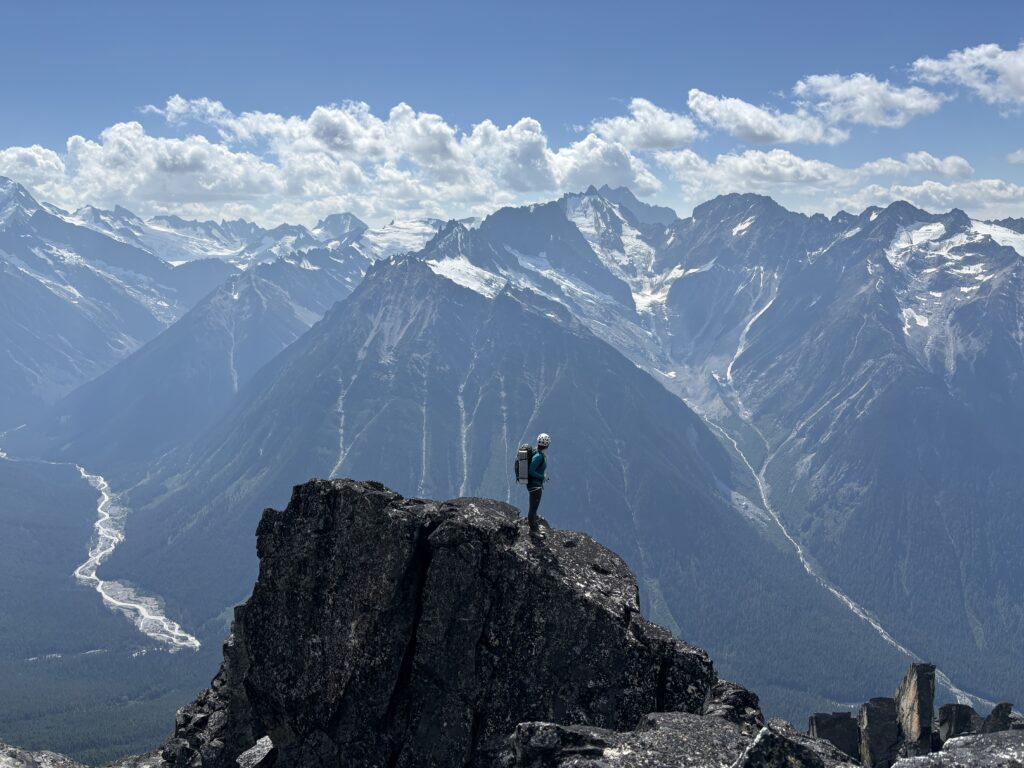
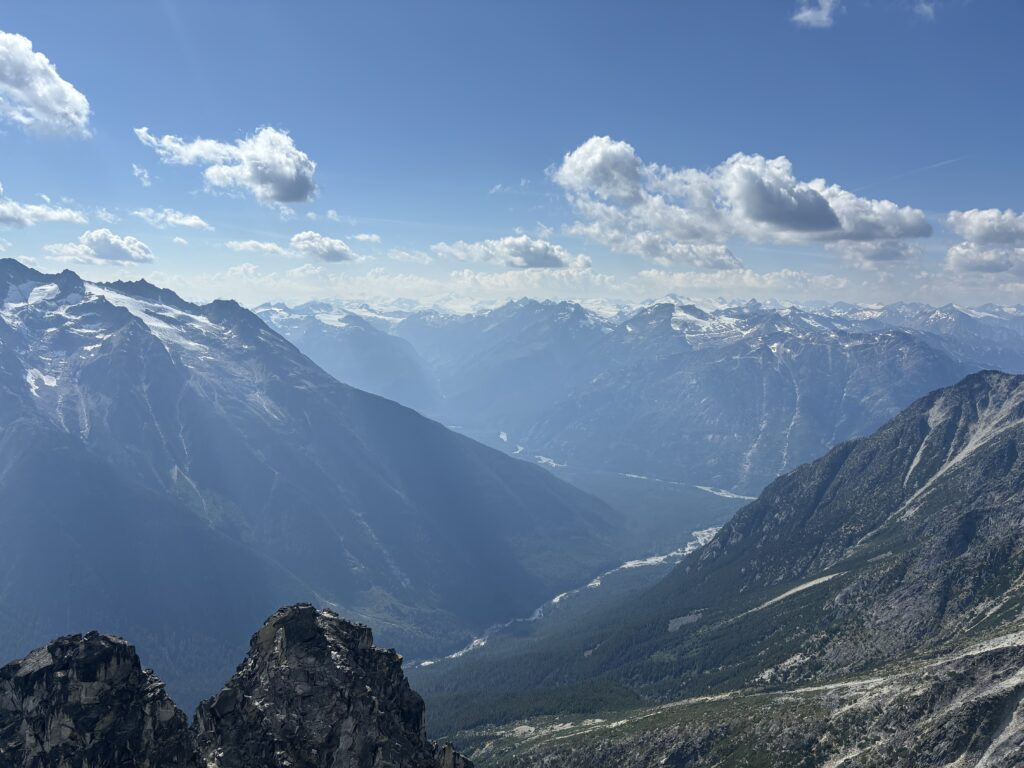
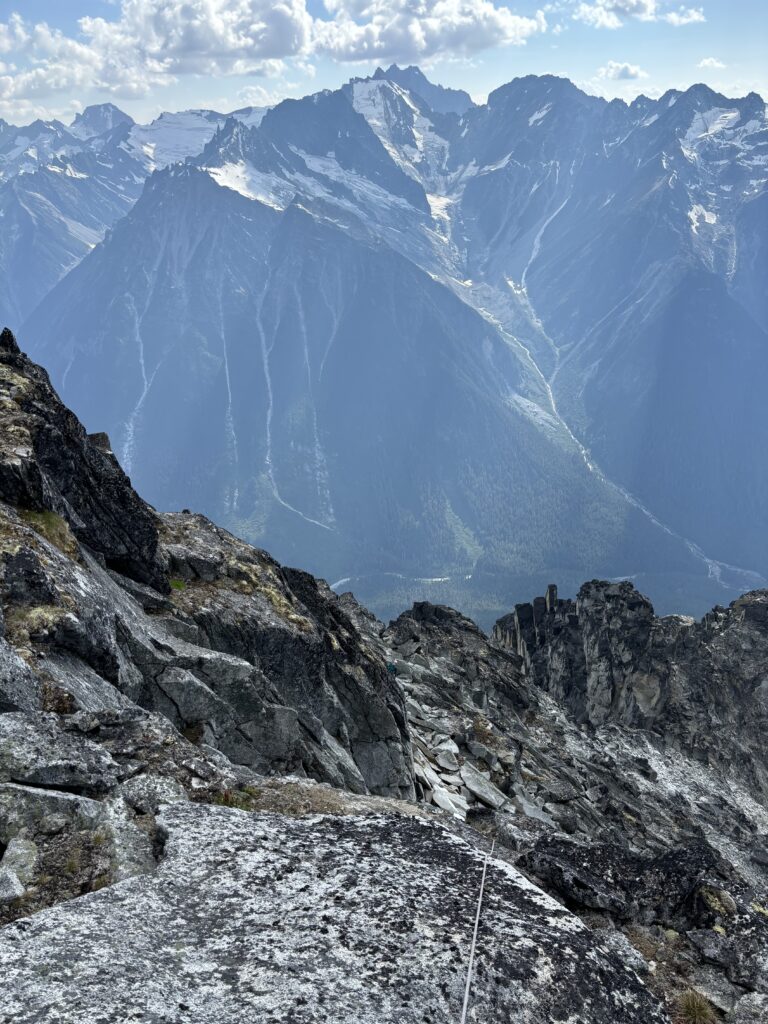
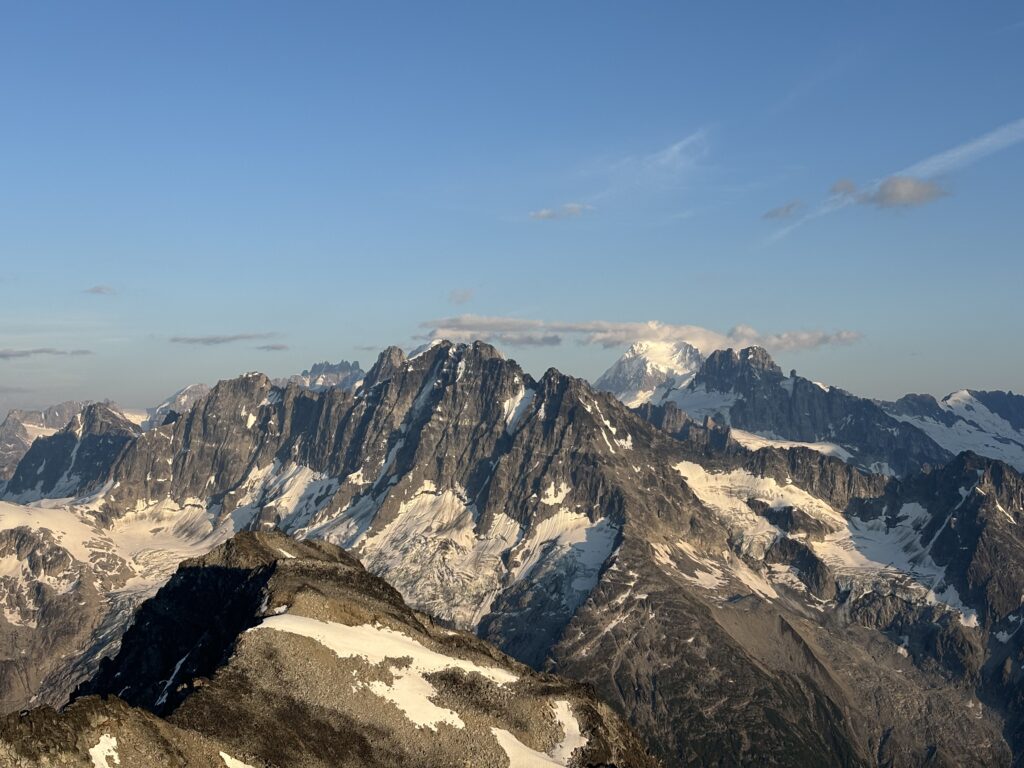
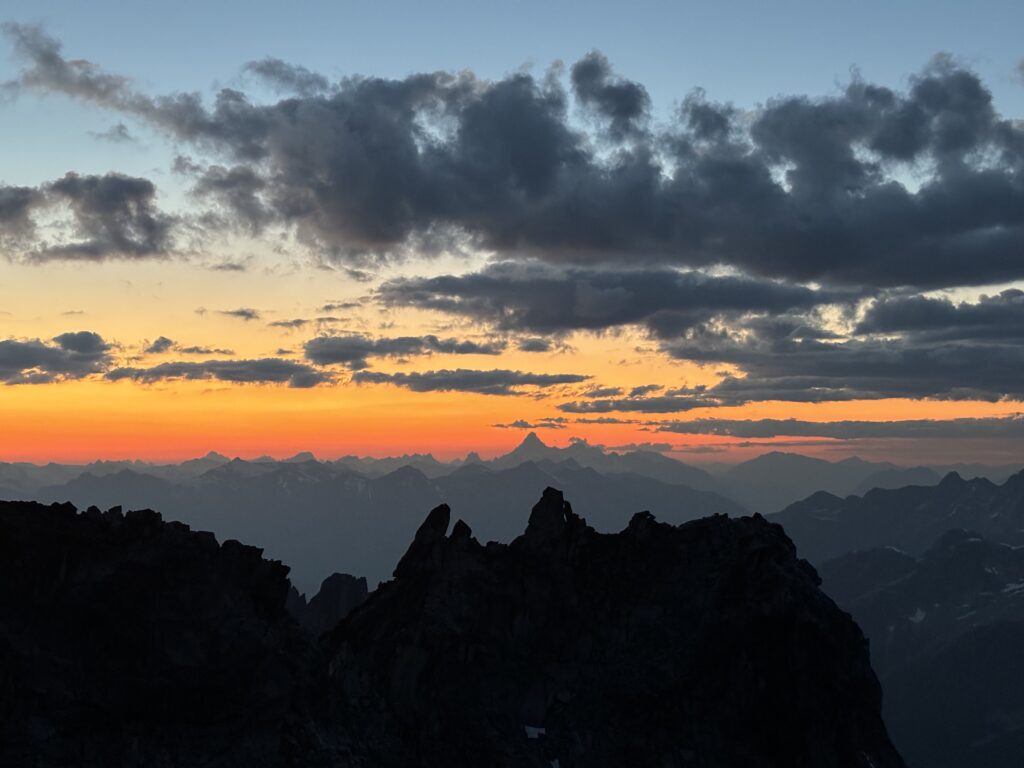
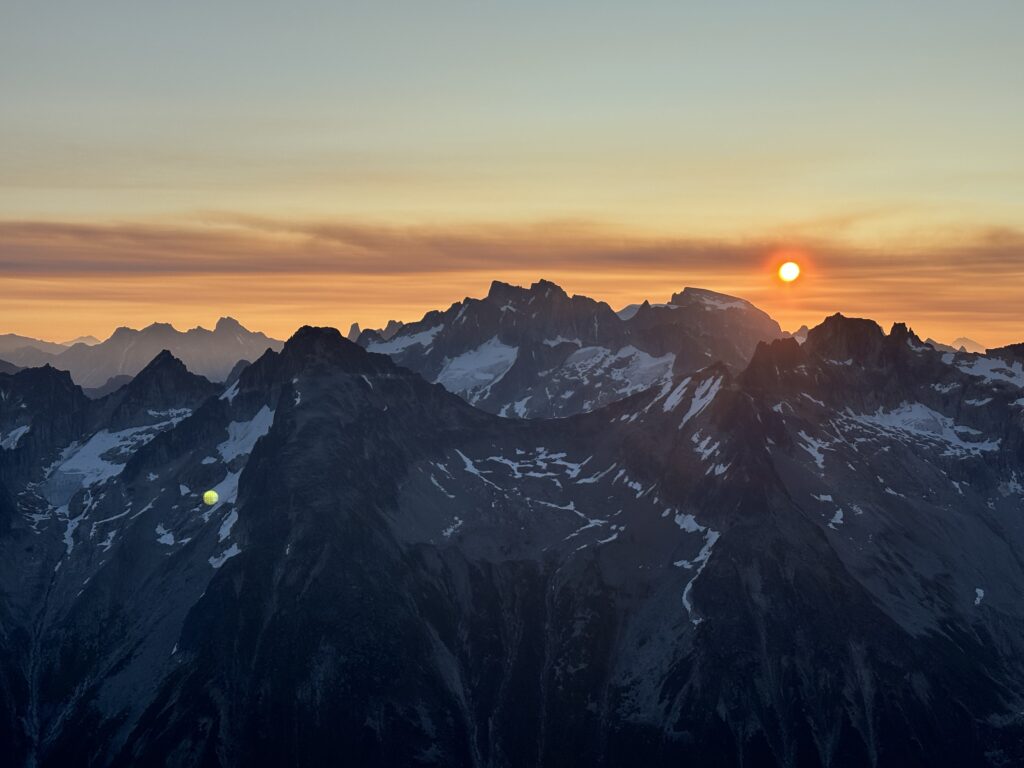
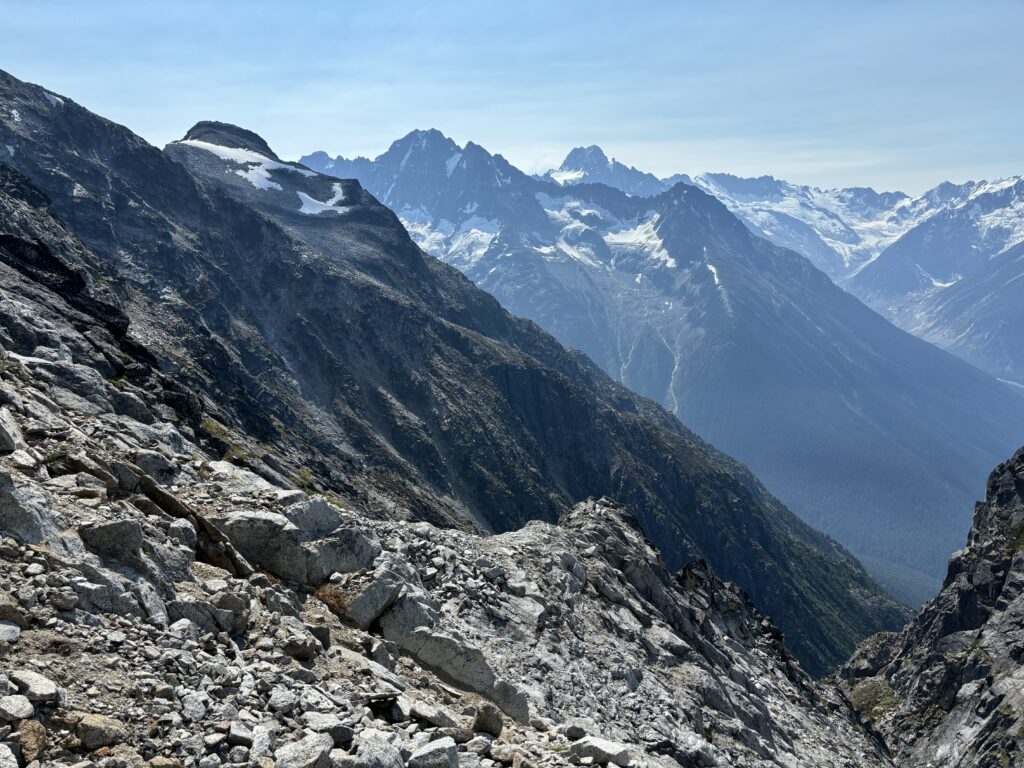
Andrea seconded up and then she swung leads to take us to the top. After a few low 4th class moves she disappeared out of sight for awhile. I then heard some grunting and grovelling followed up with an exclamation about reaching the summit! She had made it! Just in time too. The sun was nearing the horizon and we still needed to sort out some kind of bivy spot. Andrea down climbed the summit tower and then setup a belay on a ledge just below. I then climbed up and then lead through some layback flakes and then up through an easy chimney to the top. Again we were met with no cairn or evidence of a previous ascent! It seems we had another first ascent to add to the trip. All around I could see the household names of the coast mountains. Somewhat fittingly, Serra V was visible to the south east along with Waddington and I’m sure many other summits that Dick Culbert climbed. I took some photos and built a small cairn with the few rocks lying on top and then down climbed.


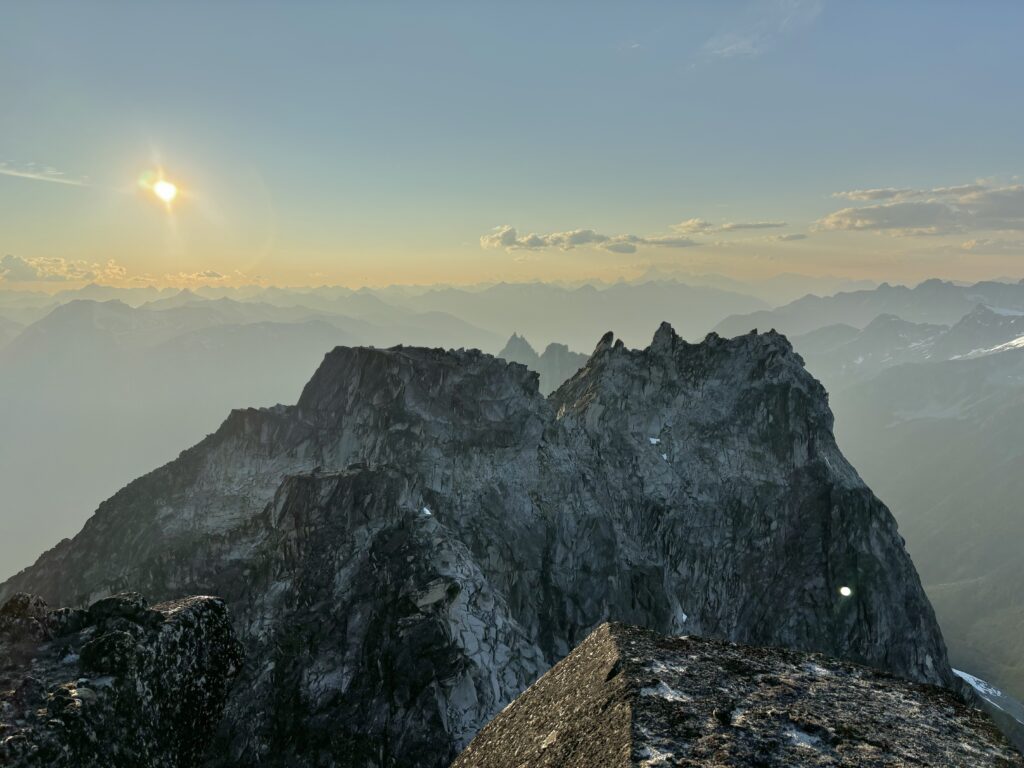
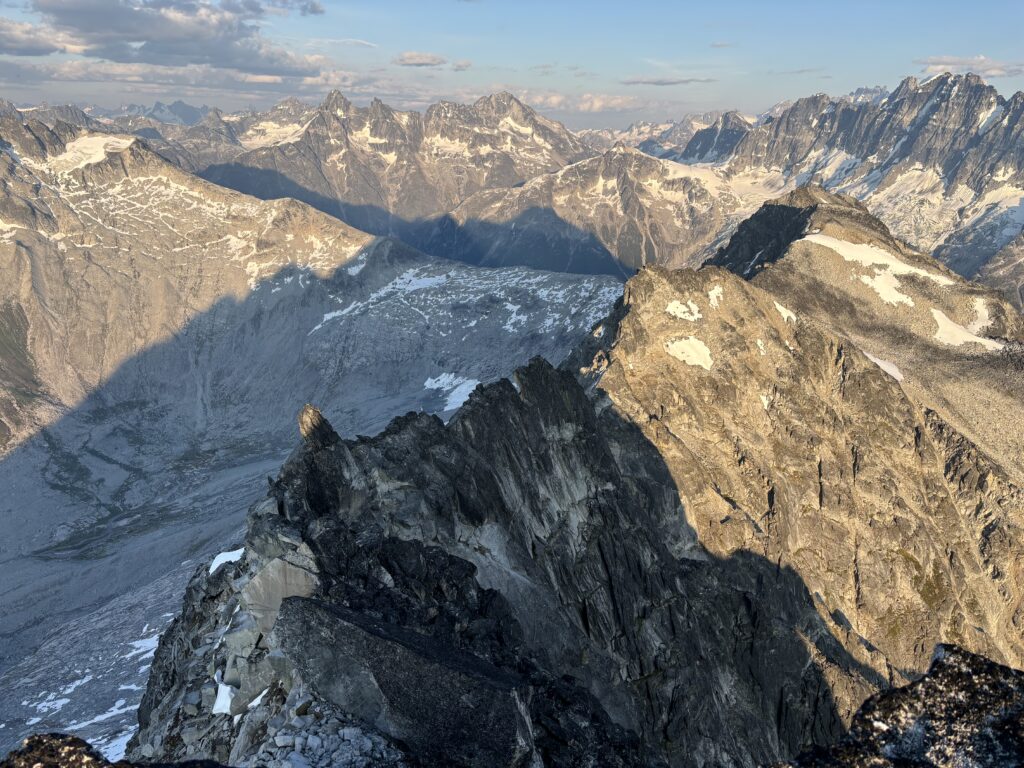
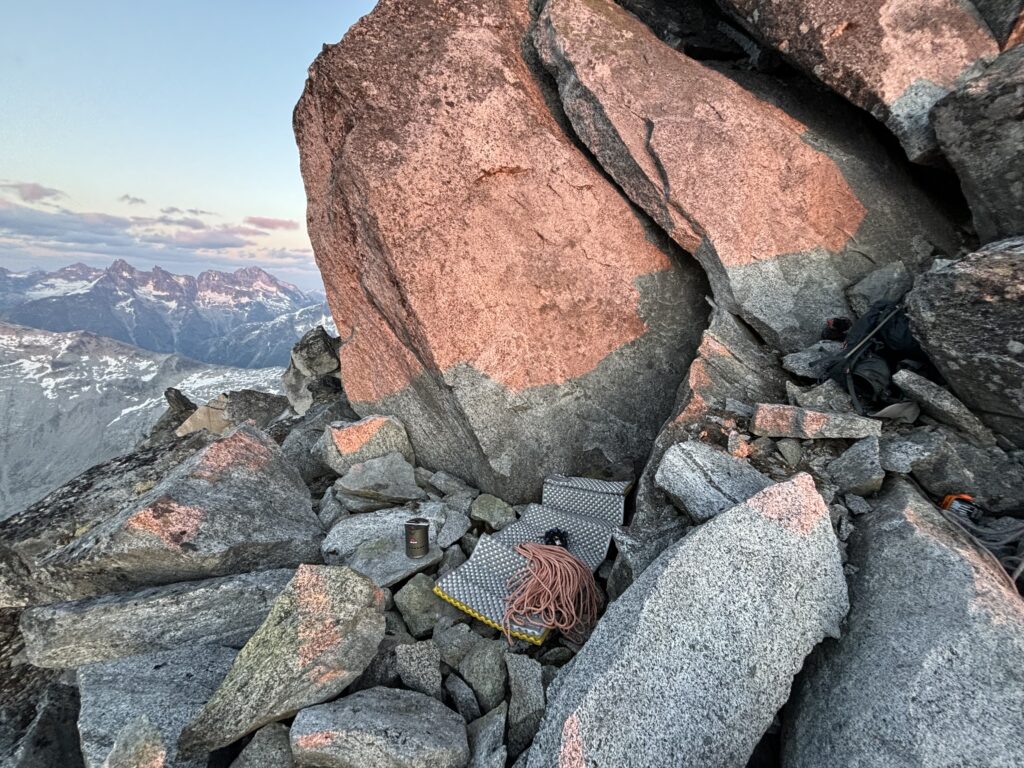
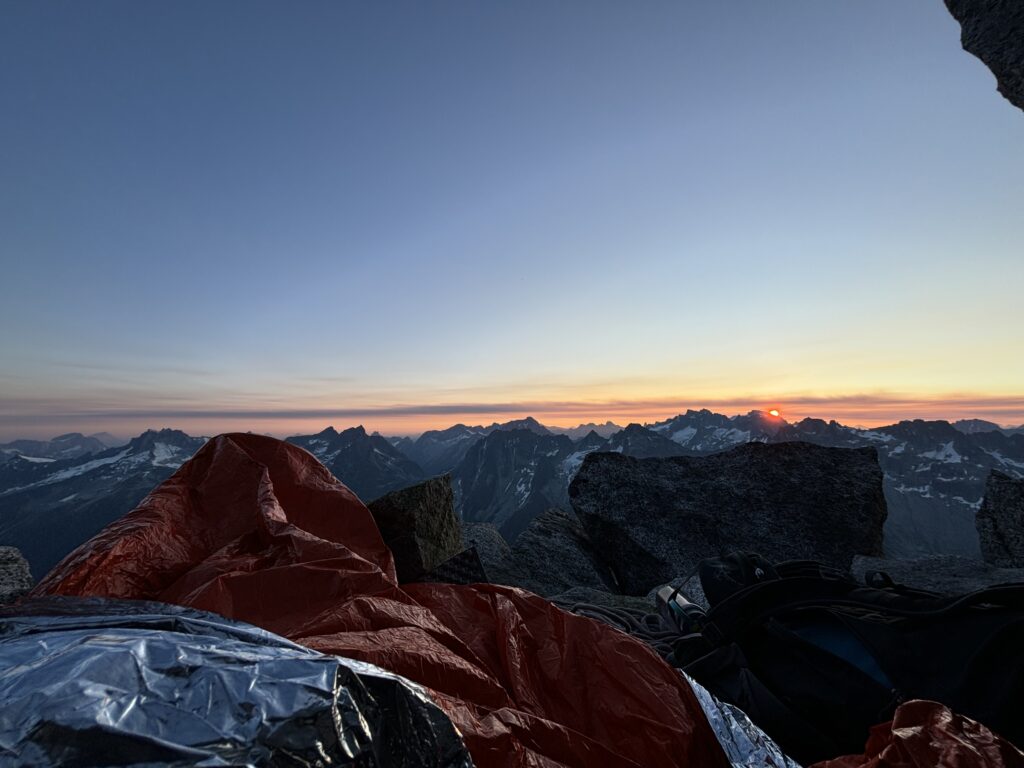
We decided to call that belay ledge home for the night and found a small alcove that would fit two with a tight squeeze. Both of us got to work forming a flat surface with the rocks and then I got some water boiling for tea and a dehydrated meal each. The scene from our bivy spot was unforgettable. The last grasps of daylight bled into the night sky and we soon cozied up in the hopes of catching some sleep. Not surprisingly, there was little to be had in the sleep department and the cold night kept me up most of the time. When we finally rendezvoused with the sun, I got to work making some tea and then we packed up and prepared for the descent.

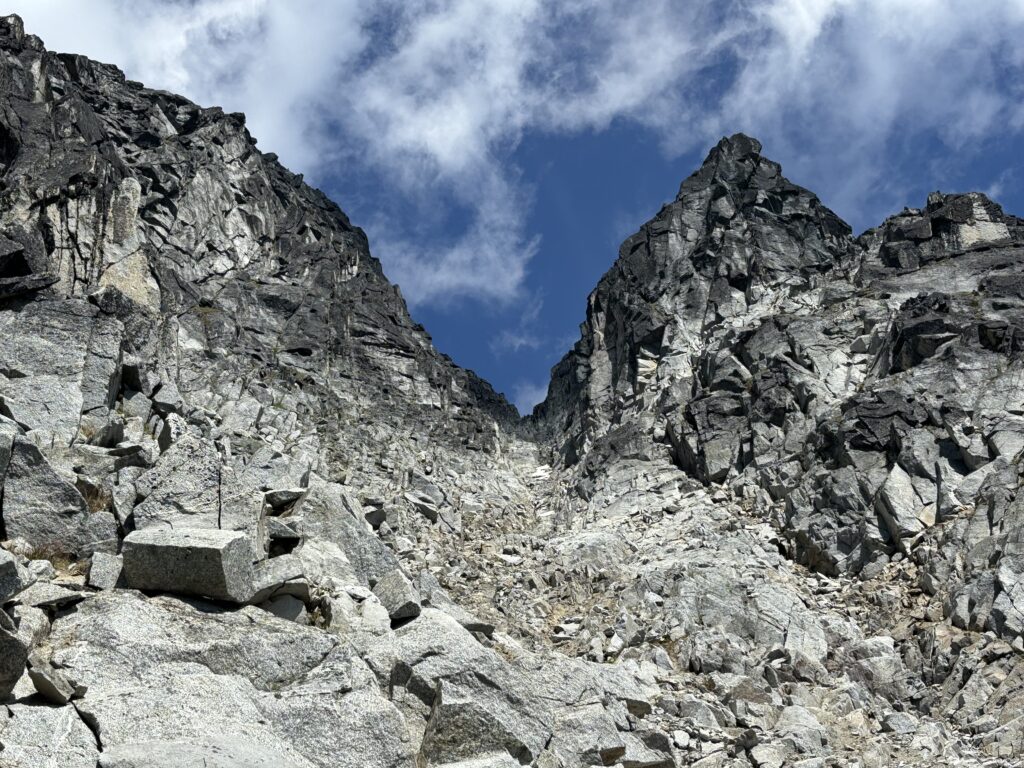
Andrea down lead across the exposed notch to tower 2 and then I followed and we scrambled back to the notch between tower 2 and 3. On the traverse in we had noticed the gully looked feasible and now were both considering giving it a go to save a long series of rappels off the south ridge of tower 3. We did one 60m rappel into the notch and then committed to the gully. Sure enough it proved to be pretty straightforward although it was crappy and loose terrain. At the bottom we joined up with our ascent gully and took it a long ways down to the heather slope traverse. Reversing that was pretty easy and now we just had to slog a long ways up the rib to reach massive bowl above.


Once we reached the bowl we were more or less on the home stretch. We just followed our descent route from our previous trip to Sedna Peak and after a few hours we were rambling along the tame ridge back to camp.
We were both surprised to find a reasonable route up to the summit given the complex steep walls that form the bulk of Culbert Crag. It certainly took some time to find our way through the storied maze of rock, but it in the end it worked out quite nicely.
Good write up of this complex route! Glad you two made it.
Jealous of you, but also content….